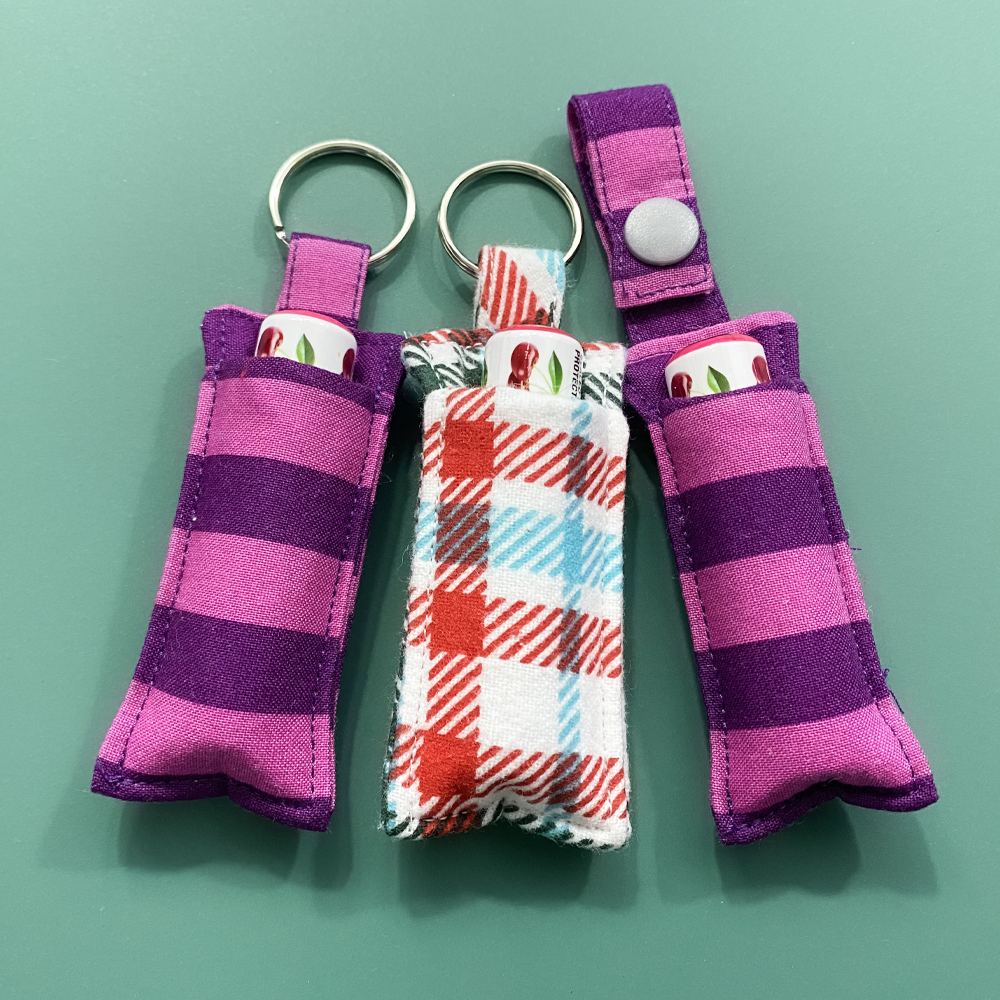
You can make this easy Keychain Chapstick Holder with this FREE Sewing Pattern & Tutorial. It is a great scrap buster project and best yet; you can make a whole bunch fast. It’s also an easy sewing project for a beginner. You can stick this keychain chapstick holder on gifts or in a stocking. It can be attached to book bags, purses, key chains or anywhere else you think you might need it.
I made a whole bunch of these to add to some gifts and I used a mix of quilting cotton and flannel for the main fabric. You can use the same fabric for the front and back or spice it up and use two different ones. I ended up grabbing this fun stripe fabric and this flannel for the ones I made.
Here’s what you need to get started:
If you’re like me an prefer pattern pieces instead of measuring. You can grab the pdf pattern and tutorial here. Included in the download: A0, A4, 8.5×11, projector and sewing tutorial.
MAIN FABRIC (Woven), Cut 2 – 2.75″ X 6.5″ OR 7 CM X 16.5 CM
FUSIBLE FLEECE INTERFACING, Cut 1 – 2″ X 5.75″ OR 5 CM X 14.6 CM – This is the one I used.
Keychain Ring Holder OR Snap option:
Choose one option below.
- KEY RING HOLDER
FABRIC (Woven), Cut 1 – 2″ X 2″ OR 6.4 CM X 7.6 CM
SPLIT RING – 3/4″ – 1″ - KEY SNAP HOLDER
FABRIC (Woven), Cut 1 – 2.5″ X 3″ OR 5 CM X 5 CM
SNAPS – I used size 20
Let’s put the Keychain Chapstick Holder together:
Please Note: 3/8″ Seam Allowance unless otherwise noted.
STEP 1: Attach Interfacing

Center interfacing on the WRONG side of the back piece. Follow the instructions on your interfacing to fuse it to your fabric.
STEP 2: Put the Ring/Snap Holder Strip together

SNAP OPTION ONLY:
Fold one short end of the snap holder strip 1/4” toward WRONG side of the fabric. Press.

For both options fold in half width wise and press. Unfold center fold.
Using center press line as a guide fold each side to center toward WRONG side, press.
Refold center and press well.

SNAP OPTION:
Edge stitch along the 3 sides leaving one short end un-sewn. The un-sewn edge will attach to the main holder.
RING OPTION:
Edge stitch along the 2 long sides, leaving the short ends unsewn.
STEP 3: Sew the Main Chapstick Holder together

Place one of the main pieces RIGHT side up.
SNAP OPTION:
Place snap holder in the center of the main piece. Align the raw edges.
RING OPTION:
With WRONG sides together, fold ring holder in half to form a loop. Align the short ends and place in the center of main piece aligning the raw edges. Pin to hold the loop in place.

With RIGHT sides together place the other main piece on top. The holder loop will be sandwiched between the layers. Pin or clip in place. Stitch leaving an opening along one of the long sides for turning right side out.
HELPFUL TIP
You can baste the loop in place to make sure it doesn’t shift while you sew. I like to sew back and forth over the loop to help reinforce it.

Clip the 4 corners and turn right sides out. Push the corners out and the seam allowance from the opening in. Make sure the front and back line up. Press well.
STEP 4: Sew the Main Chapstick Holder pocket

Measure down from the bottom of the loop holder 1/2”. Mark with a pin.

Fold the other end (the one without the loop holder) up to the 1/2” mark. This will form a pocket for the chapstick and will leave a space at the top to get the chapstick in and out. Stitch 1/8” along the 4 sides.
HELPFUL TIP
Just like on the loop holder I like to sew back and forth over the top of the pocket to help reinforce it.

If you are adding a snap, mark where you would like your snap to go. Attach the stud to the end of holder and the socket to the other end. Make sure you are attaching them to the correct side.
For the ring holder option simply feed the ring through the loop.
That’s it, you’re finished!
Don’t forget to share it with us using the tag @mammacandoit so we can see it! As always, we’re here to help if you need it! Join us on Facebook, Instagram, Twitter, Youtube, and Pinterest.
More free patterns:
Wristlet Strap
Christmas Stocking
Re-usable Towels
Affiliate links were used in this post which means that a percentage of sales go to me when you make a purchase. It does not cost you anything to use them and it helps me to keep making new patterns and tutorials for you!


