The baby’s Adalynn and girl’s Adalynn dresses made me so jealous when they came out! I wanted one for me! So when I got to test the women’s version, I was really excited–and it was totally worth the hype 🙂 When I made my first women’s Adalynn dress for myself, I loved it without any hacks. I made one in the classic swing, with pockets, and short sleeves. Living in Phoenix, Arizona, I just wouldn’t get much use out of a dress with long sleeves. I loved the way the sleeves fit, and the binding style on the collar. And, I loved the length and swing of the classic size.
BUT. I really wanted to try a sleeveless Adalynn. It’s hot here. So hot that even short sleeves can feel suffocating in the summer. I wanted a professional looking dress that I could wear in the summer, and still be comfortable in. I decided to keep the pockets, and make a fitted dress, just to see how I felt about it. In the classic swing, I am a size 6. In the fitted, I fell off the size chart, and so I made myself a 00. I love it.
 I also happened to shorten it quite a bit. I’m 5’4″, so I really don’t NEED to shorten the pattern, but I like to have my dresses fall well above my knees. I decided to cut my dress at the ruffle line and not add ruffles, and it’s perfect for me. So I guess that’s another “hack” that I did.
But how about the sleeveless hack? Here’s what I did.
I decided that I wanted the style of the neck and arms to be the same, and used binding with the same method as the neckline. So if you have this pattern, you can follow along using the instructions there.
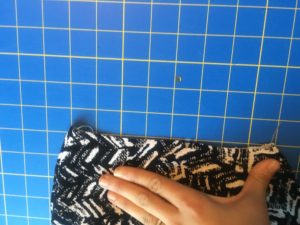
First I took the dress that I had sewn up, with everything done but the arms and the bottom hem (although you can hem first if you want, no big deal). I got the arm hole and I measured it from top to bottom. Here you can see that my arm hole is 8 inches. You can also see that I’m fighting the curve of the hole, and that’s fine. It is curved, you just tug a little and try to make it straight enough to measure.
Next I did some math. I promise, the math is not hard 🙂
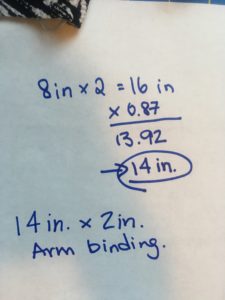 Okay, so you take the number you got from measuring the arm hole, and you multiply it by 2. Why? Because the arm hole has the front and back, which are both 8in long, so the total length that we need to bind is 16in! Now, we multiply by 0.87, which I like because you don’t have to tug too much, and you also don’t end up with a bunch of extra fabric. Everyone has different preferences, and I won’t be offended if you use a different number, like 0.85 or 0.9… In any case, the number I got was 13.92. Now let’s be honest, I’m not going to measure out exactly 13.92, so I rounded up to 14in. How you want to handle those numbers is up to you! Now, in the image, it says that i’m making a 14in x 2in arm binding, but I decided when I went to bind the holes that I actually wanted it to be 1.5in, and I suggest using 1.5in for your grainline measurement.
Speaking of which…
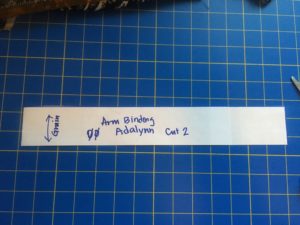
I measured and cut out of scrap paper that came from cutting out the pattern. As you can see, I just measured out 14in x 2in (which I later changed to 1.5in). I wrote out which way the grain should go to help me remember when I’m cutting. And I wrote out the pattern, size, and instructions, just as you’d find on the pattern piece if this wasn’t a hack 🙂

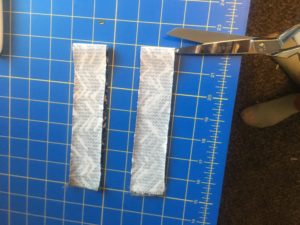
Ok, so now I cut and sew the binding pieces RST just like you did with the binding piece for the neckline. And then I cut at 1/4 points. I did this by finding the sewn part at making that 1/4 point number one. I folded the binding at that point, and found the opposite end, and cut it. Then I folded the other way using those two points, and found the centers in the opposite direction. I cut those 1/4 points as well.
 Finally, I clipped the binding to the arm hole. I used the armpit seam for the binding seam, and found 1/4 points along the arm hole to match up with the binding. Then, I sewed the binding on as directed for the neckline in the pattern!
I hope this helps! If you’d like to see more pictures of my Adalynn dresses, please go to my site, mnwsews.wordpress.com (pics won’t be posted until after the release of the women’s Adalynn dress though)!


2 thoughts on “Adalynn Sleeveless Hack!”
Pingback: MCDI Women’s Adalynn dress – MNW Sews
Pingback: Adalynn Hack Roundup | Mamma Can Do It Sewing Blog