
Hi Ladies! It’s Laura again! I’m back to talk to you about another great MCDI pattern — The Ladies Full Skirt Dress.

I really like the look of this pattern. It’s cute, fun, perfect for summer time! However, I was super reluctant to try it because I’m still nursing my baby, and plan to for a while longer. And, you know, dresses and nursing just don’t really mix well. I did sew the pattern though, and although I won’t be able to use in immediately, I love it! I loved how it went together, how comfortable it is, and how easy it is to wear. It’s a quick sew, no buttons or zippers. It slips over the head, has bust darts for a nice shape, a full gathered skirt, and a comfortable elastic waist. It’s a great pattern for all ladies. I wish I had this sooner, because it would have also worked for maternity!

So now, I have this pattern that I love, but I won’t be wearing any time soon. That’s no fun! So, nursing mamas, I decided that I liked this pattern enough to make it work. I played with pattern pieces and made adjustments because I want dresses this summer. I’m OVER wearing leggings and tops ALL THE TIME. Don’t get me wrong, they’re plenty comfortable, and I enjoy them, but I want choices! It’s nice to have options, right?
So, I’m going to talk to you today about my nursing hack to the MCDI Ladies Full Skirt Dress.
Materials:
You’ll need your fabric, elastic, and bias tape (according to the pattern). For this hack, you will ALSO need interfacing and buttons.
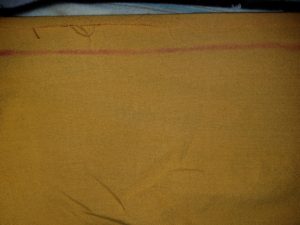
Step 1: CUTTING YOUR FABRIC
If you already have this pattern, you know that both the front and back are cut on fold. We are NOT going to cut the front bodice on the fold!
Here is what I did with the front. We are essentially adding a button placket, and we want our finished width for the front of the bodice to exactly match the finished width we would have if we cut the front on fold, per the instructions. So, I decided that I wanted a 3/4″ placket. I took my pattern piece and traced it. In the center, I added 1″. Then I flipped my pattern piece for the other side of the front, and I added 1 and 3/4″ to this side. After making my first dress, I noticed that the bodice was pretty fitted, so I decided to add an extra 1″ to the bottom of the front and back bodice, because I wanted there to be plenty of room for moving the pieces around for nursing. This may not have been necessary, but I was afraid that if it was too short, nursing would be too difficult.
Now, go ahead and cut your back bodice. Remember that if you decided to add any length to the bottom of the front, you also need to add that same amount to the back!
STEP 2: Follow Instructions for Darts and Shoulder Seams
Next, you will sew your darts and your shoulder seams per the pattern instructions.
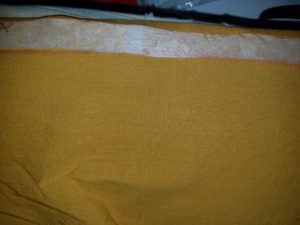
STEP 3: Finish your Neckline
Now, we are going to finish our neckline and our placket! You should have your back bodice, with the front bodice attached at the shoulders on both sides now. You will follow the instructions on the pattern for attaching the bias tape to the neckline. Just start on one side of the center front bodice and work your way to the other side of the center front bodice. Your edges (at the front center bodice) will still be raw.
STEP 4: STITCH YOUR PLACKET
Once you’ve finished your neckline, you will make your placket! Go ahead and add a little strip of interfacing to the edge of both sides at your center bodice (wrong side of fabric). You’ll use about 1″ on both sides. You can start with either side. Fold and press the fabric 1/4″ to the wrong side in the center front. Then fold another 3/4″ and press. Sew very close to your folded edge (approximately 3/4″ from the edge of your fabric). Then follow these same steps for the other side of your bodice.

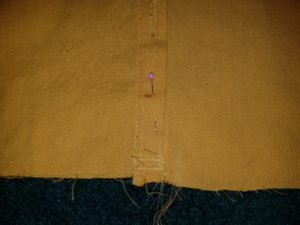
STEP 5: BUTTONHOLES
Now it’s time to add buttonholes (Or snaps if you choose)! Remember on ladies’ shirts, buttonholes go on the RIGHT side. Decide how many buttons you want, and where you want your buttonholes to be. I chose to use four buttons, so I started my first buttonhole about a half an inch from the top, just under my bias neckline. After I chose the placement for my first buttonhole, I measured and marked my other three. I think I made mine about 2″ apart, but do whatever will work for you to have them evenly spaced!! Go ahead and sew your buttonholes, and open them using a seam ripper or scissors. Place the side of your placket with your buttonholes on top of the other side. The neckline should match up and the bottom of the bodice should match up. Pin it together so that it will not shift. Now, at the bottom of your placket, stitch it back and fourth a few times so that it stays together while you are constructing the rest of your dress. When attaching your skirt, the bottom inch of the bodice will be your seam allowance. So keep this in mind when you’re sewing the bottom bodice together.
Now Let’s Finish It!
Now, you have your placket made, and your front bodice is stitched together at the bottom and pinned together at the top. You are ready to construct the rest of your dress, according to the instructions in the pattern.
When you get ready to hem, remember that you may want to shorten the dress a tad if you added any length to your bodice. I added 1″ to the bodice, so I took a slightly deeper hem so that they dress wouldn’t be much longer than it was originally intended.
When you are finished, putting your dress together, now go back to your pinned placket. Take a washable marker or piece of chalk and mark through each button hole onto the piece of fabric behind it. This is where you will sew your buttons! Go ahead and sew your buttons down and try it on!
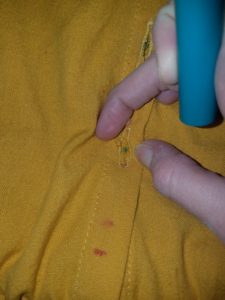
I didn’t have room for a fifth buttonhole with the spacing I used. I decided to go with four buttons. When I tried it on, the bottom was gapping just a tiny bit, so I decided to sew a button on at the very bottom, going through both pieces of my placket. This one doesn’t open, but it doesn’t need to.

Testing It Out…
Like any normal person, the very second that it came off of my machine, I tried it on. It fits! 1st SUCCESS! After a little while, Luke got hungry, so here came the ultimate test. Could I nurse him in it? I unbuttoned the top three buttons, and YES!!! WOOHOO!
With just a few more steps, and just a little more time, you’ve transformed this amazing pattern into something you can wear and nurse your baby in! And, when you’re done breastfeeding, this nursing-friendly dress will never tell anyone it’s a nursing friendly dress. It’s now just a super comfy dress with a cute placket!

I have included my affiliate link throughout this post.
My direct affiliate link is: https://mammacandoit.com/collections/women/products/full-skirt-dress-pattern?aff=60A
If you are interested in using my affiliate link to search other patterns on sale this week, this link is: https://mammacandoit.com/collections/wintertour6?aff=60
Be sure to share any MCDI you make on the MCDI Facebook Group! https://www.facebook.com/groups/Mammacandoit/
Thank you so much for reading my post! I hope it was helpful to you! I look forward to seeing what you make!