
I absolutely love the Women’s Adalynn Dress and the options on personalizing it are endless. The tutorial offers the option of adjusting the fit version based on the fabric you’re using. There is a Classic Fit, a Semi Fitted and a Fitted option. This first one is a Classic fit I made for my sister. I used the chart provided in the Women’s Adalynn Dress tutorial and with a little bit of work was able to find the perfect fit.
I used the classic fit calculations from the measurement guide in the tutorial.
My sister is rather tall so we needed to add some extra length to accommodate that. Since I was going to add in the ruffles anyway, I left this the normal length and didn’t cut at the ruffle line (again, she’s pretty tall), and I added the ruffle to the normal dress length. This gave us another 3″ we needed to adjust for her height.

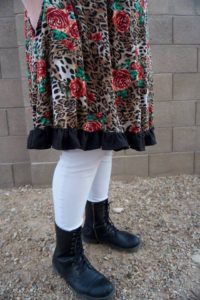
You may have noticed, this dress also doesn’t have the normal short sleeve length. My sister isn’t a fan of short sleeves, she prefers either long sleeves or elbow length. I figured we could easily make that work for her by adding in some bands. I used the below calculations to add the arm bands.
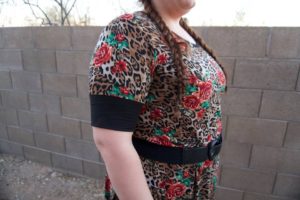
I measured the opening of the lower sleeve and multiplied this by 80%. I then added in seam allowance. This came out to 13.7″ but I am huge on rounding so I decided it should be 13.75″. I then had to figure out how long she wanted the bands to be. Her goal was to have the bands end right above her elbow. We measured the distance from the lower sleeve to her elbow, and multiplied it by two to get the armband height. We cut armbands at approximately 13.75″ by 7″. Stretch going with the 13.75″ length and the grain going with the 7″ height.
Overall she was very happy with this dress. Now I know how to pre-pay for more babysitting. If you’d like to see more about sewing this pattern, check out my blog Natalie Bug Creations.


