
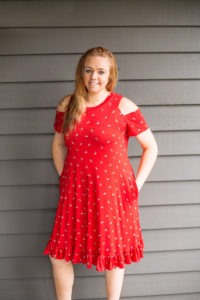
Let’s start off by saying… This dress is seriously the BEST! The base pattern is amazing on its own, but holy smokes, the possibilities of add-ons/changes/hacks/etc are endless! I loved sewing this up. It was such an easy and quick sew and with 3 kids plus a couple other “nanny kids”, I don’t have much time to sew (naps are few and far between)!
Here are the women’s size 00-20 and the women’s plus size 14w-40w, grab them now, they will seriously change your life! (Well, your wardrobe at least)
The Adalynn Dress | Women 00-20
The Adalynn Dress | Women Plus 14w-40w
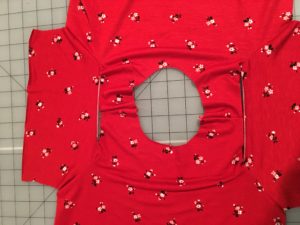
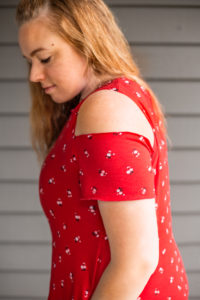
So this hack that I wanted to show you is for a cold shoulder. There’s nothing too scientific about it. I started out by cutting all my pattern pieces the way I normally would. Next I got the front and back pieces on my table and just used my rotary cutter to bring in the armscyce/shoulder a bit, I guesstimated but by the time I got to the shoulder it was about 1/2″.
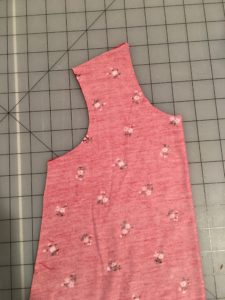
After cutting both the front and the back, I laid one on top of the other to make sure the shoulders were the same size.

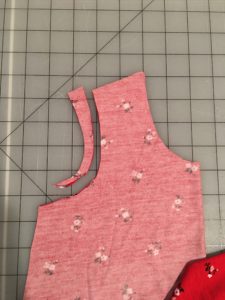
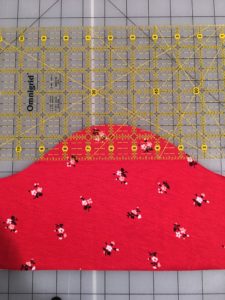
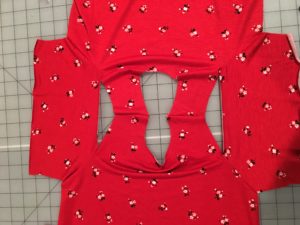
Next, I got both of my sleeves. Laid them on top of each other, wrong sides touching. I chose to cut off 1 1/2″ to make the hole of the cold shoulder. I liked the amount of this opening on my finished dress but you can chose to do more or less, depending on what you prefer! With cutting off 1 1/2″, the notches were still on my sleeve, which was great for lining up the sleeve to the bodice. ((when I made my daughter’s cold shoulder, i only cut off one inch))
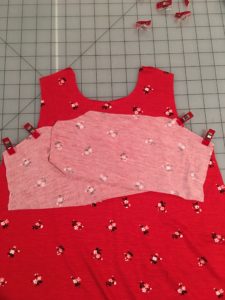
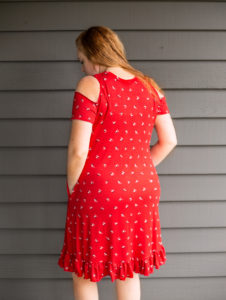
So I chose to add pockets and do a ruffle. I added the those per the pattern directions and in this step, I also added the sleeves. I started with lining up the side seams, continuing until I got to the top of the sleeve, matching the notches. Once I got everything sewn on the front bodice, I repeated with the back bodice.

After everything was attached, I sewed up the side seams, starting from the sleeve and ending at the bottom ruffle, going around the pocket, just as the directions say. I turned it right side out and added the neckband.
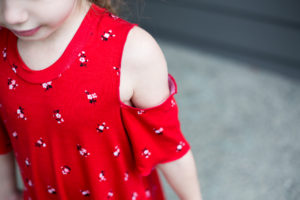
Lastly, I finished the sleeve hem and the cold shoulder hole! I’m a big fan of the rolled hem so that is how I finished both the hem and shoulder holes!
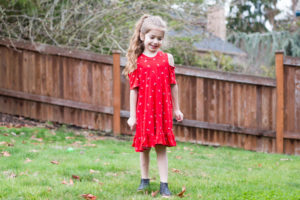
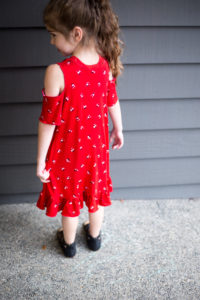
Voila! You’re done! I made an identical dress for my little princess, because, what 5 year old little girl doesn’t want to be just like mommy?
Get yourself a copy of the Girls Adalynn dress sizes 2T-16 here!
The Adalynn Dress | Girl 2t-16
Annnnnd why not throw in the BABY version for added cuteness!!
The Adalynn Dress Pattern | Nb-24 months


1 thought on “Cold Shoulder Hack”
Pingback: Adalynn Hack Roundup | Mamma Can Do It Sewing Blog