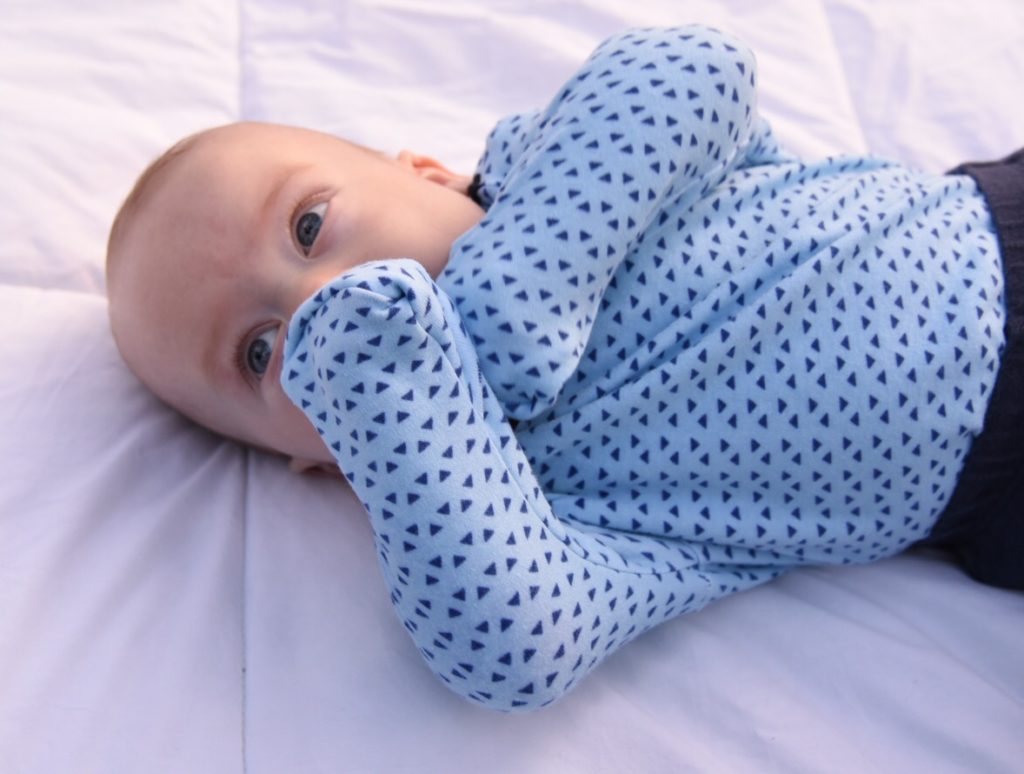
Tiny babies have sharp fingernails. They scratch themselves, they scratch you. Babies can also get cold hands sometimes while they sleep. So mamas tend to like the clothes that have scratch mitts attached to the sleeves.
I’ve seen in some Facebook Sewing Groups where ladies are expecting and specifically want a pattern that includes scratch mitts. Scratch mitts are that important to them! But, I just want to tell you, your pattern does not HAVE to include scratch mitts. If you have one that you love, like the Mamma Can Do It Onesie or the Mamma Can Do It Onesie Dress, they’re SUPER EASY to add! I PROMISE! I’d rather use a pattern that I LOVE and do a tiny modification than use one I’m not wild about JUST BECAUSE it includes scratch mitts. Make sense?
First off, what makes this pattern so great that I’m determined to use it, and suggest that you do as well? I won’t go into too much detail, but I think you need to know why I love this pattern!
- It’s an easy sew, I promise. Even a beginner can do it! Don’t be intimidated by the lapped neck or the snap placket. It’s EASY.
- The way the snap placket is constructed is AWESOME. For real, I promise, this pattern has the EASIEST construction of leg bindings and snap placket EVER.
- Did I mention I like the way the snap placket is constructed? No need for interfacing, and it’s SO STURDY! You use a piece of woven fabric to make it and a set of snaps! I like this Snap Set.
- Cut lines for disposable diapers AND cloth diapers. Mamas who use cloth diapers know the struggle. A lot of onesies don’t fit well over cloth, and they may cause leaks even! This pattern fits PERFECTLY over cloth, no pulling or stretching, making compression leaks less likely!
Now that I’ve explained WHY we want to use this pattern and why it’s worth modifying, now let me tell you HOW to add your scratch mitts!
STEP 1: The Size
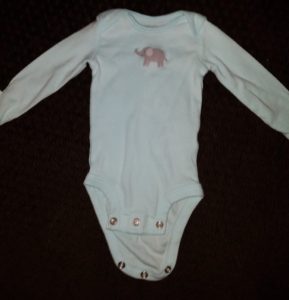
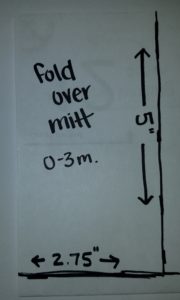
You need to decide how big you want to make your scratch mitts. I measured this newborn size oneise.
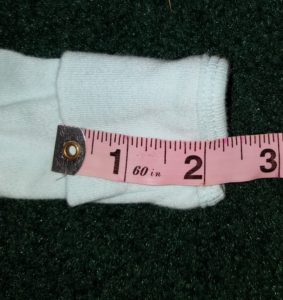
As you can see, the mitt part of this onesie measures about 2.25″. I decided to make my scratch mitts 2.5″ tall. You can use this measurement or make them however you want!
STEP 2: Math!
Let’s do some math! I know, I know… you thought you were NEVER going to do math again once you finished school. This isn’t complicated though! haha Just simple multiplication!
Our mitt piece is actually folded in half, so we need to double the measurement that we are using here to get the height of our mitt piece. Whatever measurement you used, multiply that with 2. That is what you will cut the length of your fabric. (This is how TALL your mitt piece should be!)
For the width of the mitt piece, you will need to measure your pattern piece. Measure at the bottom of your pattern piece, like in the picture below. As you can see, mine was right at 2.75″. Yours will be different, depending on the size you have chosen. We are NOT doubling this measurement because we only put the mitt on the back of the sleeve.
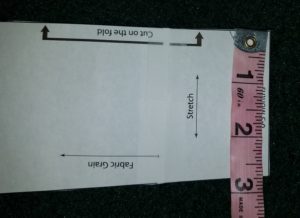
Your math and your mitt pattern piece. I like to draw my pattern pieces so that I can just trace them to the fabric. This obviously isn’t necessary though! You can always just measure these pieces out as your cut your fabric!

STEP 3: The Binding
We are going to make a binding strip for our arms. The length of the sleeves DOES include hem allowance but we are NOT hemming. I DO NOT recommend cutting off any length from the sleeves, however. HERE IS WHY! When you have scratch mitts, you really want the sleeves to be a tad long. If they are not long enough, when you fold over the scratch mitts, it really pulls, almost pulling the neck off the baby’s shoulder. My nephew spent a little time in the NICU after he was born. His nurses LOVED outfits with scratch mitts. My sister noticed quickly that the outfits with sleeves that were a tad longer were better because they didn’t pull so much when they folded the mitts over. So when we made hers, she wanted the sleeves lengthened for this reason!
To make your binding piece, you need to measure your sleeve. You’ve already had to measure the sleeve pattern piece, so you can use this measurement X 2. This will go on the bottom of the whole sleeve, so we want to account for the entire sleeve measurement this time!
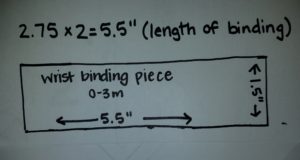 I chose to make my binding piece 1.5″ tall, because that’s about the height of the other binding pieces included in the pattern.
STEP 4: Cutting Your Fabric
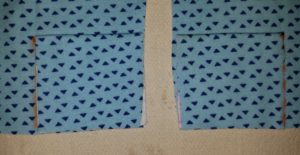
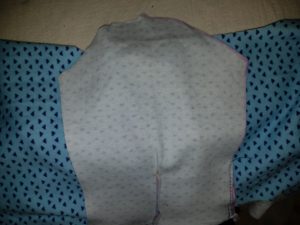
 Here I have all of my fabric pieces cut out! As you can see we have our extra pieces as well! I’ve got TWO scratch mitt pieces and TWO binding pieces!
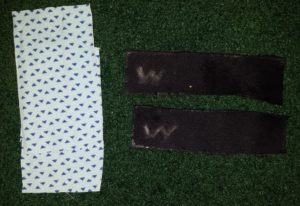
TIP: I like to label my binding pieces when I have so many on a pattern like this! I don’t want to get confused when I go to sew. I marked both of these wrist binding pieces with a “W” using chalk so I would remember what they were for and would not get them mixed up with the other pieces! This pattern already has a few long strips between the front neckline, back neckline, and both leg opening pieces! This just makes it easier for me!
STEP 5: Making A Slit
Okay, we are ready to start assembling the sleeve! YAY!
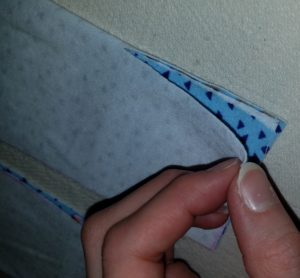
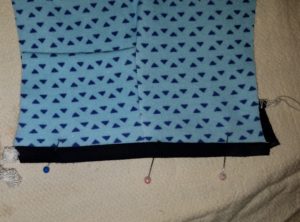
Fold your binding piece in half and press so it’s nice and neat. Lay it on one side of your sleeve. Mark in the center of the sleeve where the top of the mitt piece hits. You will make a slit from the bottom of the sleeve up to that dot you’ve made! 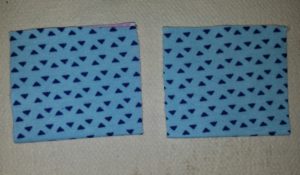
STEP 6: Layering your fabric
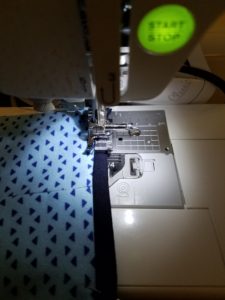
Now, lay your mitt piece one side of your sleeve and fold the sleeve in half. You will sew from the bottom of the sleeve to just above the top of your slit. Taper your stitches off of your fabric when you hit the top of the slit.

STEP 7: Binding the Sleeves!
Go ahead and open your sleeves up. We will now be binding the bottom of them.
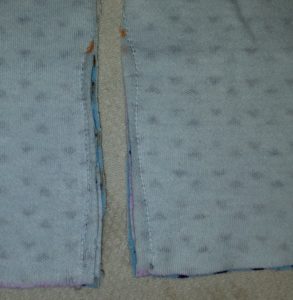
VERY IMPORTANT!! Make sure when you do the second sleeve, it is a MIRROR IMAGE of the first sleeve! You want them to be OPPOSITES because we want the mitt to be on the back of each sleeve!!
Both sleeves are open. One should have the scratch mitt laying one direction, and the second should have the scratch mitt laying the other direction.
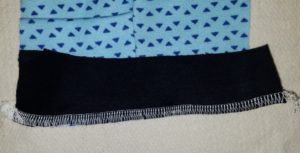
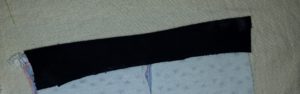
Pin or clip your binding piece to the bottom of your sleeve piece right sides together.
Sew or serge the binding to your sleeve piece. I stretched my binding very slightly!
Press your binding piece DOWN.
Then flip your binding to the back. Covering your sewn or serged edge, topstitch your binding piece. Remember you need to use a stretch stitch on your sewing machine, a double needle, or a coverstitch! We don’t want to pop our topstitching when we put it on the baby!!
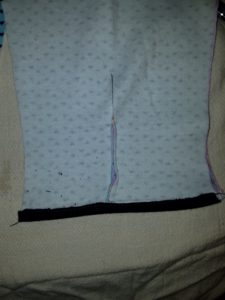
Now, flip your sleeves over and trim the extra binding off the back. (Trim the part that is not sewn. Be CAREFUL to not snip your sleeves!!)
STEP 8:
Now you’re ready to finish constructing the onesie using the instructions in the pattern!
When it’s time to attach your sleeves to your onesie, be sure you attach the sleeve that has the mitt piece facing the BACK of the onesie!!
Remember when it comes time to hem the sleeves that we DON’T do that! We’ve got a beautiful binding on ours!
See! That wasn’t too bad! I told you this was WORTH doing!


And just because we could… here’s a cousin picture in their matching MCDI Onesies! Big cousin doesn’t have cool scratch mitts though!


Thank you so much for taking the time to read this blog post! I have included my affiliate link throughout this post and would really appreciate you using it if you choose to purchase! This is a wonderful pattern, and I’m sure you’ll love it as much as I do!
I encourage you to check out their other wonderful patterns as well!
If you do sew one, please remember to share in the Mamma Can Do It Facebook Group! The ladies there would LOVE to see it!


