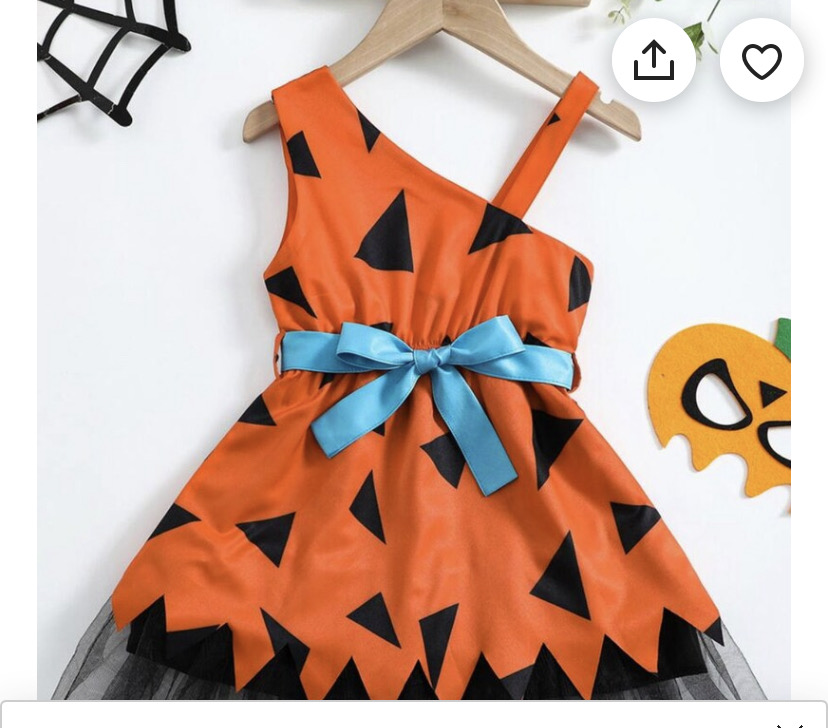
October is almost here which means Halloween is right around the corner. This year my sister sent me a picture she found on Pinterest for this adorable Flintstones Costume and asked if I could make it for my niece. I couldn’t resist staying yes, I love the tulle peaking out from underneath. I knew I had the perfect pattern for this costume. With a few modifications the Sadie Dress would be perfect. I ordered this orange, teal and black cotton fabrics, as well as, this black tulle. I’ll walk you through how I modified the pattern to make this costume.
Here’s a picture of the ‘Pinspiration’ costume she wanted.
Want to make this too? Find the links to the pattern and free add on’s below.
- Sadie Dress – Baby NB-36m
- Sadie Dress – Girls 4-16
- Grab the Free bone pattern and triangle graphic here
Let’s get started!
All seam allowances are 3/8″ unless otherwise noted. You will need the Sadie Dress pattern to make this costume.
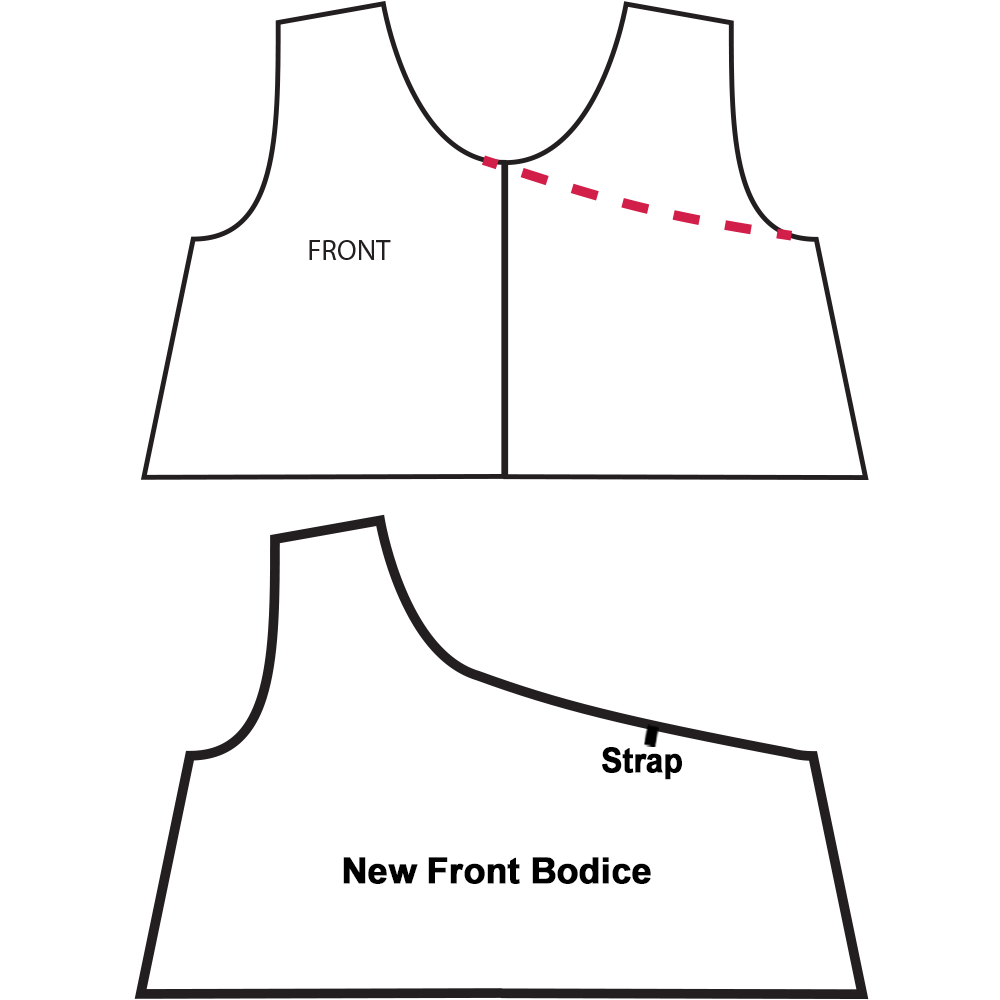
Step 1: Adjusting the pattern pieces
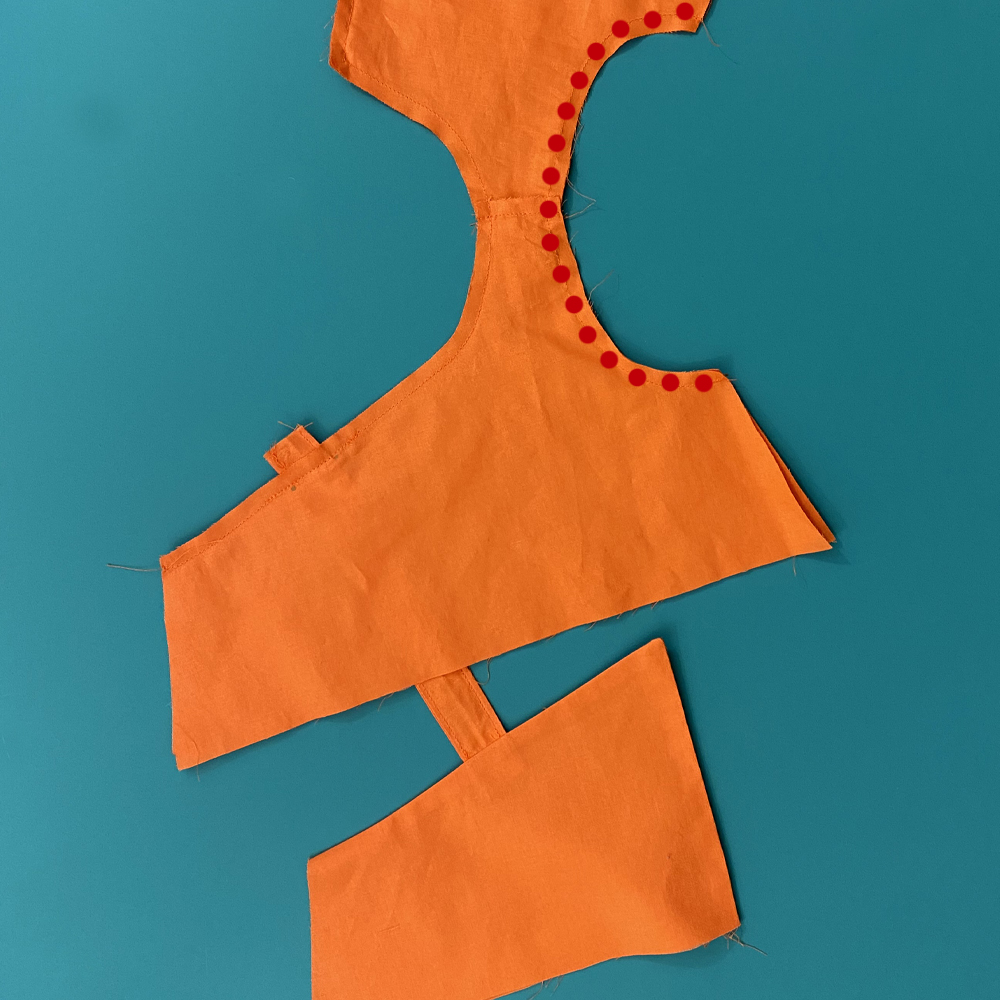
Begin by printing and cutting out 2 front and 2 back bodice pieces from the Sadie Dress pattern.
Front Bodice
First, we will adjust the front bodice to make it asymetrical. Tape or glue the 2 front pieces together along the center fold line. Decide which side you would like to have the strap on. Draw a gentle curved line from the neckline to the armscye.
If you will be adding a strap make sure to mark the strap placement on the pattern piece as well. I placed mine in the center of the original strap. Cut out your new pattern piece.
Place the new pattern piece onto your fabric. Cut 1 in your main and 1 in your lining fabrics.
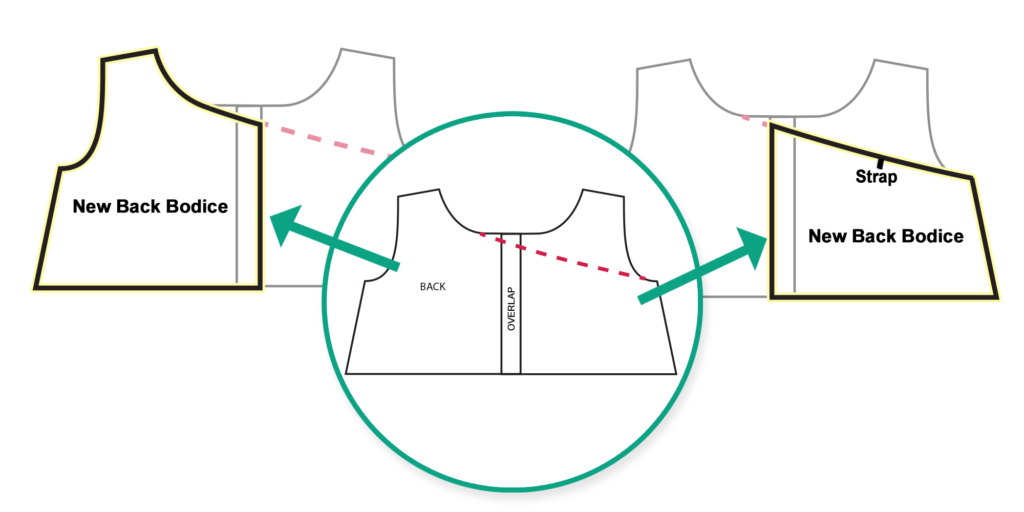
Back Bodice
Next, we will adjust the back bodice pattern pieces. We will do this very similar to the front. Overlap the 2 back pieces 1″ along the center back. The overlap is where we will add snaps later but we need to account for it when adjusting the pattern. Draw a gentle curved line from the neckline to the armsyce going the same direction as the one you made of the front bodice piece.
The highlighted areas on the diagram below will be your new pattern pieces. Don’t forget to mark the placement for the strap on the back. Cut out the new pieces. You will now have 2 new pattern pieces for the back. Take your 2 new back pieces and place them together, overlapping 1″. Make sure to true up the 2 pieces so they line up properly. Cut each out, 1 in your main and 1 in your lining fabrics. Pay attention to the direction of the pieces as you cut them out so that they are going the right way when you place them together.
Step 2: Bodice
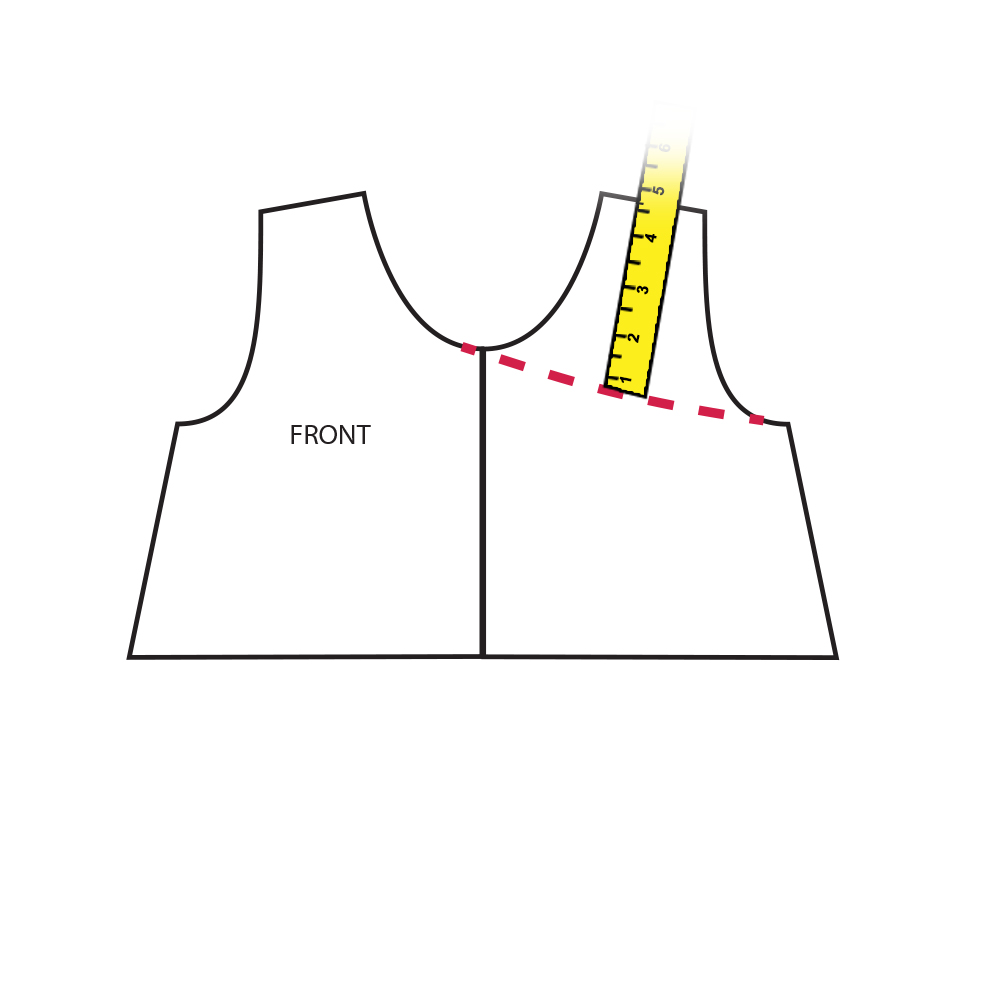
If you are adding a strap to the other side of the bodice we need to calculate how long to make it. Begin by measuring from the center of the original shoulder down to the new line you made. Mine was 4.375″. Measure the back pattern piece as well. My back measurement was 4.25″. Add those 2 numbers together. 4.375″ + 4.25″ = 8.625″. Next, subtract the seam allowance. 8.625″ – .75″ = 7.875″. I will round this up to 8″ and add 1″ to this number so that the strap will overlap the bodice 1/2″ on the front and back while attaching. I cut 1 strap 2.25″ x 8″ . The finished width of the strap will be about 3/4″. You can adjust the width to your preference.
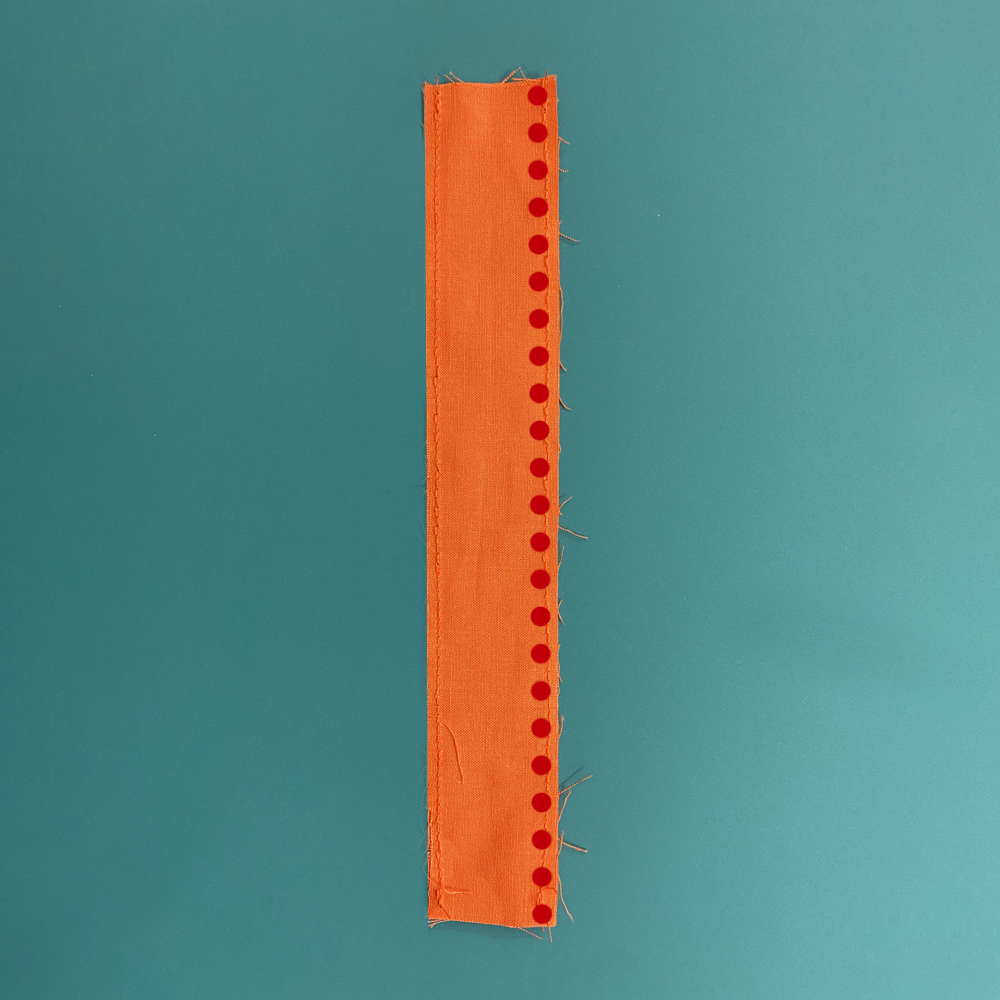
Fold the strap in half widthwise with right sides together, press.
Stitch 3/8″ from raw edge along the long side.
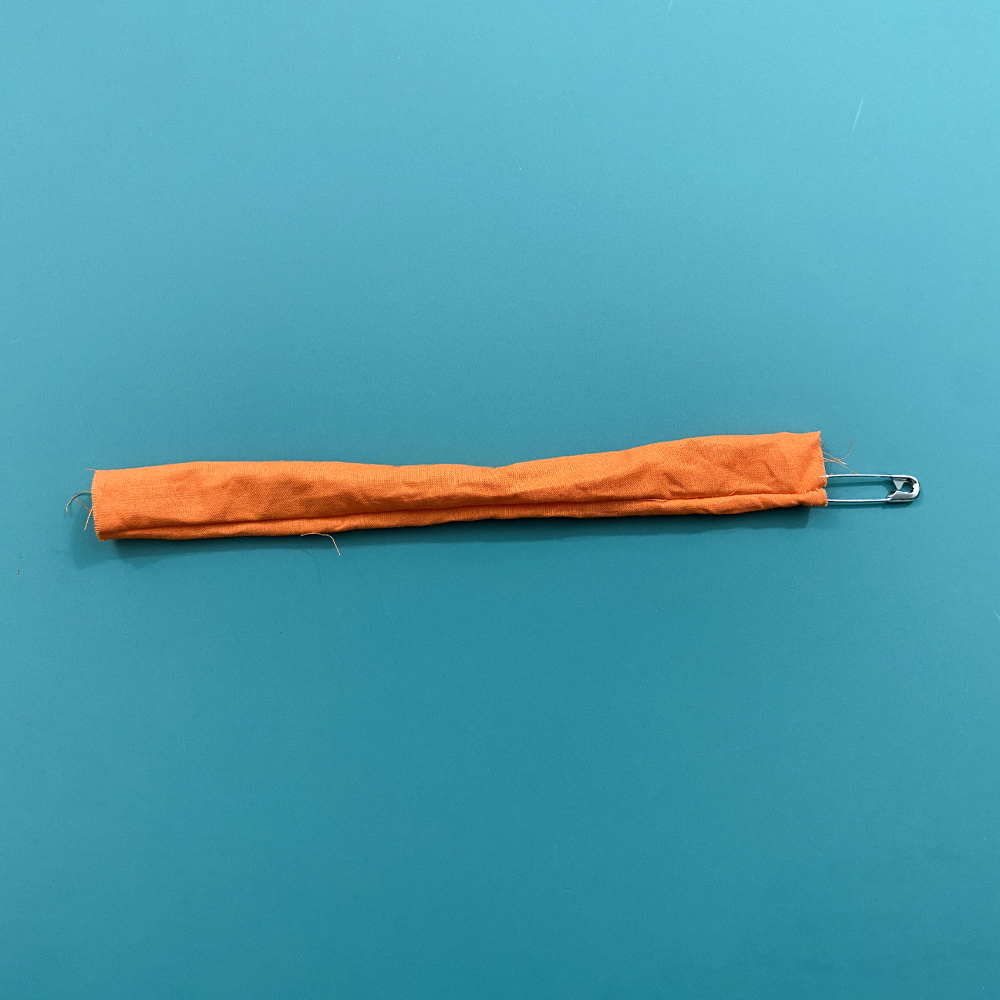
Turn the strap right side out and press. Top Stitch 1/8″ from the edge along both long sides.
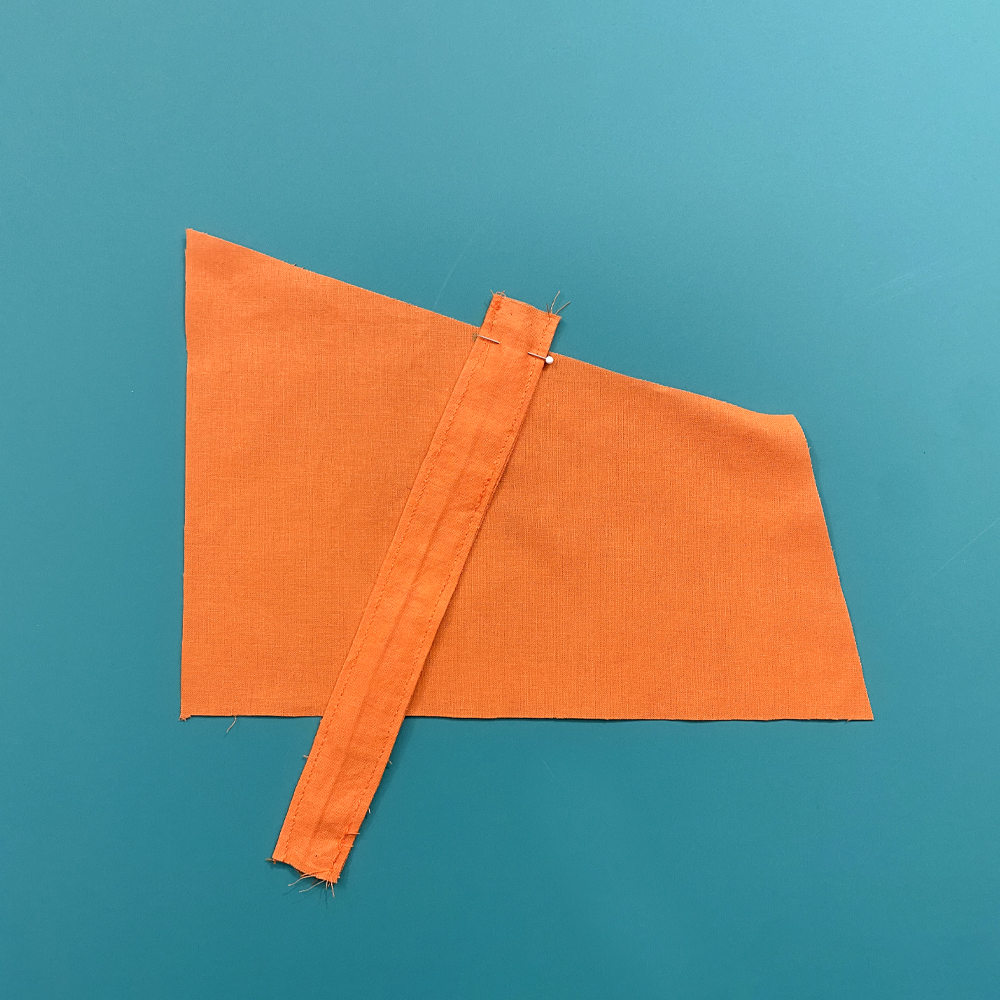
Place the main angled back piece right side up. Place the short end of the strap, right sides together with the main back piece. Let the short edge of the strap overhang 1/2″. Pin to hold in place.
Place the lining angled back piece on top with the right side facing down. The two back pieces will be right sides together and the strap will be sandwiched in between. The wrong side of the strap will be facing toward the lining piece. Stitch from the armsyce to center back and down the side. I like to sew back and forth over the strap to reinforce it.
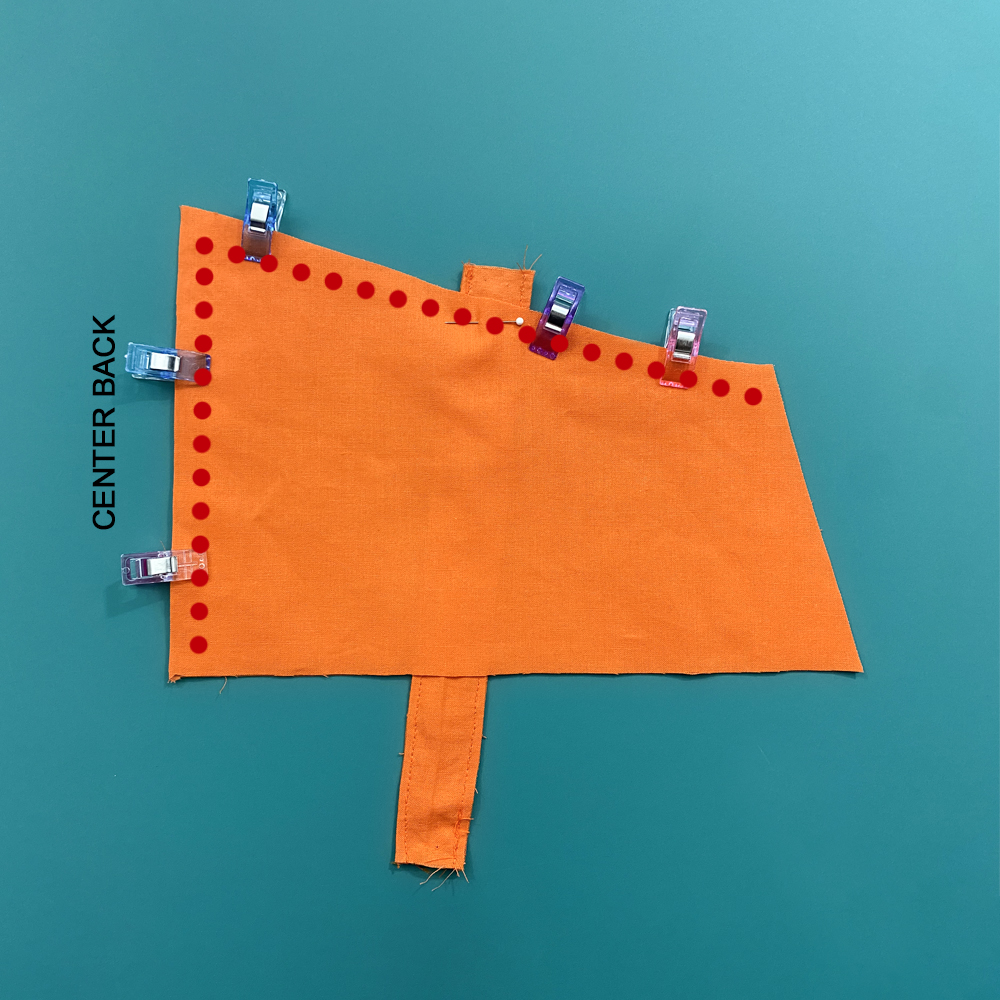
Clip the corner at center back and turn right side out, press.
Align the raw edges of the shoulder seams on the main fabric front and back pieces. Pin/clip to hold in place and stitch together. Repeat with the lining pieces.
Place the main front bodice piece right side up.
With right sides together place the strap on top of the front bodice with the strap overhanging the edge 1/2″. Place the other front lining piece on top with right sides together and align the shoulder seams. The strap will be sandwiched in between the two pieces. Make sure your back piece that is attached to the strap is facing the correct way.
Pin/clip together. Stitch along the neckline. Sew back and forth over the strap to reinforce it.
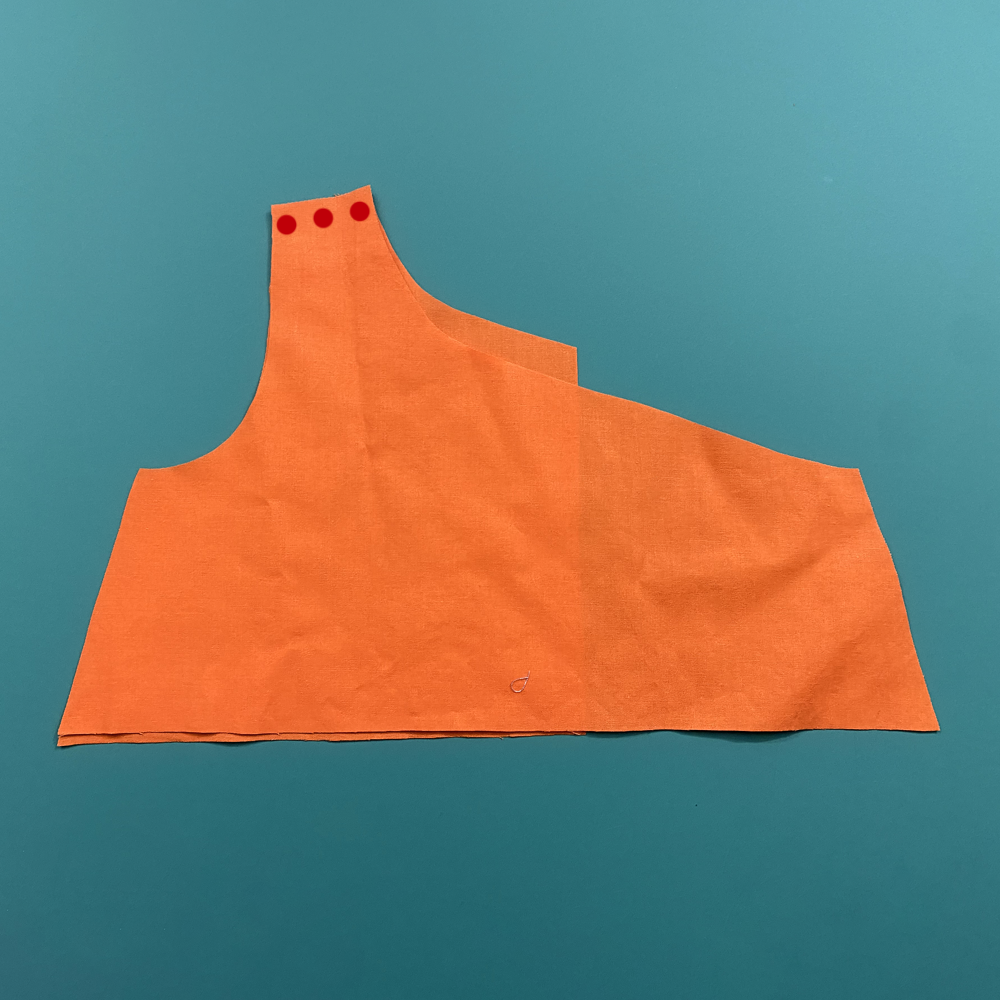
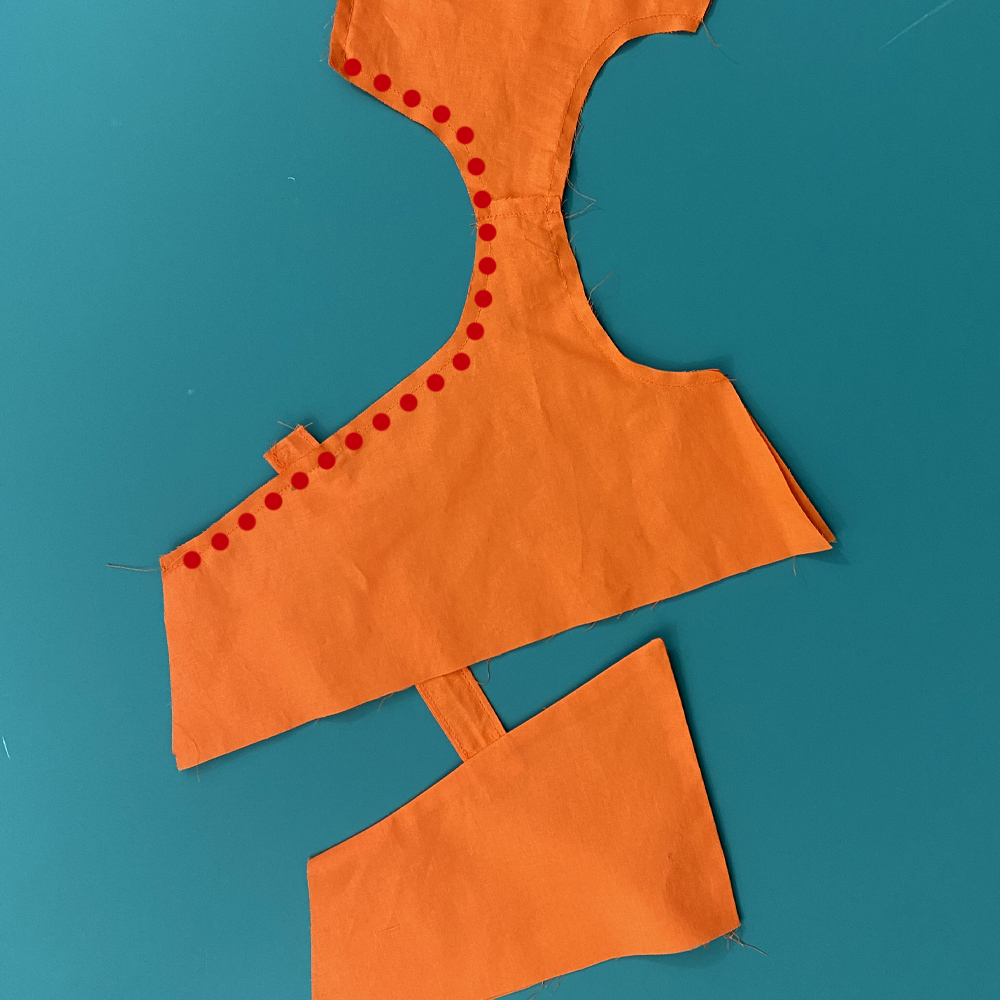
Align the shoulder seams and armscye. Pin/clip together and stitch. Turn right side out and press. See the pattern tutorial for more detail if needed.
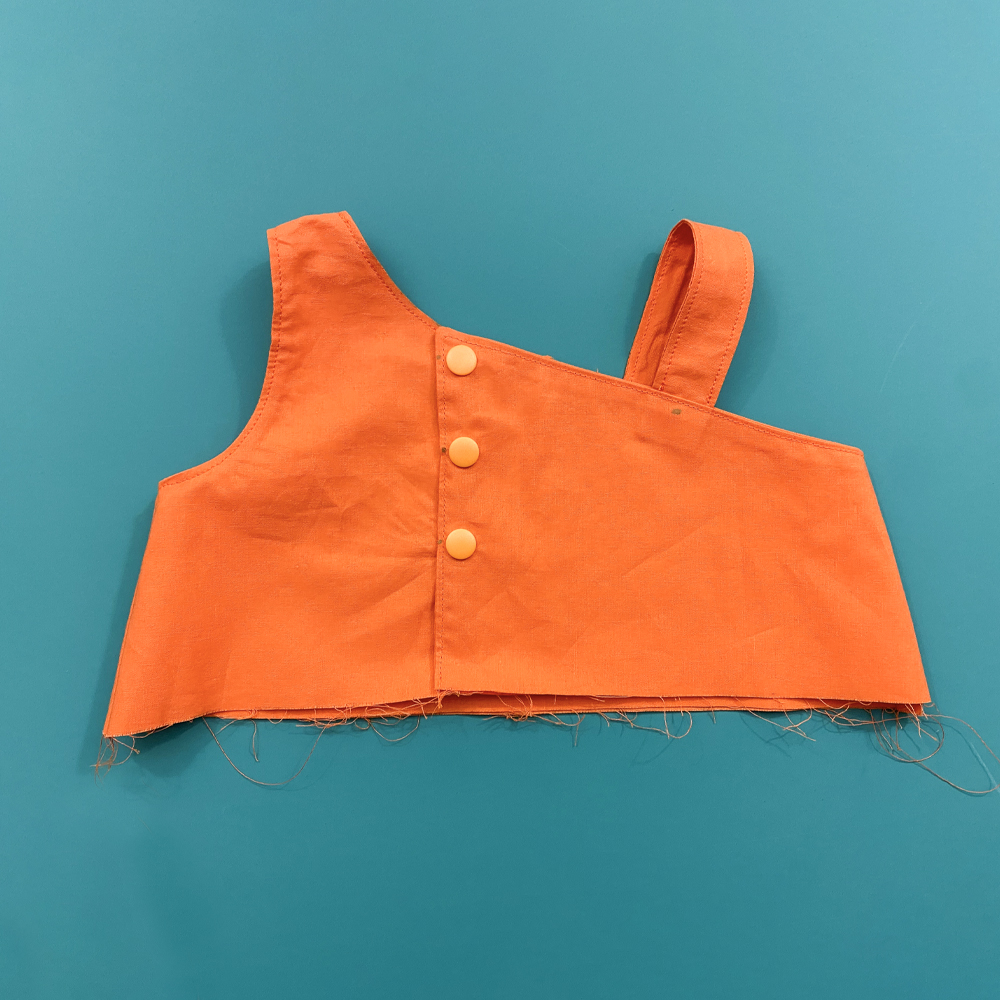
Place the snaps per instructions in the Sadie tutorial. Set bodice aside for now.
Step 3: Skirt
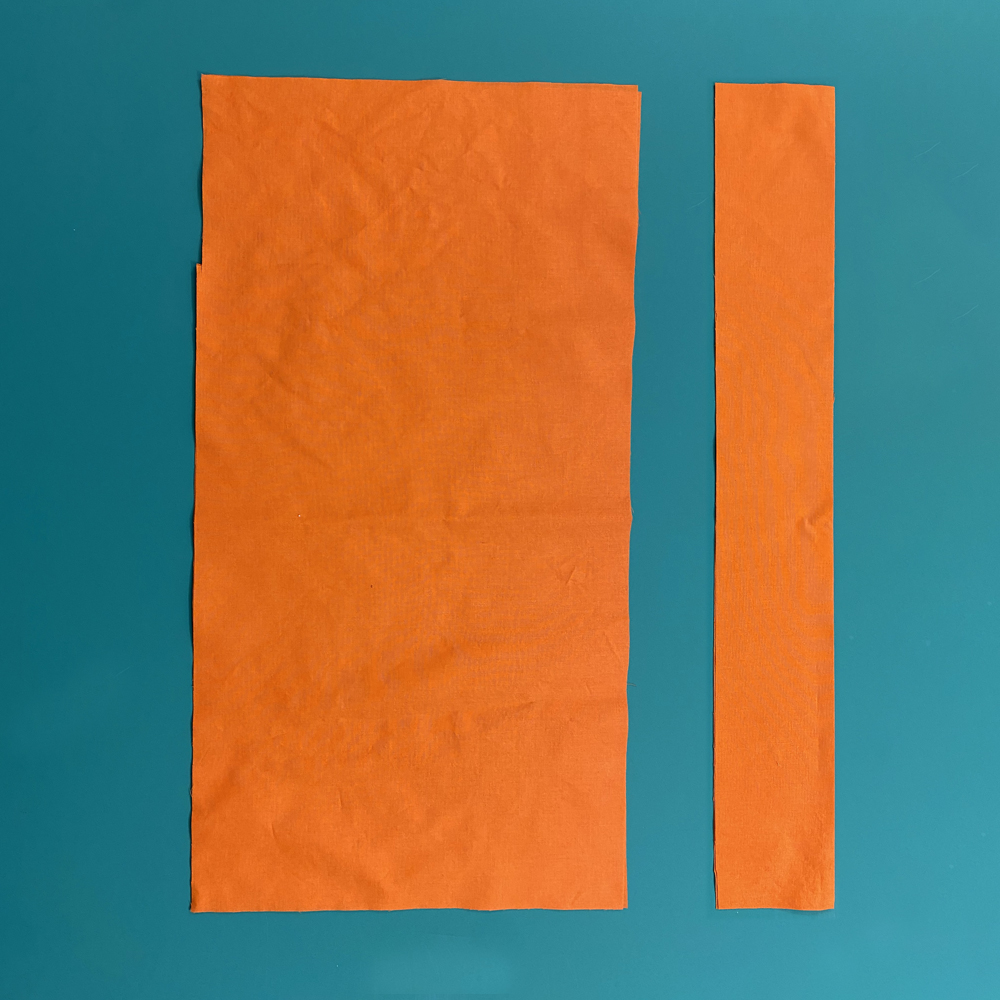
Cut out 2 skirt pieces in your main fabric per the measurements from the Sadie pattern. I used the bottom skirt dimensions for this. I subracted 1″ from the height because we will be using a facing instead. Also, cut out 2 pieces that are 2-3″ tall x the length of the bottom skirt. This will be for the facing on the hem.
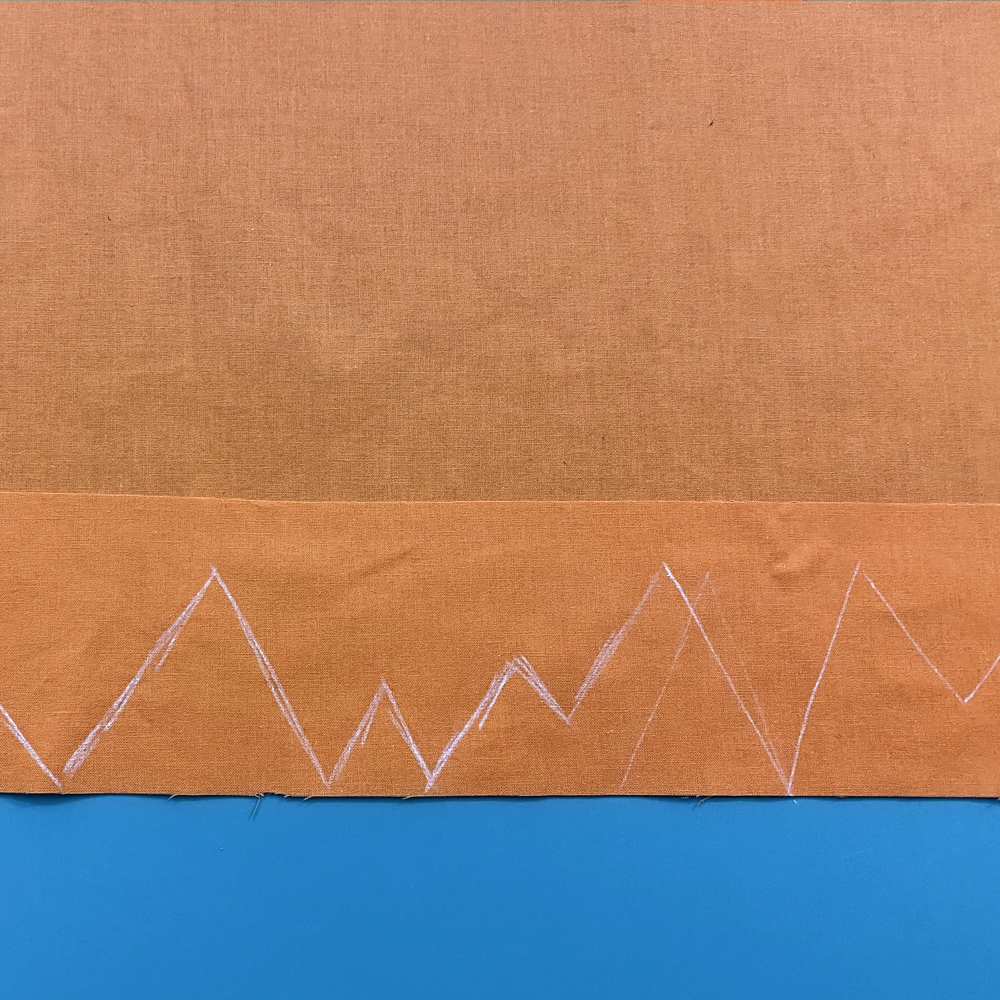
Using a fabric marker or chalk, draw the bottom jagged edge of the skirt like the inspiration photo onto the facing fabric. Place the facing right sides together with one of the skirt pieces. The line you drew should be facing you. Stitch the facing to the bottom of the skirt following the line you drew.
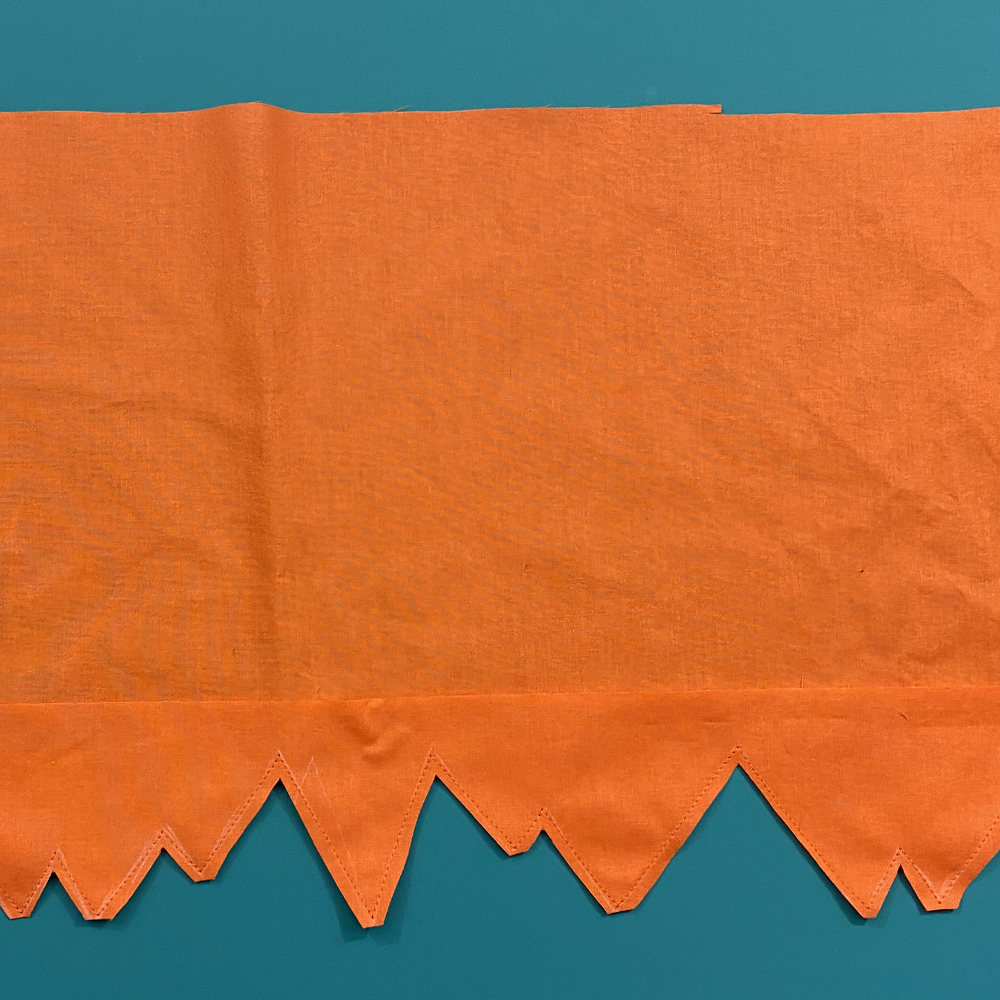
Cut the excess fabric close to the stitches at the bottom.
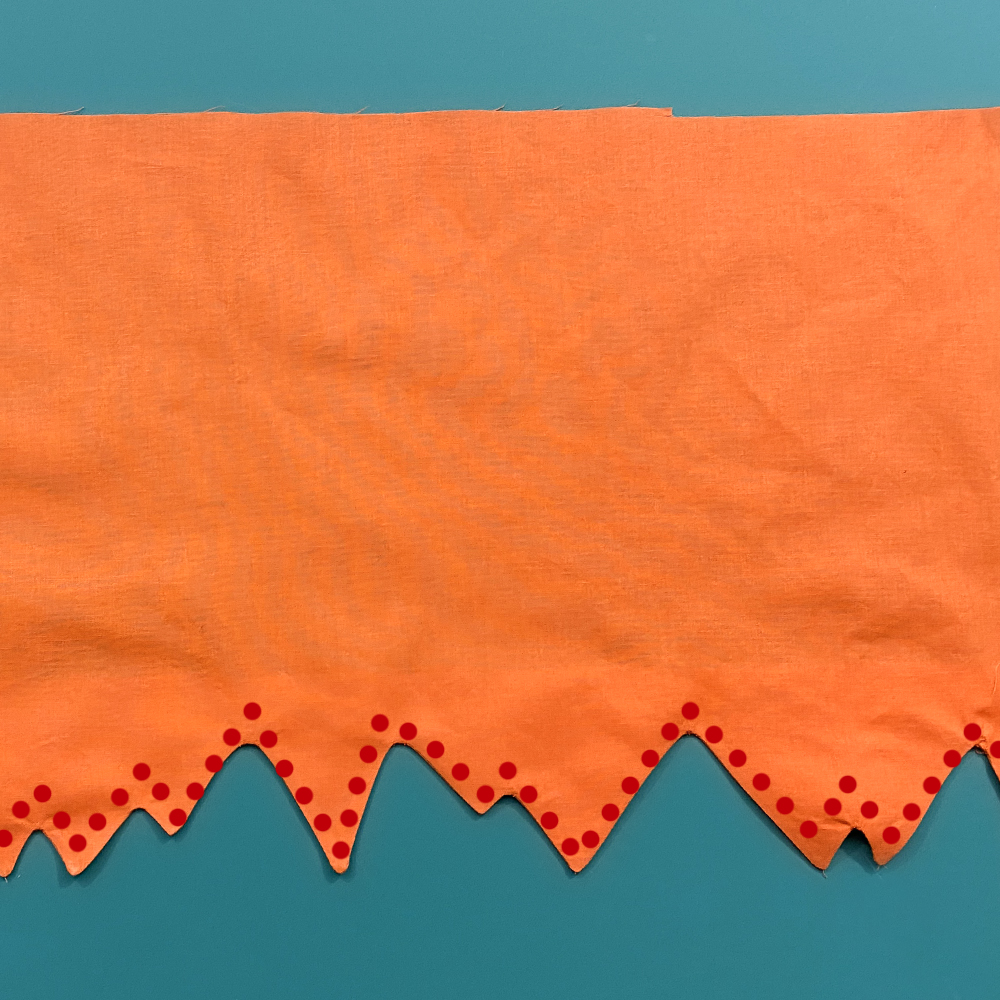
Flip the facing toward the wrong side of the skirt, pushing each point out. You can use a pin to gently pull the fabric to make a nice sharp point. Press well. Top Stitch 1/4″ along the bottom edge. Trim away excess fabric from facing only with pinking shears.
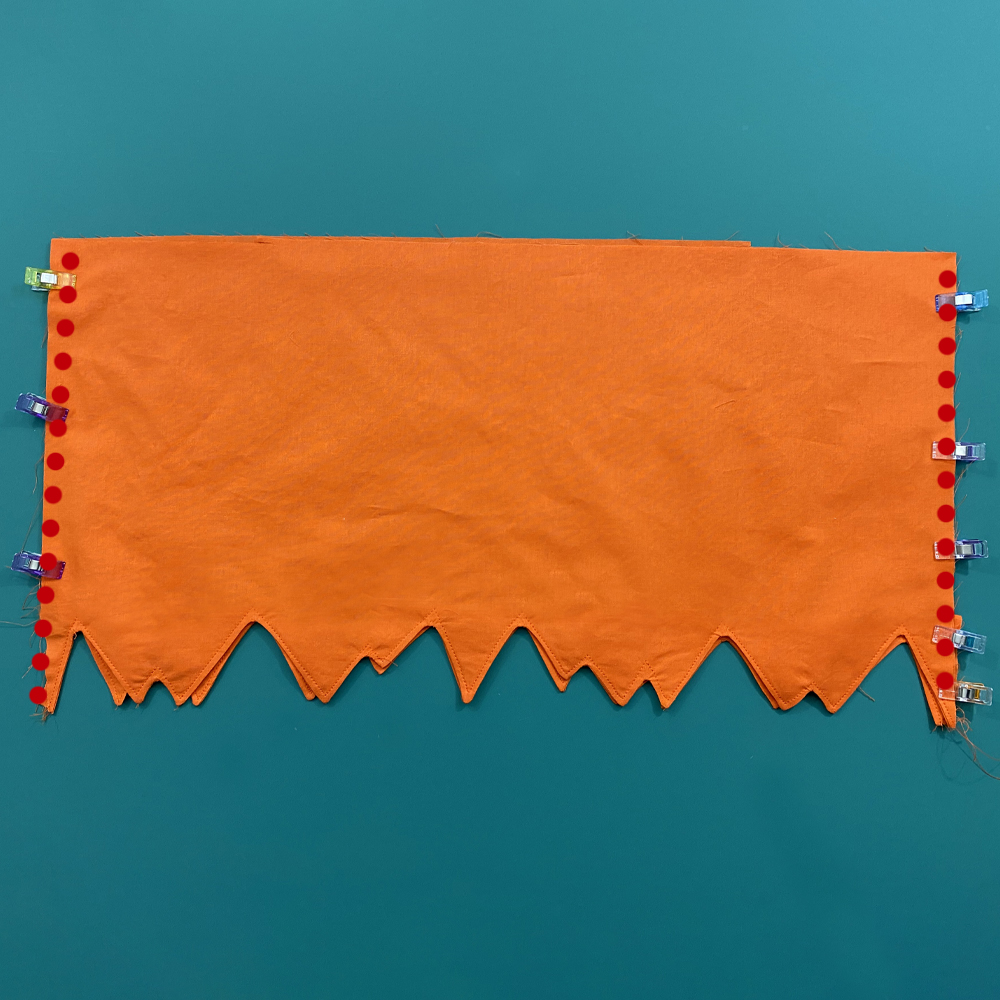
Using the first skirt piece as a guide trace the bottom hem onto the other facing piece. It’s important that the pieces are the same at the side seams. Attach the facing as you did the first skirt piece.
Place the 2 skirt pieces right sides together. Pin/clip and stitch the side seams. Finish the raw edges with a zig zag stitch or a serger. Set aside for now.
Step 4: Lining & Tulle Skirts
A skirt lining is optional. I added one to keep the tulle from itching the skin. If you plan to wear pants under the costume you may choose to leave this out.
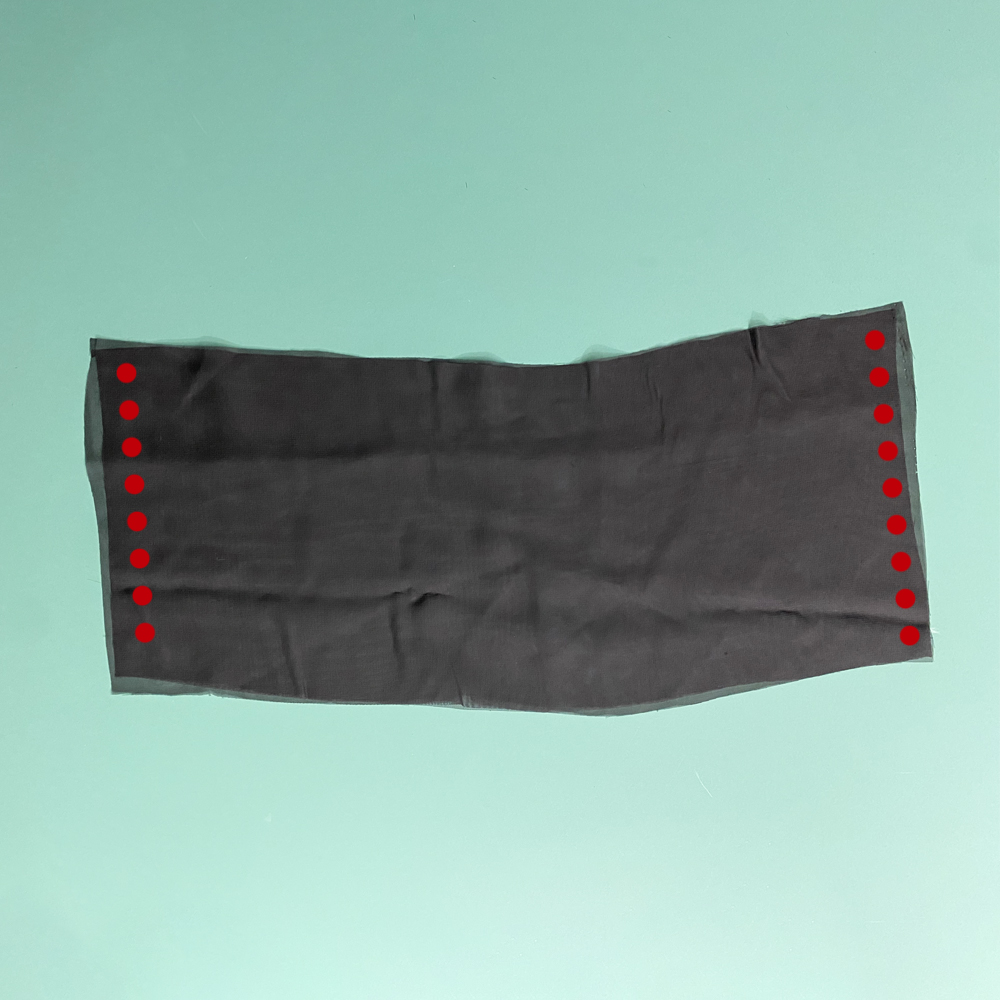
Cut 2 lining pieces the same dimensions that are listed on the pattern for the top skirt. Place them right sides together. Pin/clip together and stitch the side seams. Finish the raw edges with a zig zag stitch or a serger.
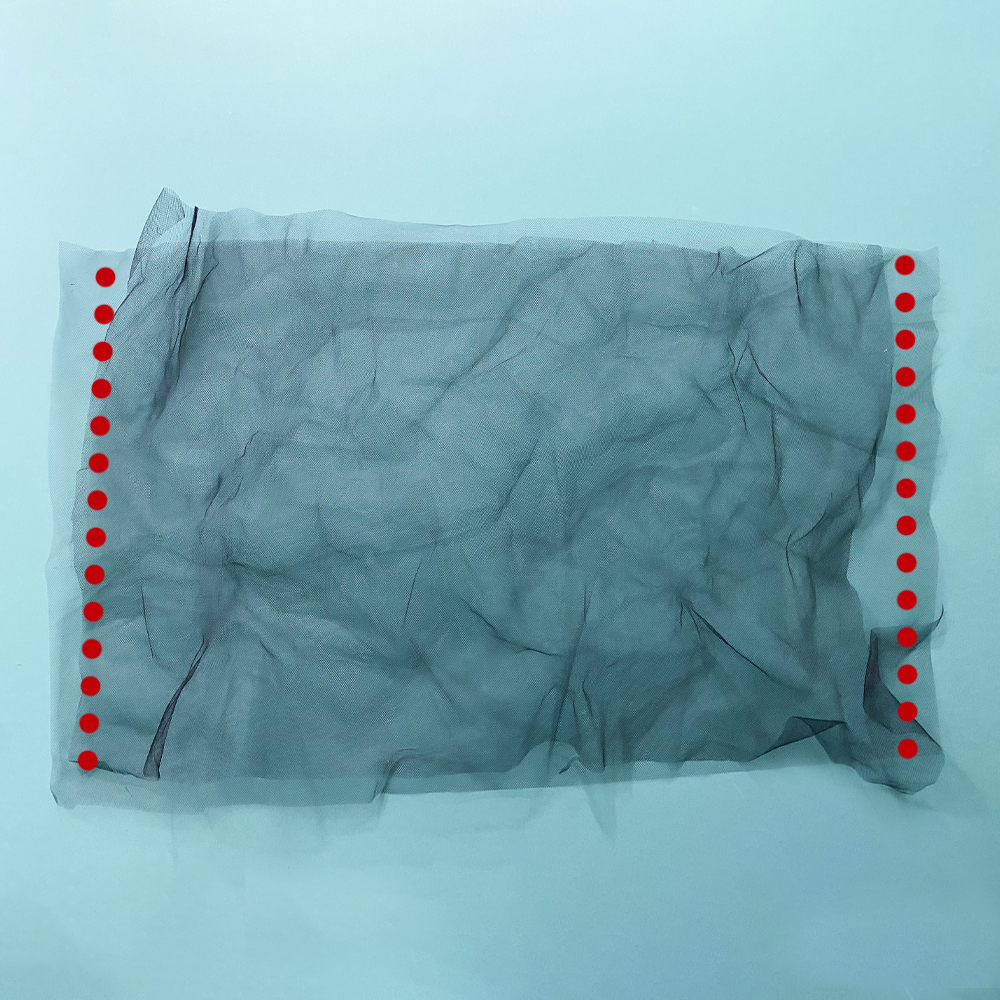
For the tulle skirt you will cut 8 pieces of tulle the same length as the main skirt. I made the height about 2 inches taller than the main skirt so that I could cut it after it was on to determine how much I’d like to peak out of the bottom.
Place 2 pieces of tulle together and stitch the side seams. Repeat this with the remaining tulle. You will make 4 tulle skirts total.
Step 5: Assemble the Skirt
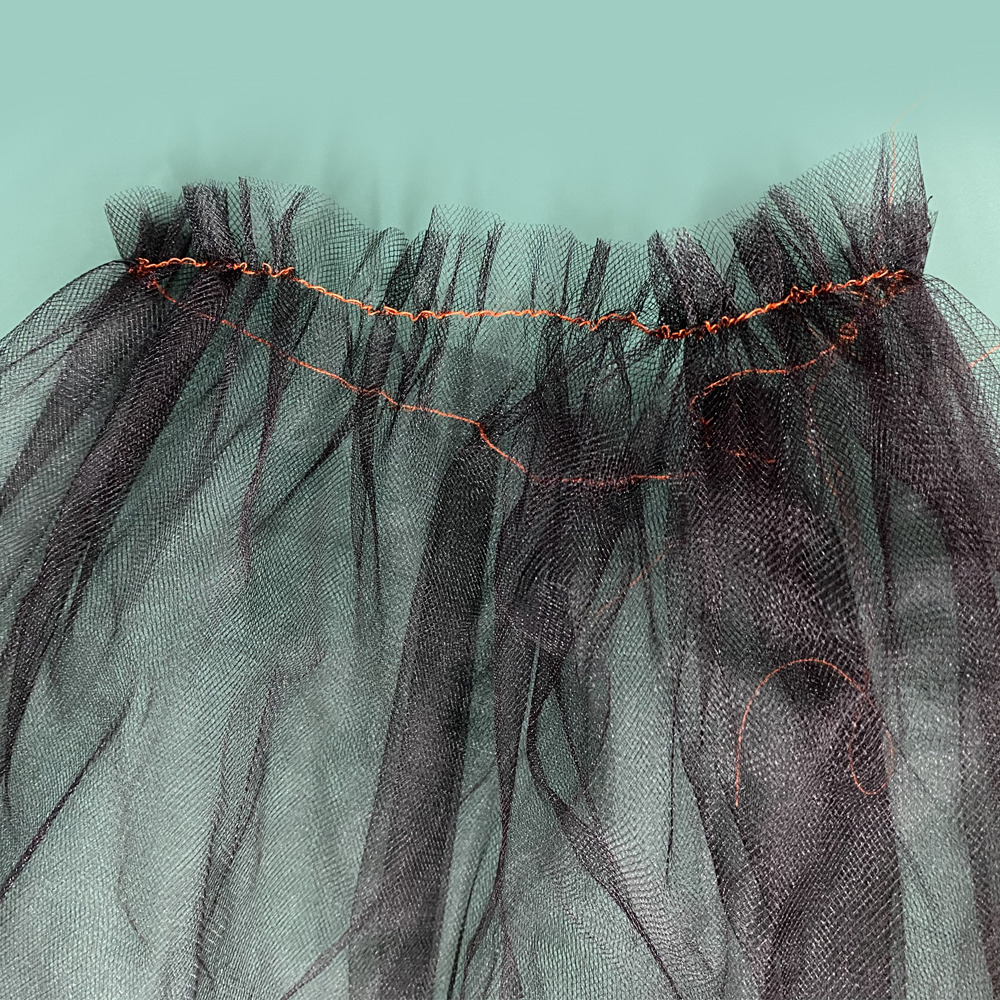
Sew a basting stitch along the top edge of each skirt. You will do this for the 4 tulle skirts, the main skirt and the lining skirt.
If you are not familiar with a basting stitch. Simply set your sewing machine to a straight stitch with the longest stitch length.
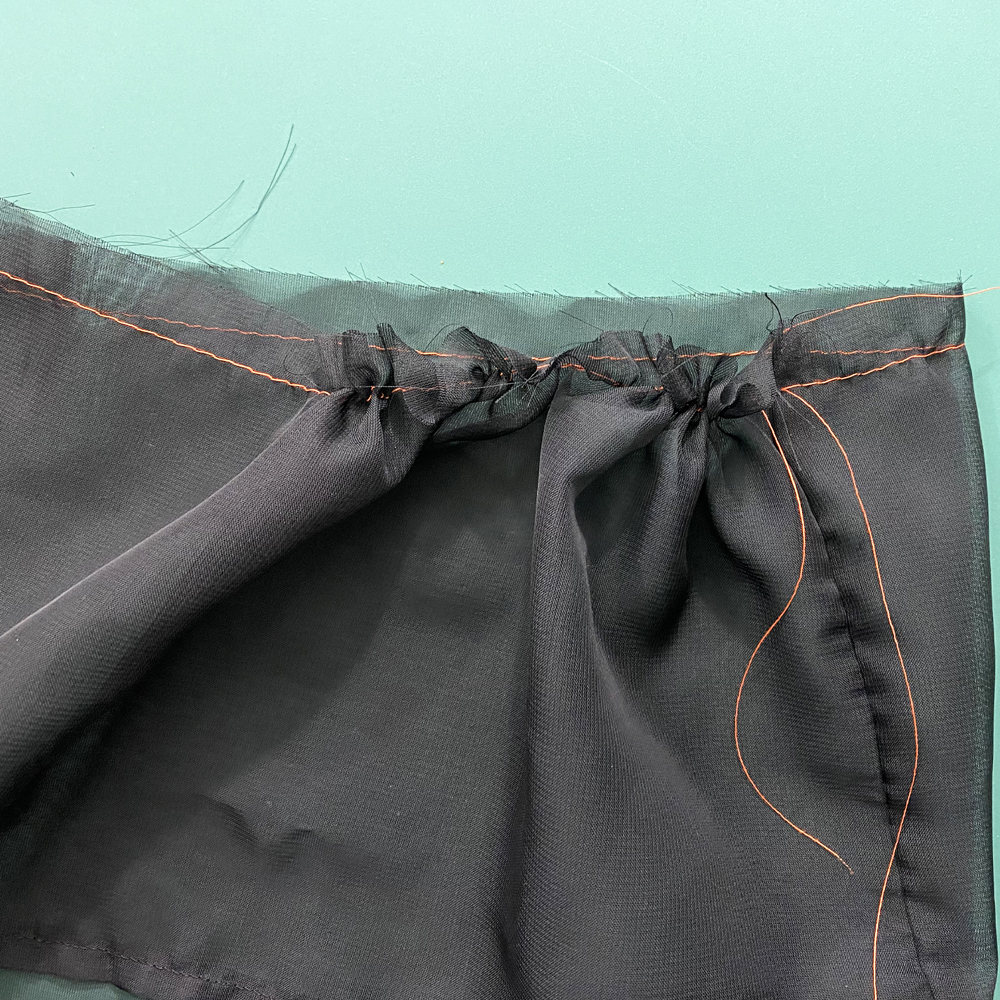
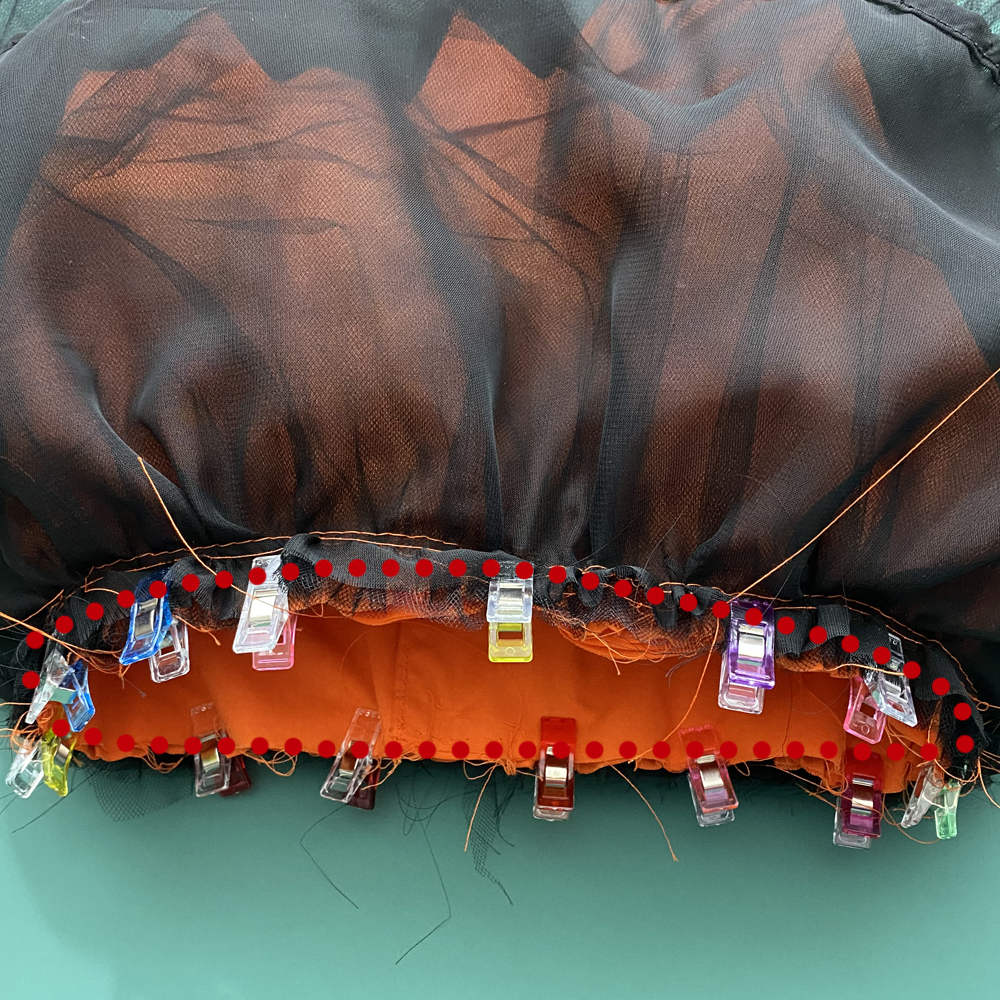
Pull the bobbin thread and gather each skirt to the width of the bodice. Repeat this with all skirt pieces.
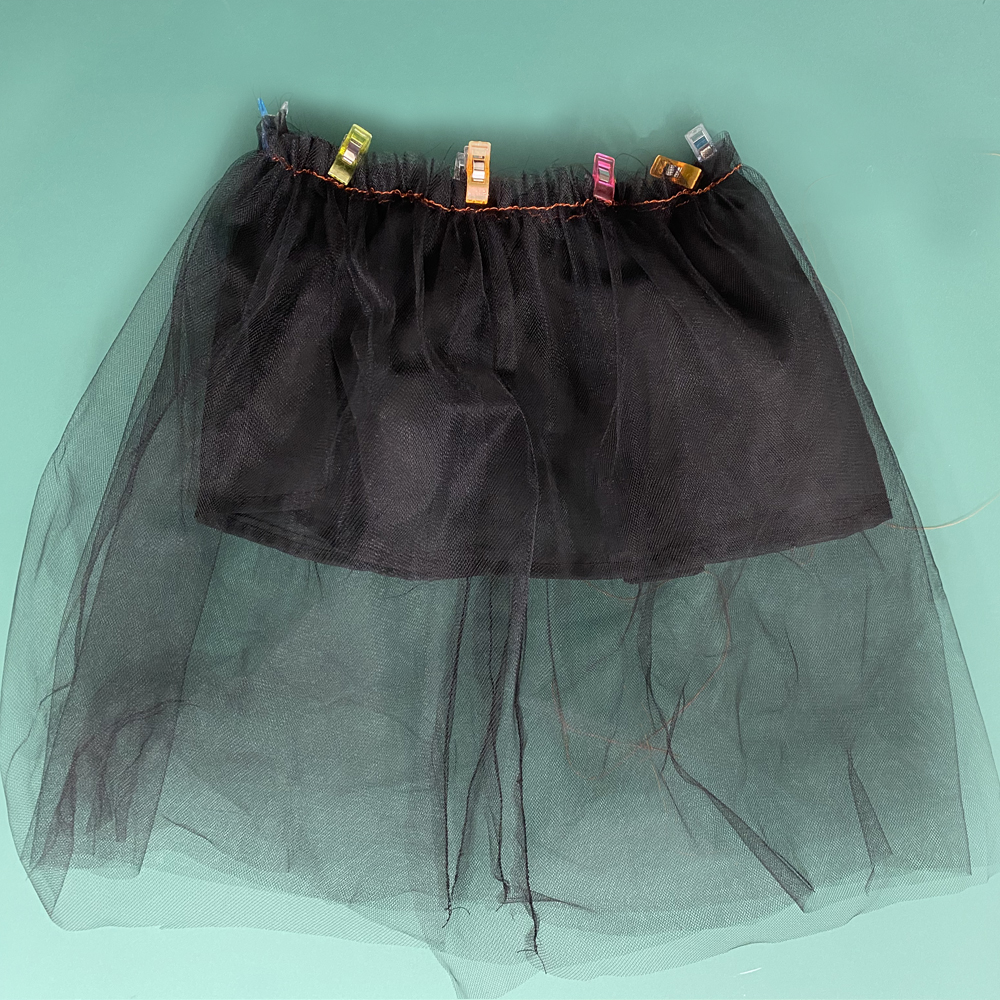
Optional: Place 2 skirts together and align the raw edges at the waist. The wrong side of the main skirt will be attached to the tulle and the right side of the lining will be attached to the tulle. Pin/clip and baste together. Repeat with the remaining skirts. This step is optional but it will help keep the layers from shifting.
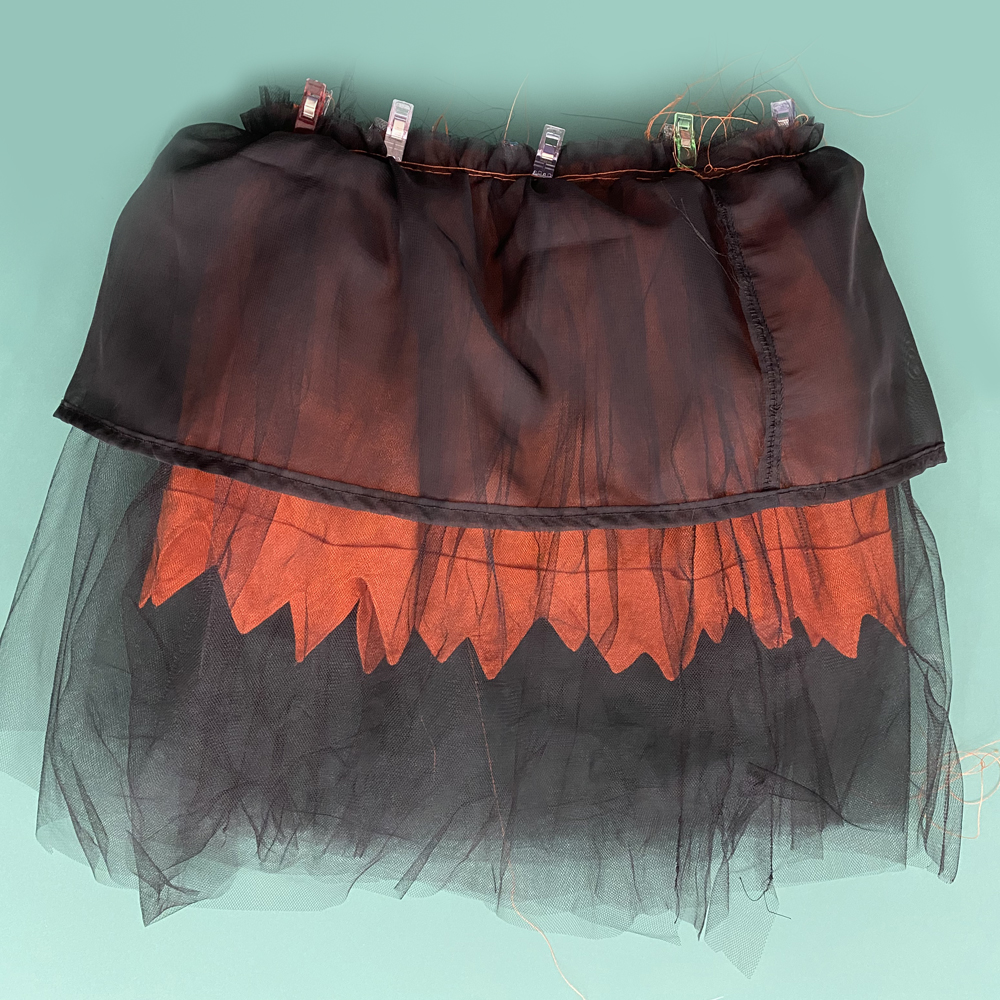
Layer the skirts together wrong sides out. The main skirt will be the inner most layer, followed by 4 layers of tulle and then the lining skirt on the outside. Baste the 6 skirt layers together to keep them from shifting when attaching the bodice.
Slide the bodice into the skirt, right sides together with the main skirt. Align the side seams and raw edges. Pin/clip together, stitch.
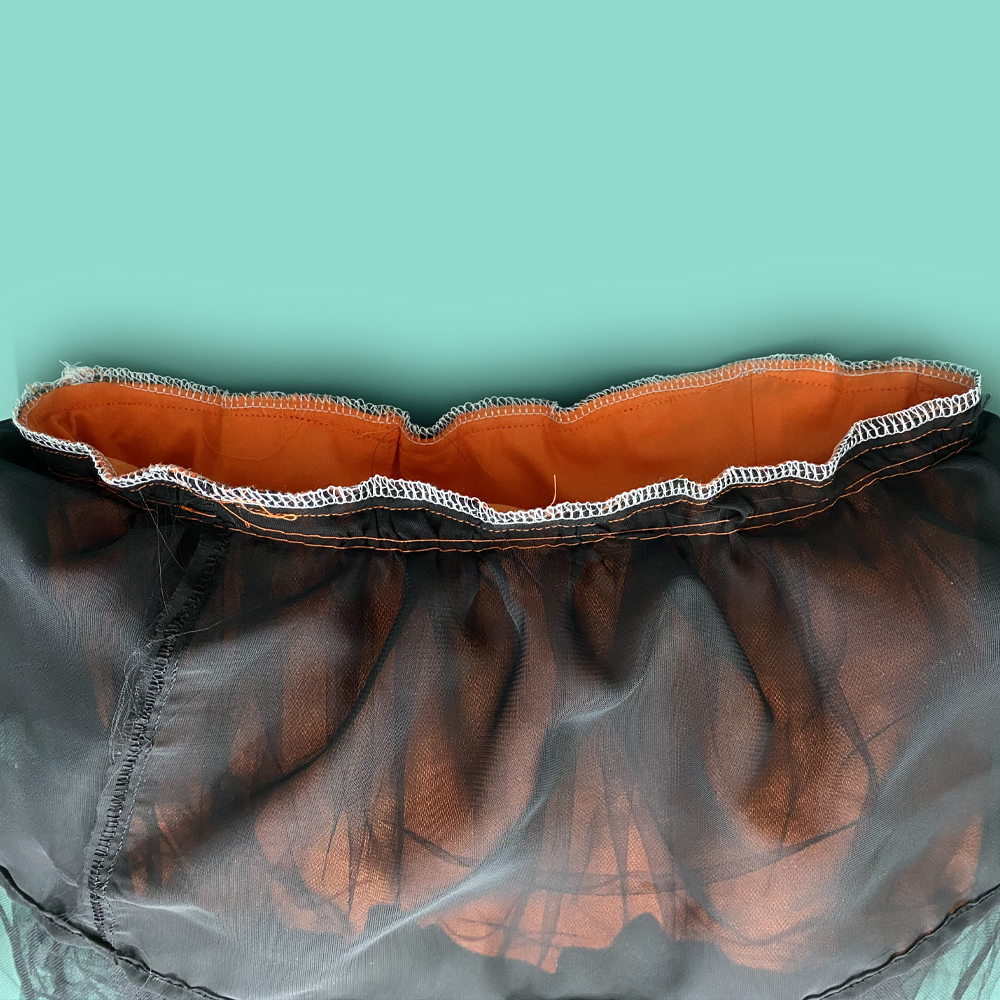
Finish the raw edges with a zig zag stitch, serger or pinking shears.
Optional: Top stitch seam allowance down.
Step 6: Adding Vinyl
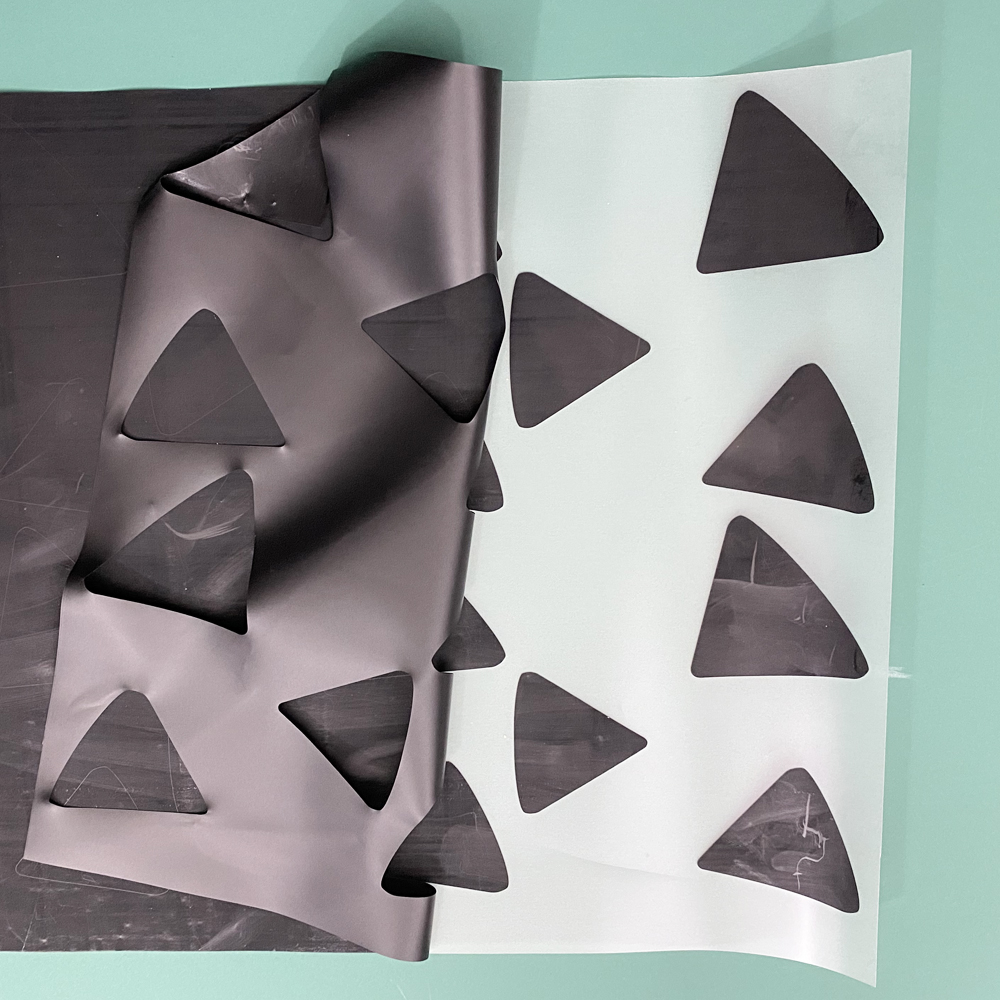
To add the decorative triangles, I used iron-on vinyl that I cut out on my cricut. You can make your own template or you can grab this one I made for free here. I just duplicated the triangles as many times as I needed. Once you have your vinyl cut out, weed it.
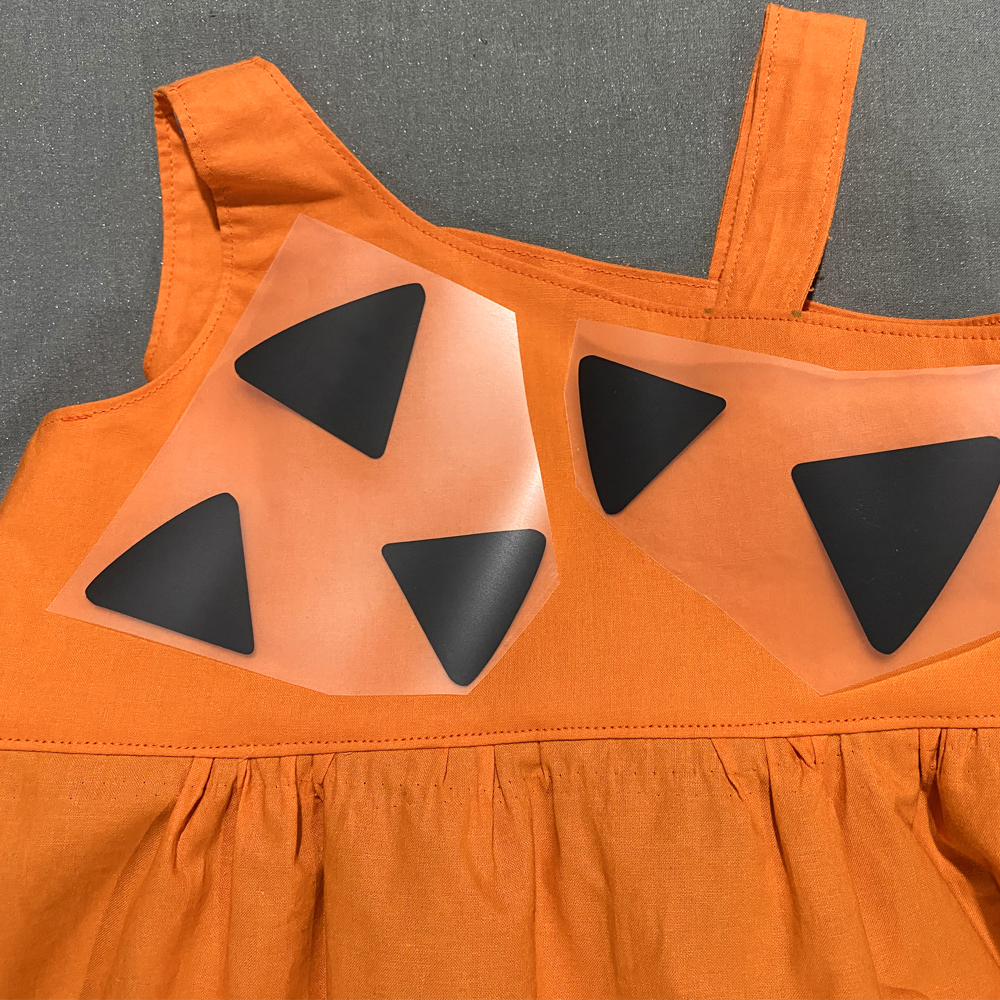
Place the triangles randomly over the costume. I found my mini cricut heat press worked the best for this because it was on the smaller side.
Follow the cricut recommendations based on your fabric to determine what settings you should use. You can check the Cricut Heat Guide here: Cricut Heat Guide
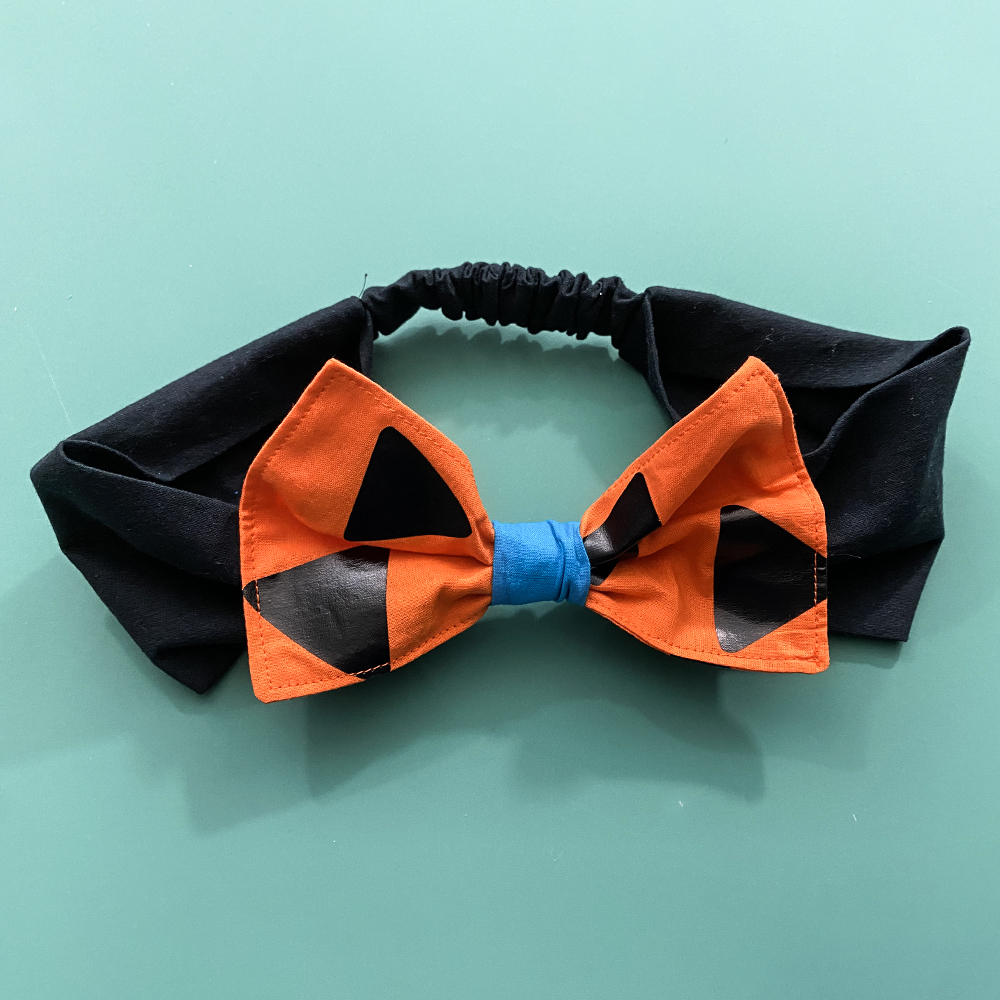
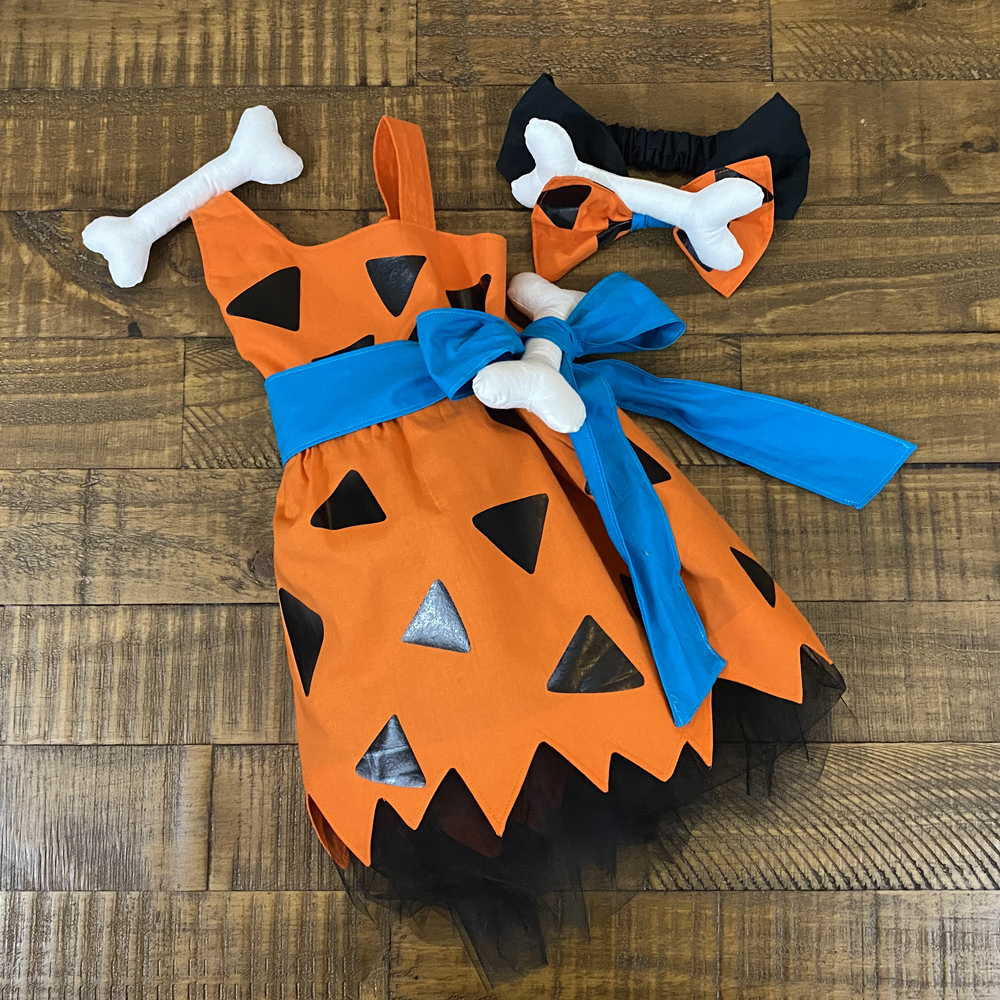
Step 7: Bones (optional)
Once you are happy with the vinyl you have added you can make the bones to add a little more detail to your costume.
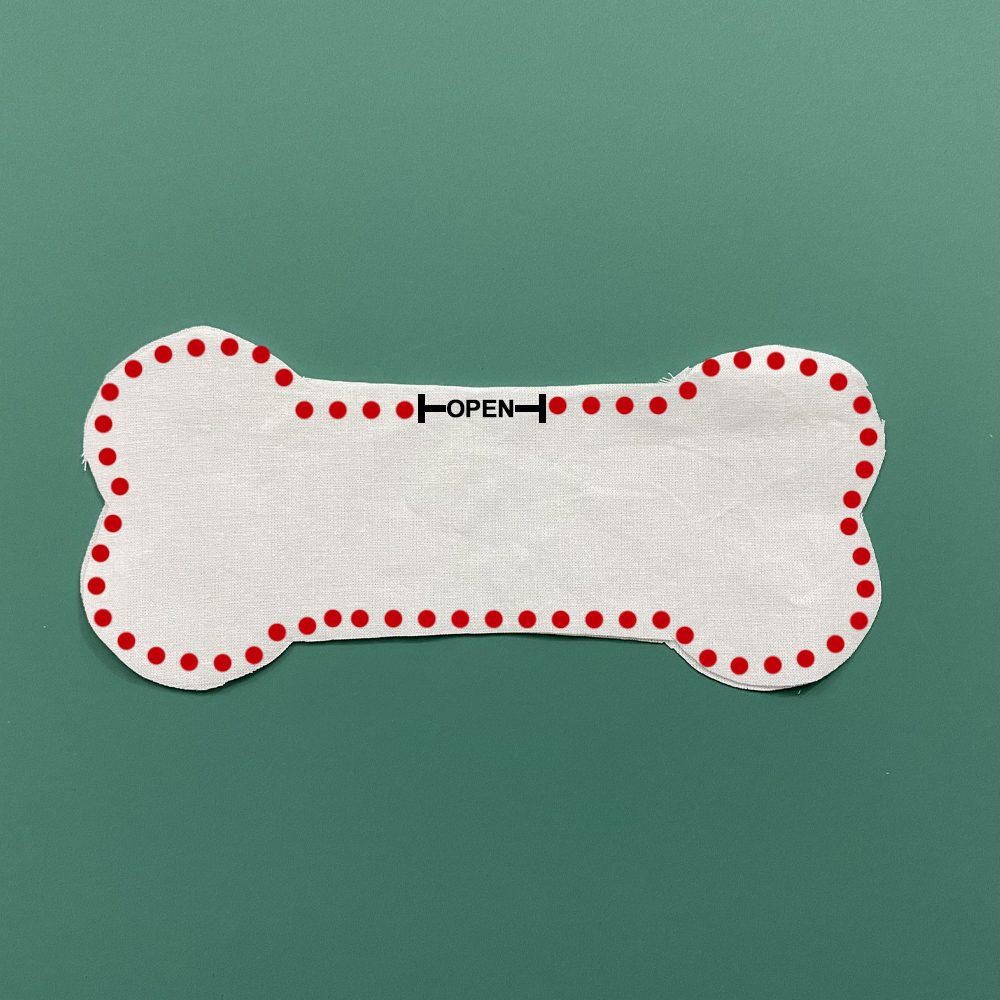
I added 3 bones to the costume. One on the shoulder, in the hair bow and on the sash. You will need to cut out 6 bone pieces from the white fabric to make 3 bones. Place 2 bones RIGHT sides together and sew 3/8″ from raw edge. Leave an opening for turning right side out.

Turn right side out, press.
Fill the bone with Poly Fil. The more filling you add the sturdier they will be. This is the one I used.
Close the opening with a ladder stitch. Repeat with the remaining 2 bones.
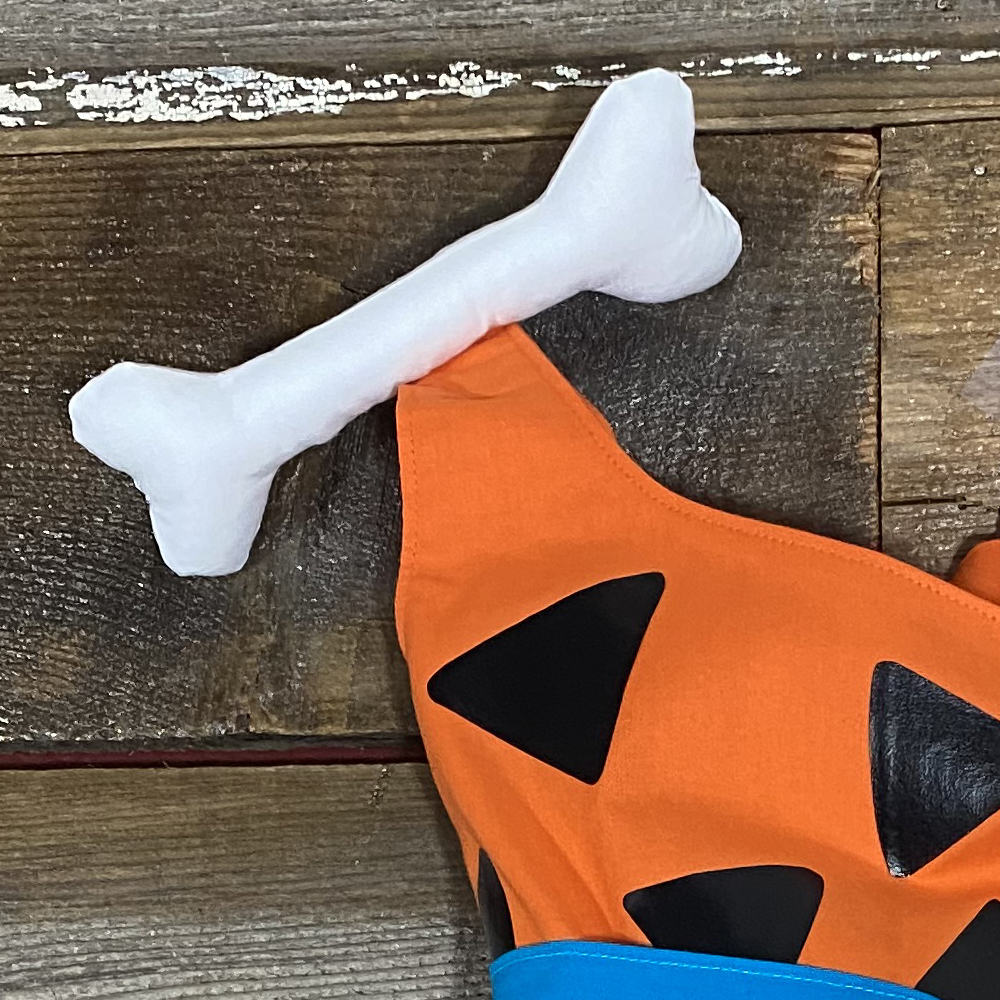
Sew the bone into the desired location on the shoulder.
Step 8: Sash (optional)
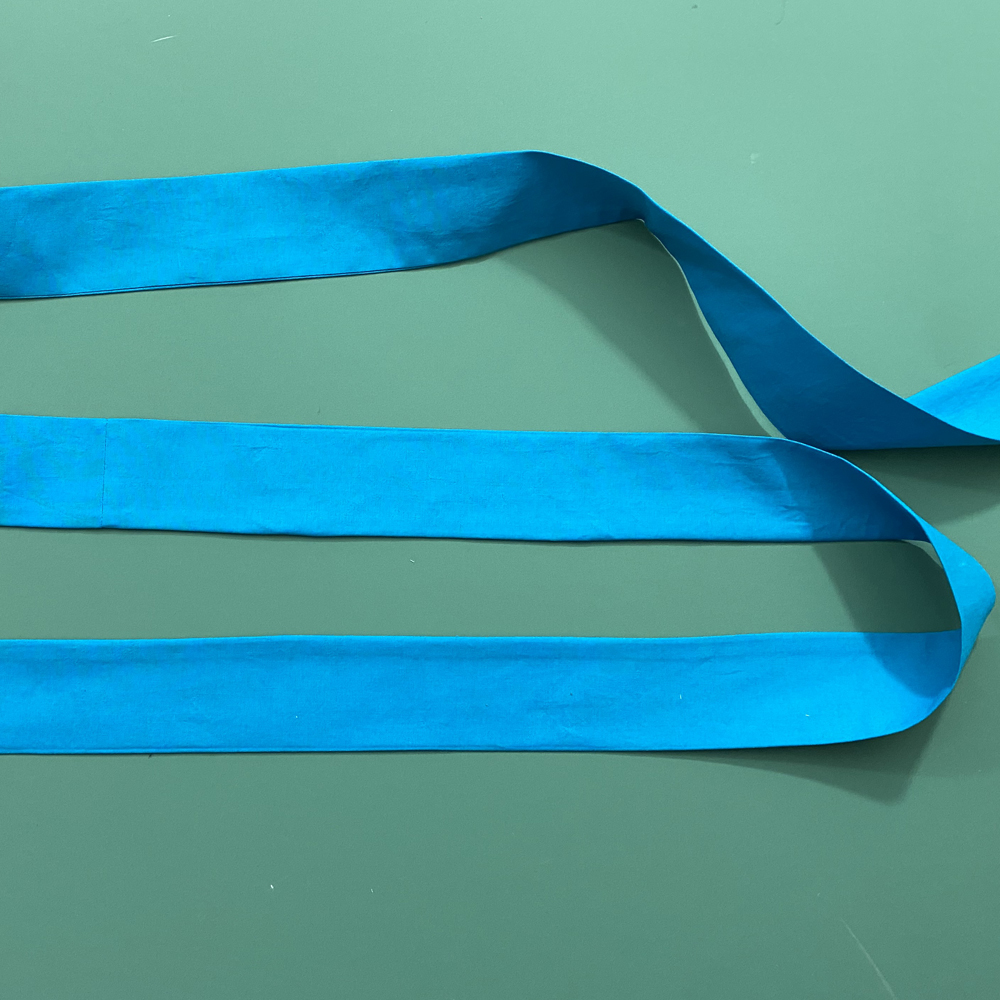
For the sash, follow the directions in the pattern. I did add 20″ to the length of the dimensions in the pattern so that it would be a bit longer.
Want to make a matching headband?
Use one of these patterns