
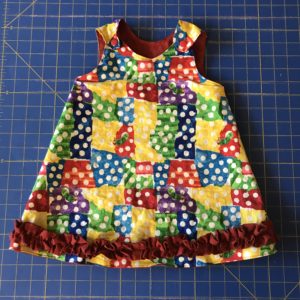
 I can’t wait to show off this alternate way of putting a ruffle (or 10) at the bottom of your joyful jumper!
Attention all newbies to pattern hacking and customizing. Attention to anyone who has been terrified of sewing clothing. This is a blog for you!
As a mom of two boys, I had officially sworn off making clothes. Then I had a baby girl.
The joyful jumper was one of the first dresses I made.
I then discovered ruffles. #ruffleallthethings
If you haven’t already bought your pattern, here is a link for the “bundle package” which includes the full size range (NB – 16). Girls and baby sizes are also available individually.
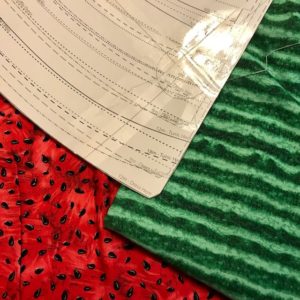
You’ll need to print your pattern out, and tape it together. (Throw that fabric you wanna use in the washer while you’re working on the pattern)
Awesome. You’re making great progress (that was the annoying part). Go ahead and cut out your pattern (I used the dress length).
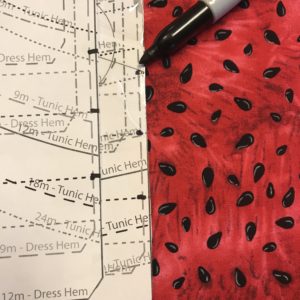
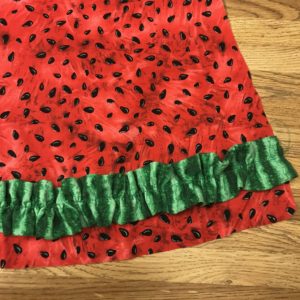
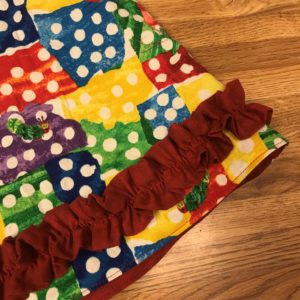
Now, you will need to measure the approximate width of the pattern where you want to put the ruffle. In the Hungry caterpillar dress shown, my ruffle was placed about 2 inches up from the bottom of the fabric. (hint-mark it on both patterns-measuring up from the bottom of them so that they are exactly the same distance from the dress’ hemline. This will be important for the ruffle to look right) For the 6 month dress I made, I got about 18 inches. Mark the dress fabric to show you where to pin the finished ruffles.
You’ll cut out 2 strips that are 4 inches x (pattern width times 2).
(In my case this was 2 strips of 4 x 36 inches)

Want more than 1 ruffle?
No problem. Just cut more strips! I’m working on one now with three ruffles. The bottom is 2 inches up from the bottom and the ones on top of it are about 1 inch above the one below.
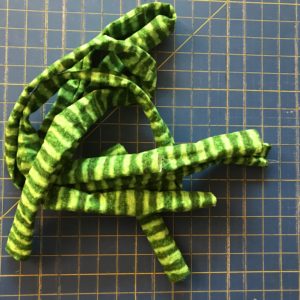
Time to make the ruffle.
Take one of the strips and sew along the long side with right sides together. There’s no need to stitch along the short sides.
Turn it the right way and do the same steps with the other strip.
Press with an iron (of if you’re like me and impatient, skip that step-the world will continue)
Great job!
You’re now at the most “complex” part of the hack here. Ready?
Take your tension dial and turn it up as high as it goes. Make the stitch length longer. Turn off any backstitching settings so your machine does NOTHING to knot threads.
Sew a line down the middle of each ruffle tube.
Now hold onto one of the threads and push the fabric towards the other end so it gathers. 
Continue this until the ruffle is the length of the location on the dress that you want to place it. Pin it in place and sew along the center of that ruffle (make sure you readjusted stitch length and tension). Repeat the process of attaching your ruffle for each desired ruffle on the front and back of your dress. (For one ruffle, you will be doing the process twice-once for the front piece and once for the back).
Follow the rest of the pattern for the jumper as it is written.
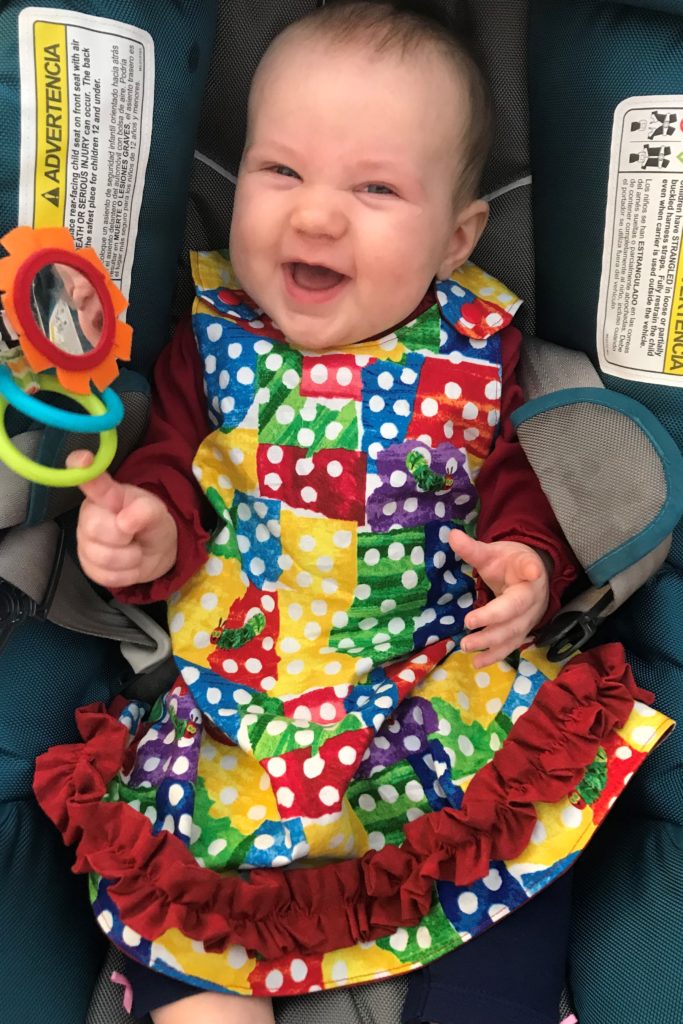
You’ll love the result!
Give it a shot-if you still need to purchase your pattern, you can do so here:


