
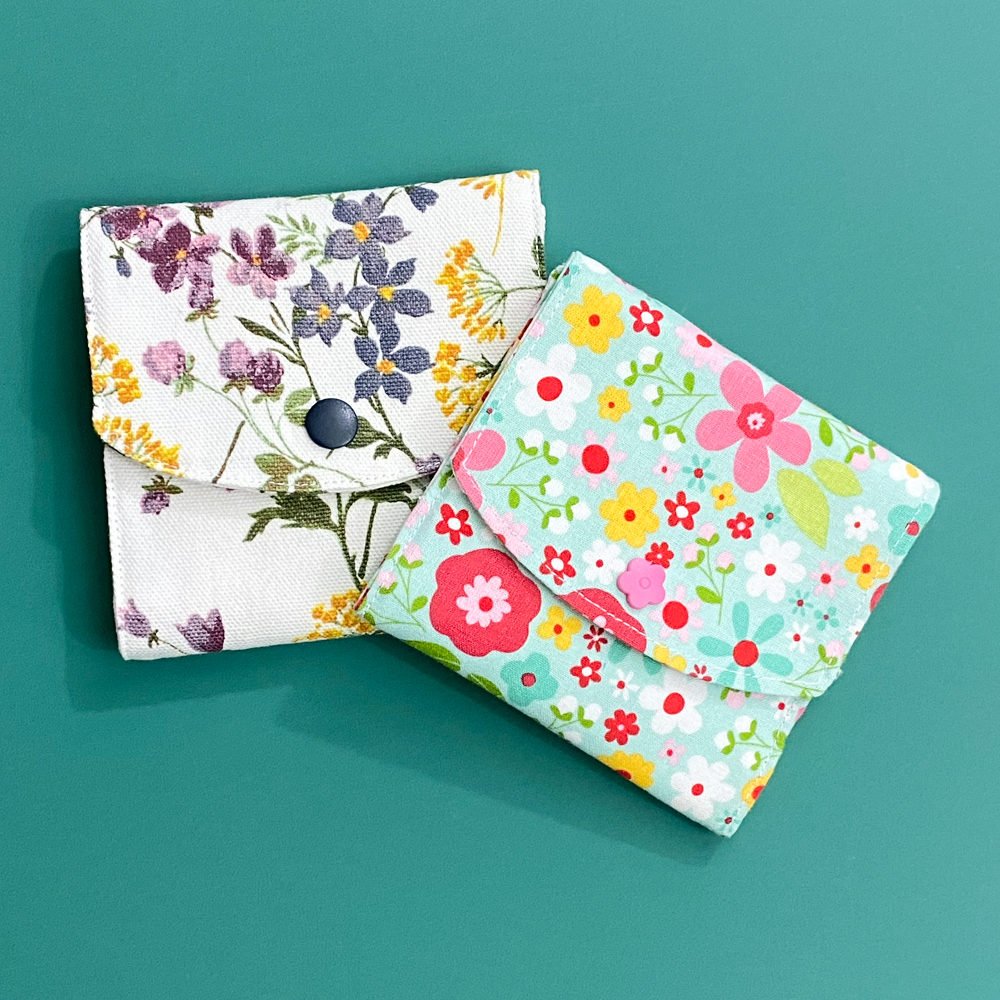
This is a simple wallet sewing pattern you can make to carry your cash or cards. It is a small size and perfect for kids or to toss into a larger bag.
Get the free pattern here
Supplies:
• Main Fabric – 1/2 yard Woven fabric or you can use a Fat Quarter. (ex. 100% Cotton and Cotton Canvas)
• Contrasting Fabric for pocket – 1/2 yard Woven fabric or you can use a Fat Quarter.
• Fusible Interfacing – 1/2 yard. This is optional, but recommended. It will give more structure to your wallet. I used Pellon SF101.
• Snaps or Velcro – I used Size 20 KAM Snaps or you can use this velcro that comes in different colors to match your fabric. If you want something fancier you can use a metal snap.
• Point Turner (optional) – I like this one.
• Sewing Clips
• Cutting Mat
• Scissors
• Sewing Machine
Watch the video or follow along with the tutorial below.
Sewing Tutorial
Cut out your pattern pieces and apply the interfacing to WRONG side of the fabric. Apply interfacing per the directions on the interfacing package.
This pattern includes a 1/4″ Seam allowance.
Pocket Assembly
We will start with folding the inner pockets.
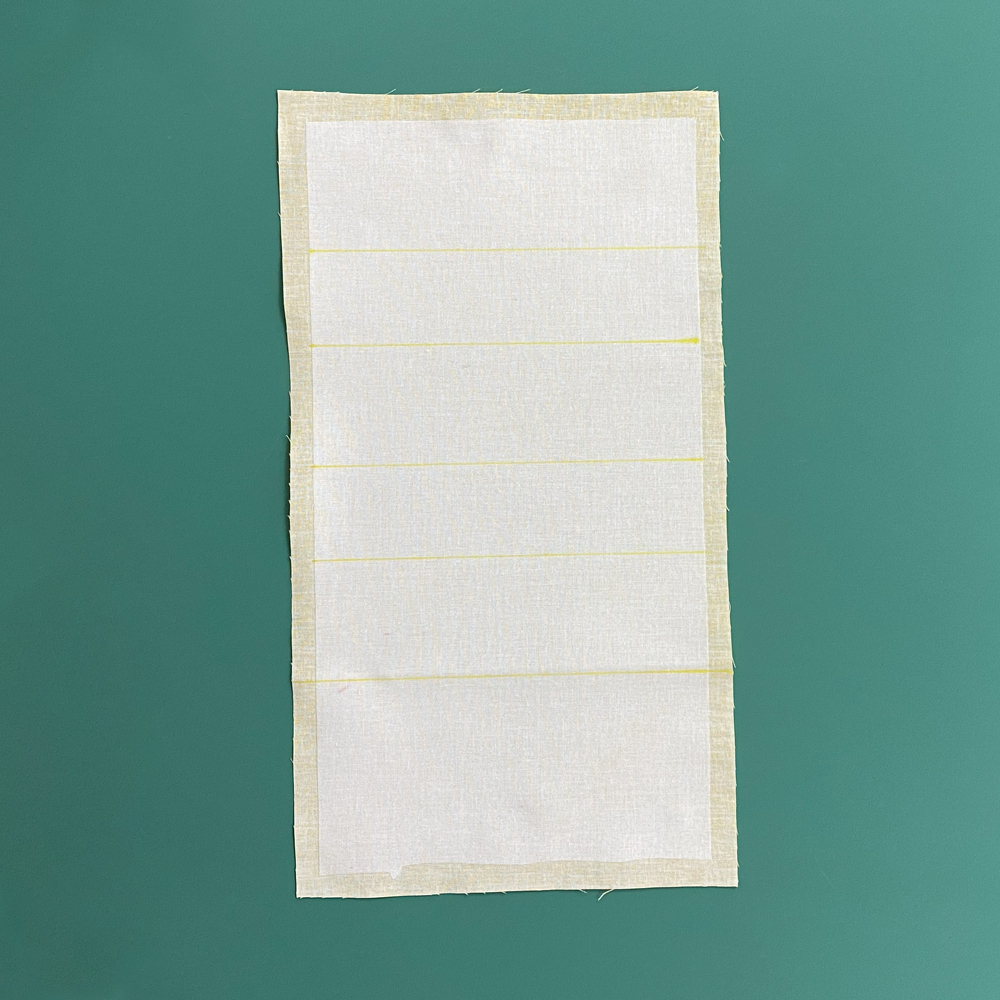
On the WRONG side of pocket piece, mark your fold lines per your pattern piece.
With WRONG side of pocket piece facing up, fold edge up toward WRONG side of pocket piece. WRONG sides will be together, press the fold.

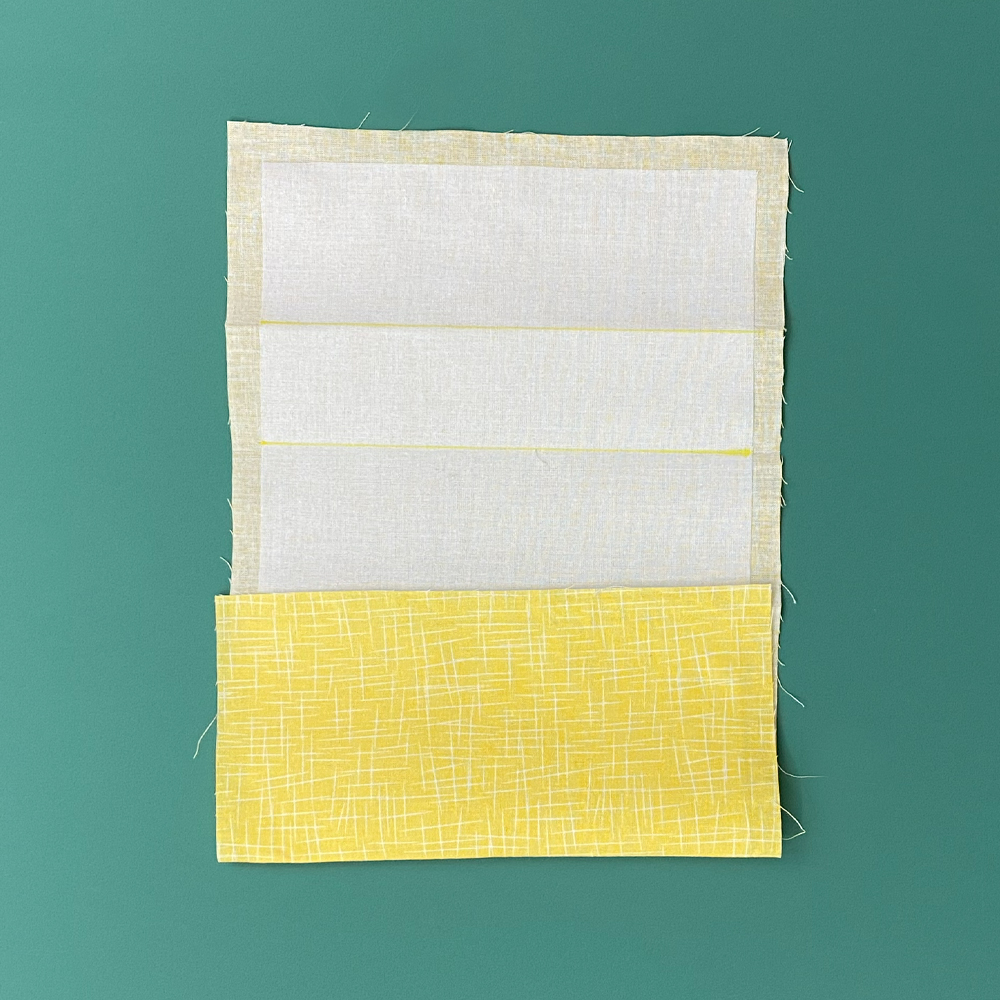
Turn piece so RIGHT side is facing up. Fold fabric up to next line with RIGHT sides together. Next, fold fabric back down to next fold line. The second fold should be about 1/2″ from the 1st fold line. Press both folds well.
Repeat those steps for the next fold.
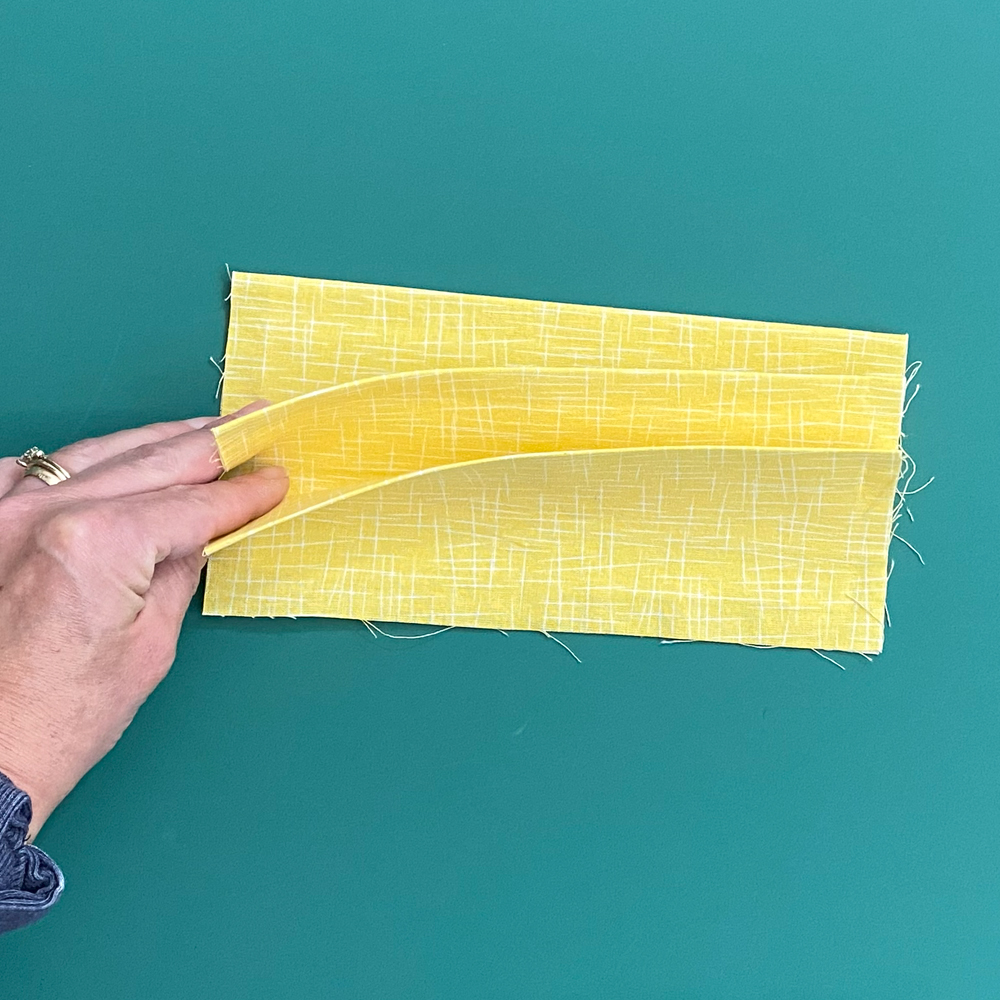
Your pocket piece will look like this once it’s folded. Press fabric really well.
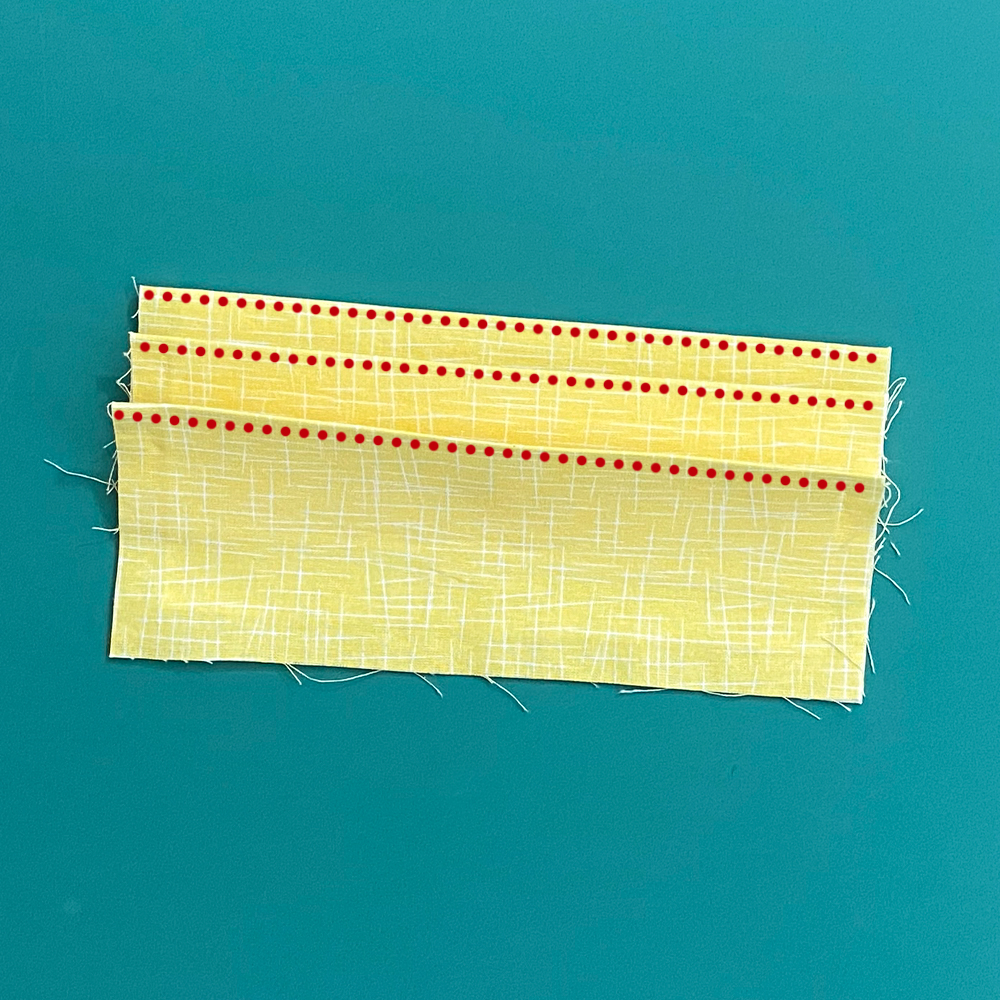
Topstitch 1/8″ from edge along the top of each fold.
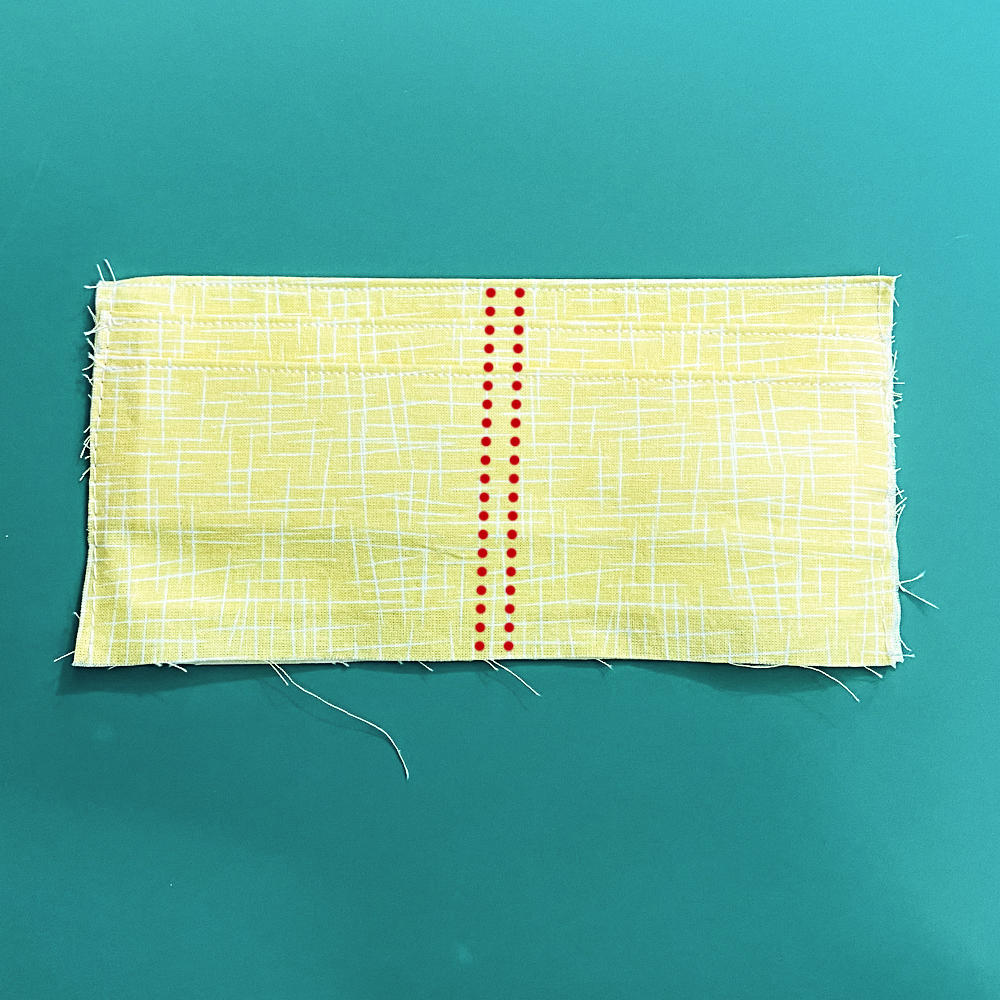
Find center of pocket and mark with chalk or a fabric marker. I find it easiest to draw the center line on the back (the side without the pockets) to keep the stitch line straight. Stitch 1/4″ on either side of center line.
Attach the pocket to the lining.
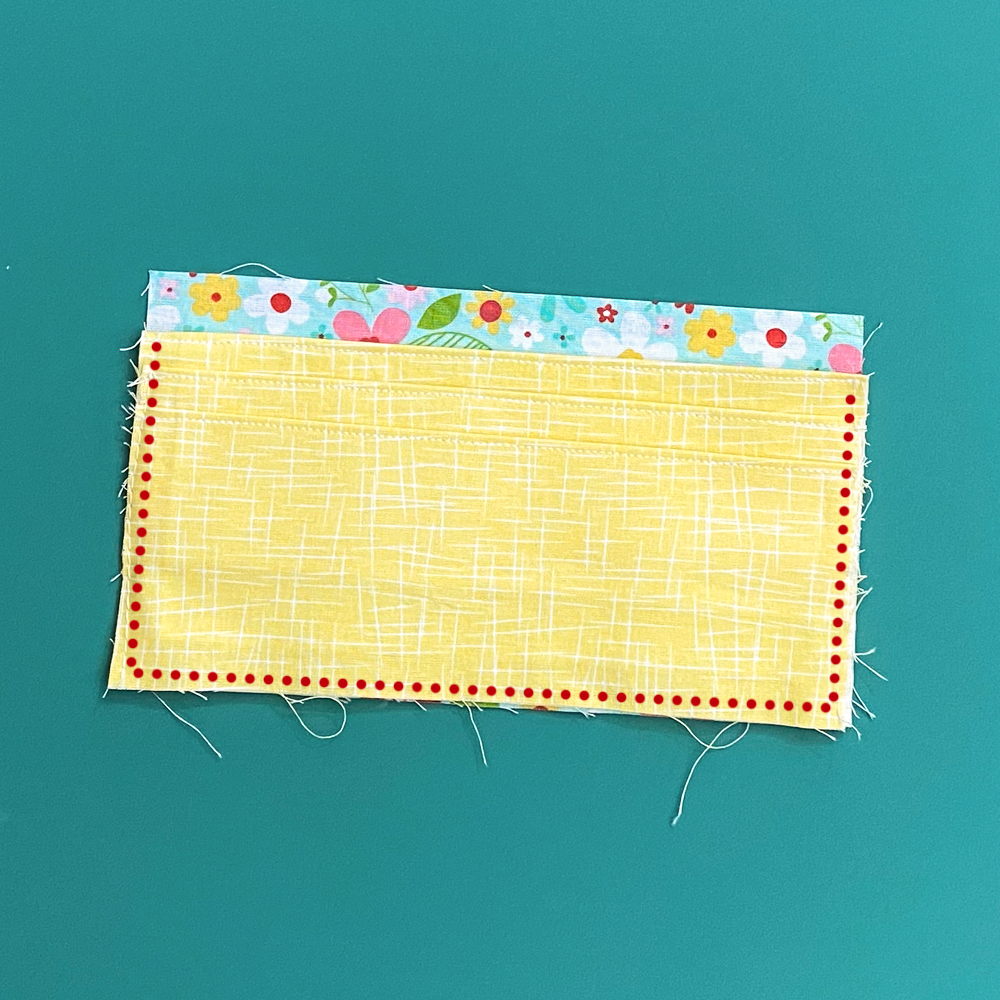
Place back pocket piece RIGHT side up. Place pocket onto back piece with WRONG side of pocket to RIGHT side of back piece. The pockets will be facing you. Align raw edges and baste pocket to hold in place.
*A basting stitch is a straight sitch set to the longest stitch length on your sewing machine.
Place back flap RIGHT sides together with back pocket piece. Align the raw edges along the straight side. Curved side will be facing inward toward pockets. Stitch together. Open flap and press.
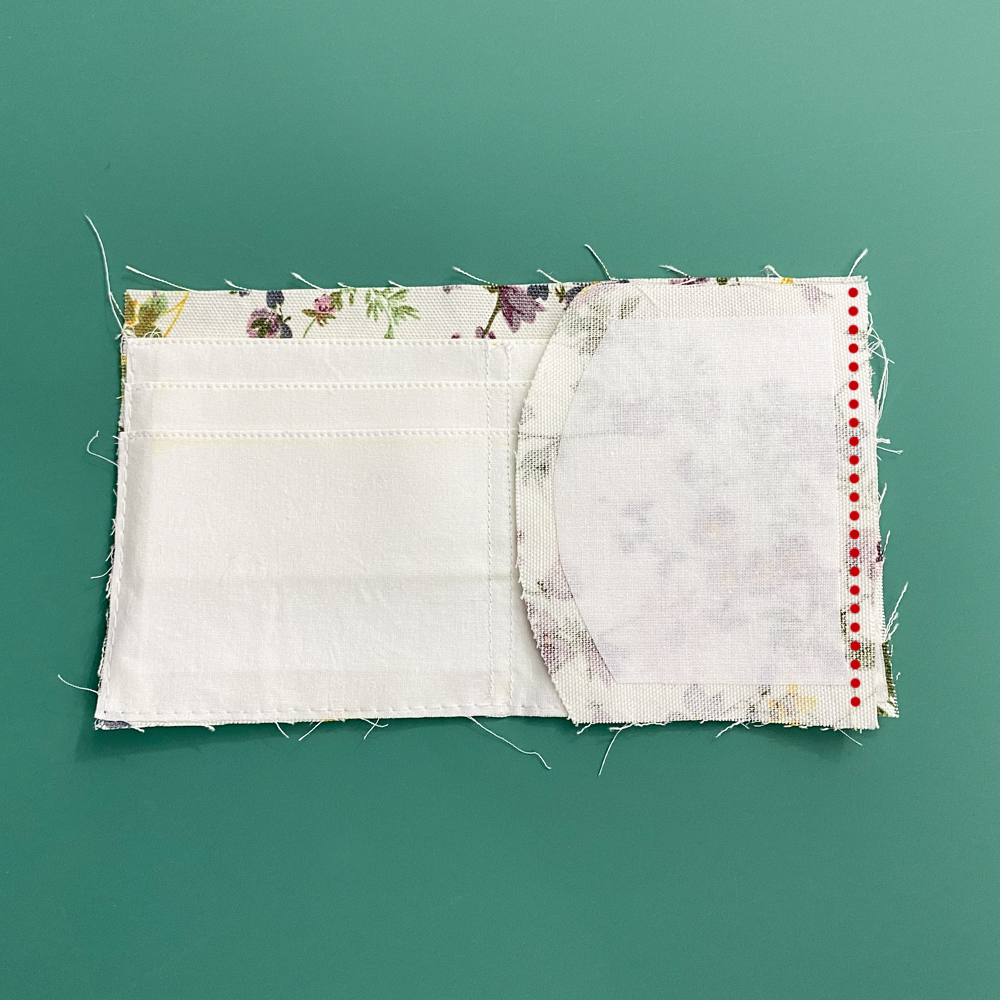
With RIGHT sides together, place the 2 wallet pieces together. Align raw edges. Stitch together leaving about a 2″ opening for turning.
Please Note: If you are using velcro instead of snaps, you will want to attach it to the main piece (the one without the pockets.) before sewing the wallet together.
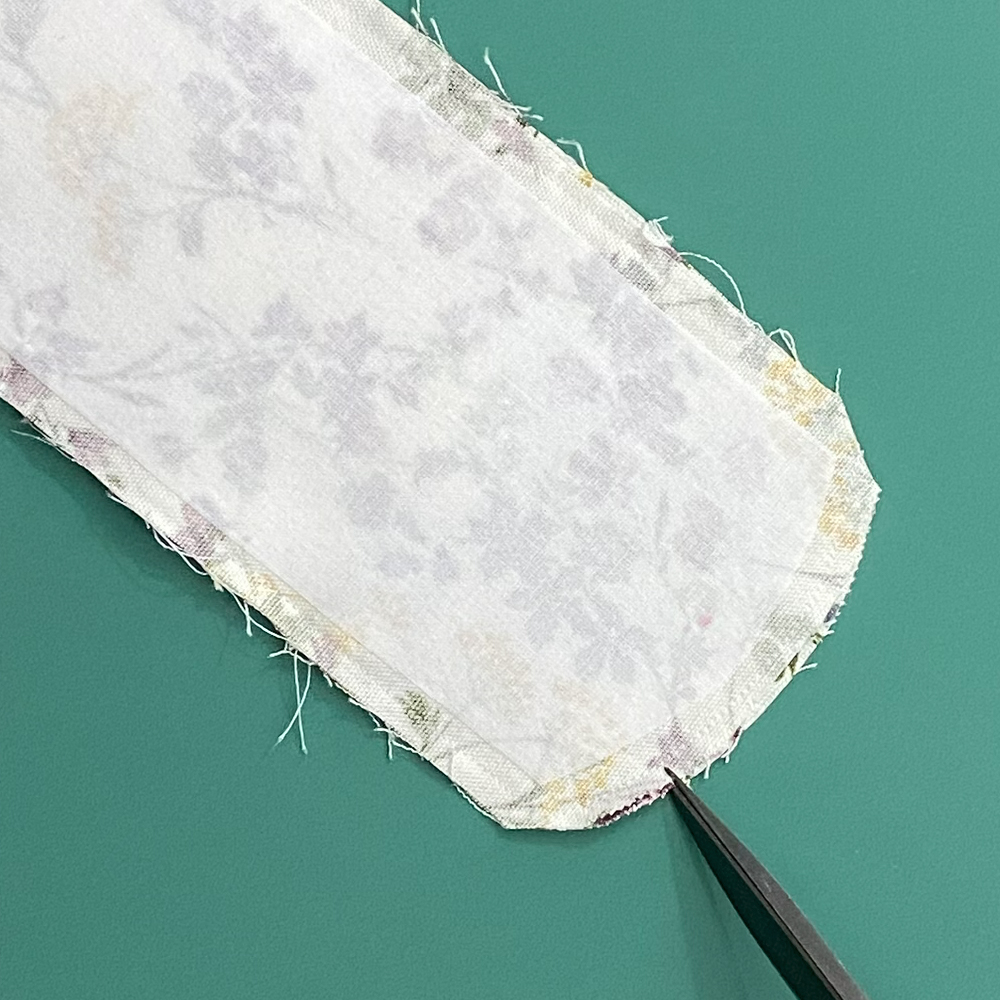
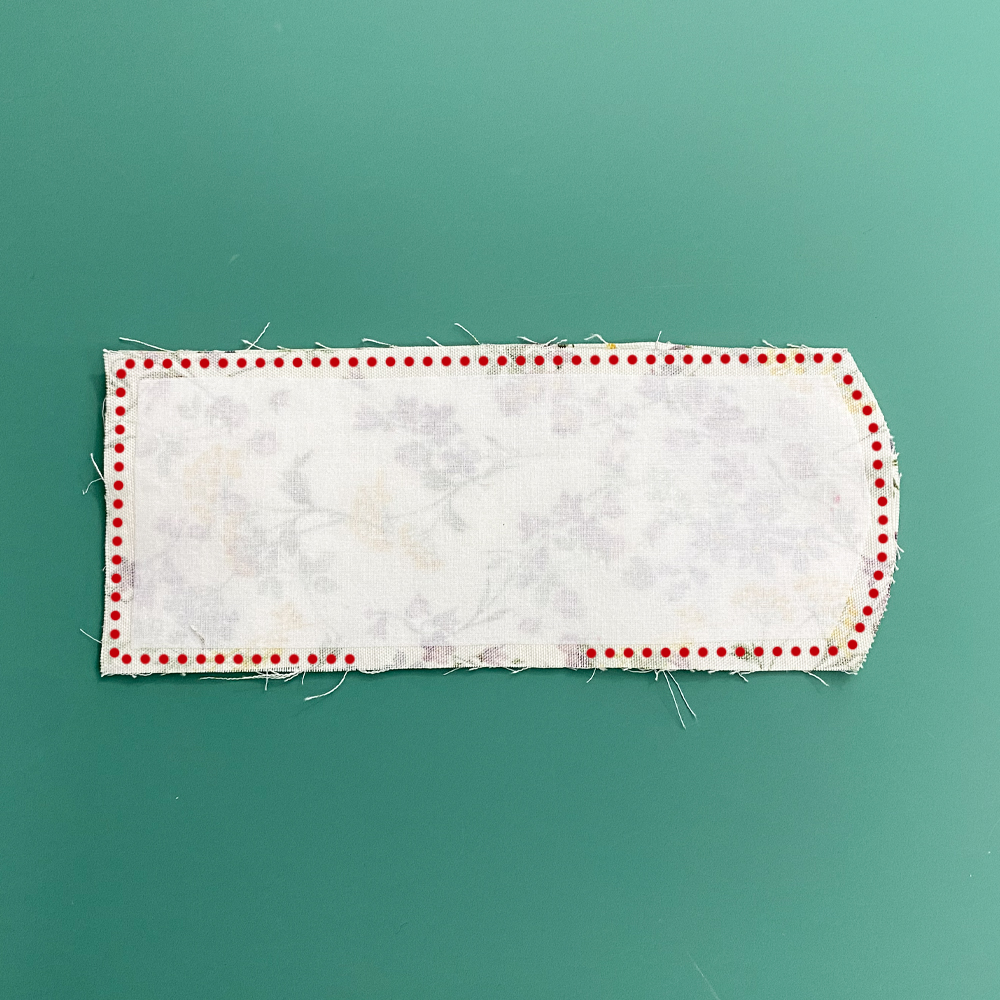
Clip each corner as close to the stitches as you can without cutting through them. Cut snips in the seam allowance along top curve. Make sure you do not cut through your stitches. You can also use pinking shears if you prefer.
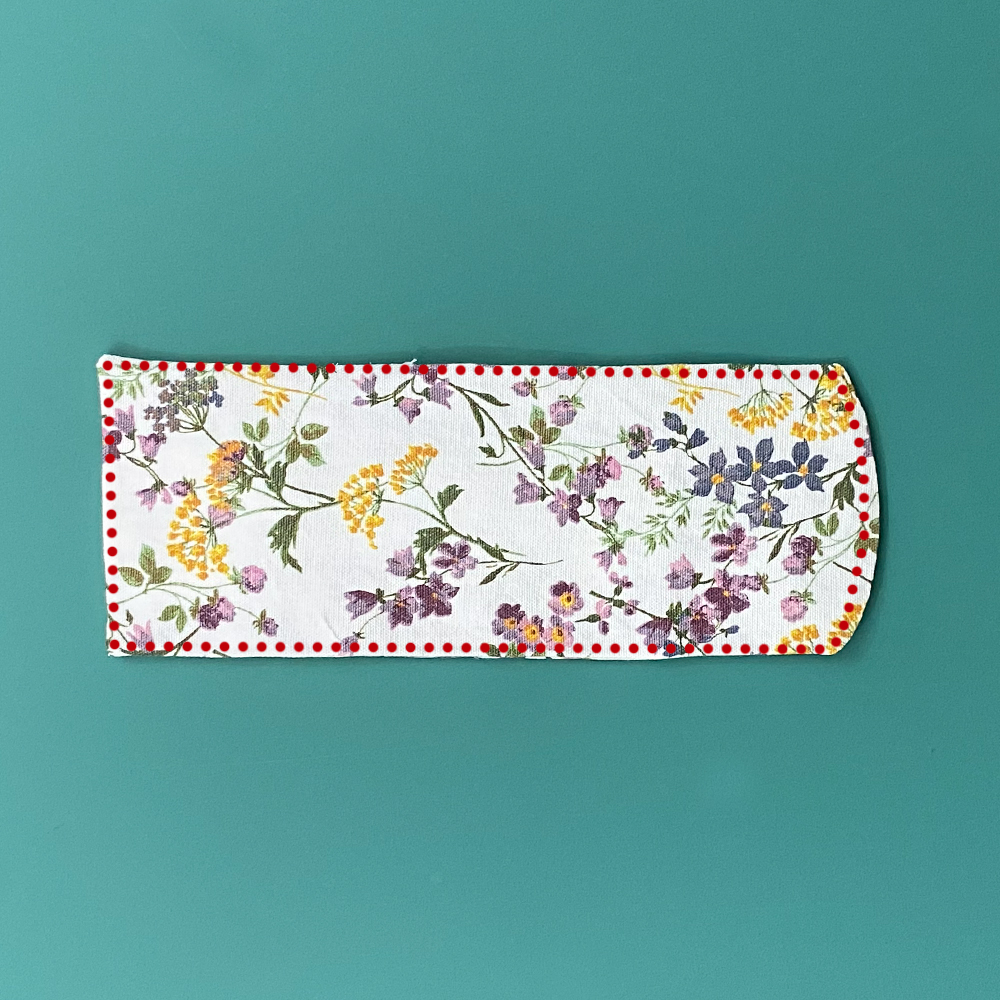
Turn wallet RIGHT sides out, tuck seam allowance from opening inward. Press well. Topstitch 1/8″ from edge around the entire outside.
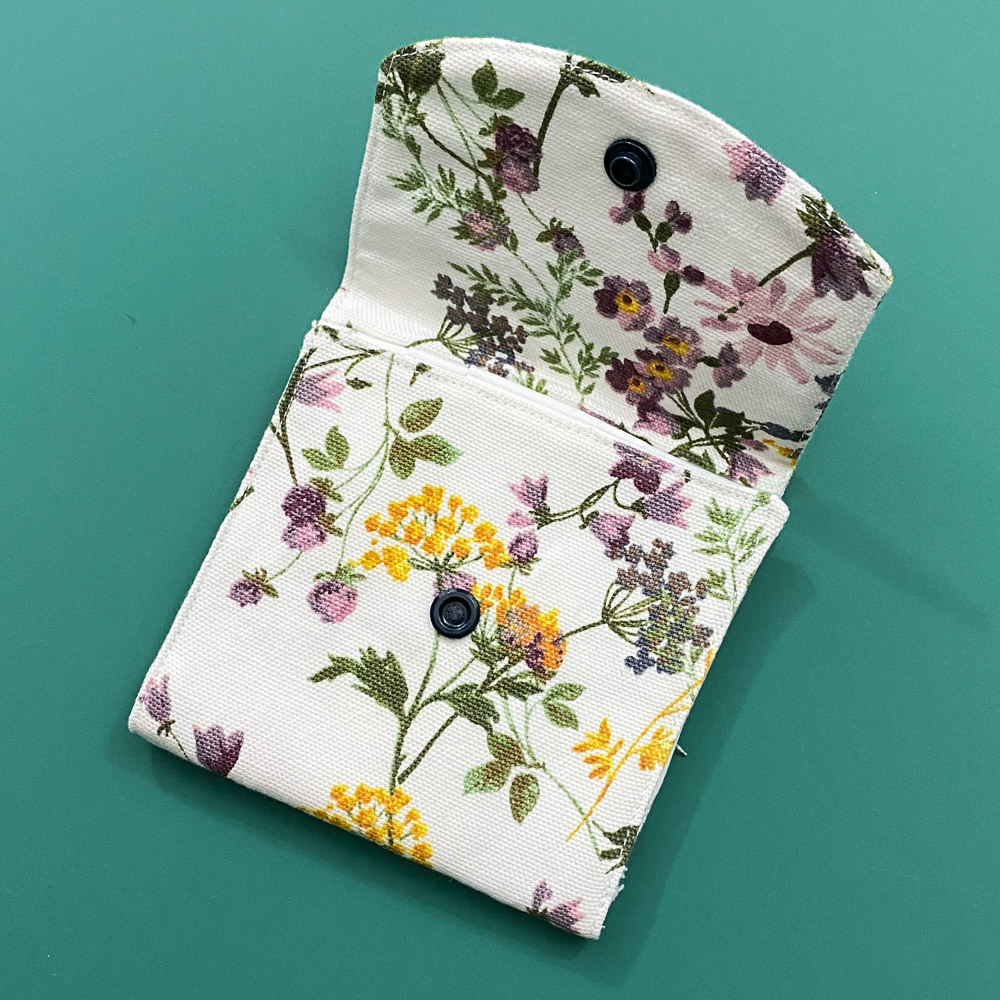
Fold pocket up to the flap and fold flap down. Use the pattern piece to place snap or you can put it where you prefer. Mark center of top flap about 1/2″ from edge. Poke a hole through the flap. Fold flap down and mark the flap hole location on inner portion of the wallet. Poke a hole only going through the outer fabric and not the pocket. The female snap will attach to the inside of the pocket, not through the pocket itself. Attach a stud snap in the outer flap. Insert the female snap inside the pocket.
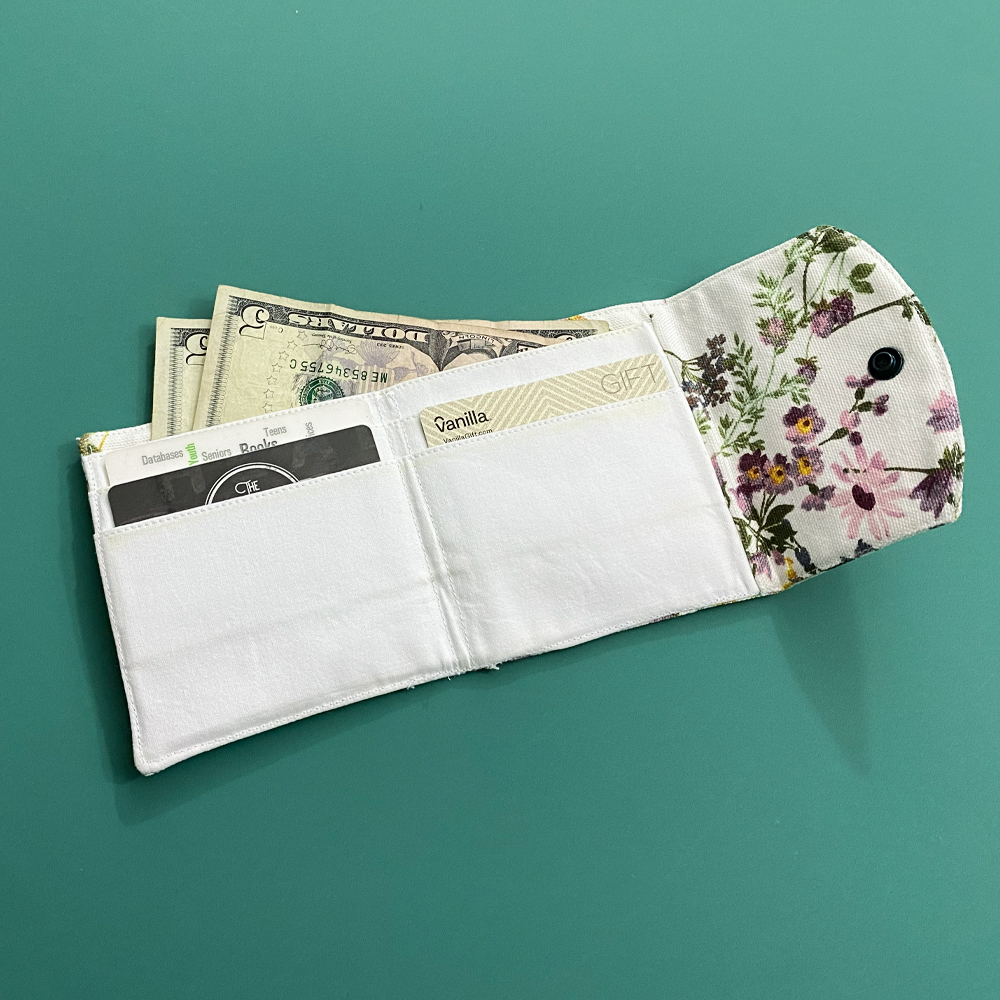
That’s it! Keep one for yourself or give one as a gift!
Show off your wallet and share it with our community of sewists. Make sure to tag us on Facebook and Instagram using @mammacandoit so we can see you in them!
Don’t forget to join us on Facebook, Instagram, Twitter, Youtube, and Pinterest to stay up to date on all things Mamma Can Do It!


