Hi. I’m Mary Kaye Cole, a wife, Grammy and sewer, errrr sewist, ummm seamstress…whatever, I like to sew!
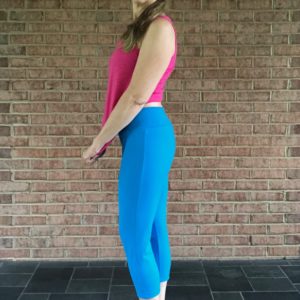
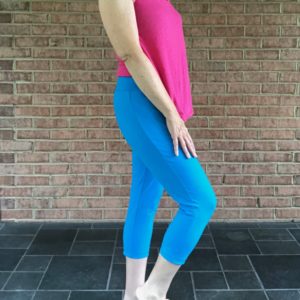
Necessity is often the mother of invention, and certainly was the case with my new cute Mamma Can Do It skinny Fit Pants in this gorgeous 17 oz turquoise supplex from Phee Fabrics. I thought I had more yardage of my fabric than I did. “No problem,” I thought to myself, “I’ll just make crops instead of full length.” I actually love this cropped length, but I still didn’t have enough fabric for the yoga waistband I had planned. Enter the alternative waistband for the MCDI Women’s Fit Pants!
This waistband is made in two pieces: an inner waistband and an outer waistband. Both pieces are identical and have a little bit of shaping. Here’s how you can make the waistband.
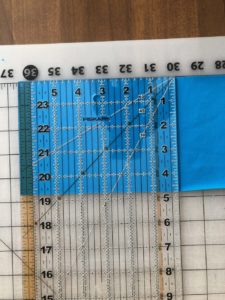
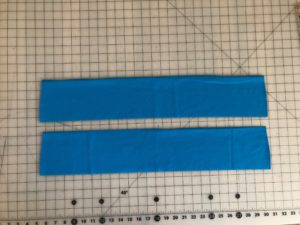
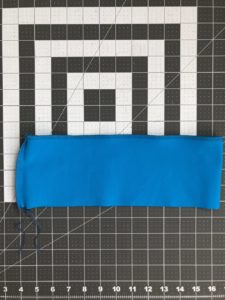
First you will figure the dimensions for one new pattern piece and cut two pieces of fabric from this new pattern piece. (In my case, I am not actually making a pattern piece. Instead, I am determining the dimensions of my new rectangle. I don’t usually print rectangular pattern pieces unless I need to measure them for some reason.) Measure the long side of the waistband piece provided with the Fit Pants pattern. This will be the length of your new pattern piece and the stretch of your fabric will run across this length just like with the original pattern piece. Now decide how tall you’d like your waistband to be (I started with 4″). Add 3/8″ seam allowance (SA) on both the top and bottom, and this will be the height of your pattern piece. My “pattern piece” ended up being 4 3/4″ tall by the length of my original pattern piece. I later decided this was too tall and cut 3/4″ off of the height. Cut two pieces of fabric based on your new pattern piece (or in my case using my new dimensions). There is no need to differentiate the inner waistband from the outer at this point.
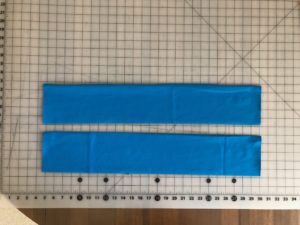
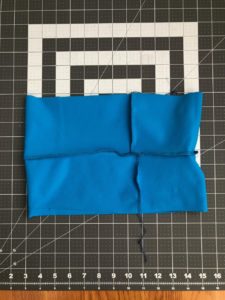
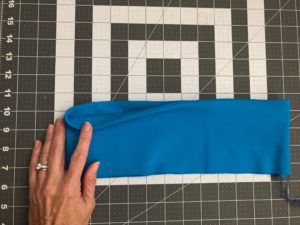
Now it’s time to add a little shaping to both ends of each piece of fabric. (Technically you could do this on your pattern piece. I didn’t just because I didn’t actually create a pattern piece.) I used my (broken…sigh) French curve to cut an approximately 1/4″ curved, tapered cut. If you don’t have a French curve, you can use a ruler and make an uncurved, tapered cut. You can even free hand if you’d like. Notice at the very top of the fabric, I left about a 3/8″ SA that is straight. To make this cut, you can fold your pieces in half, stack them and make one cut through four layers of fabric, or cut each end of each piece individually, being certain to reverse the direction of the taper. I find it’s much easier to fold, stack and cut once…less chance for me to make an error! Notice the subtle shaping at each end of each piece of fabric when I unfolded the fabric pieces.

Time to sew. Fold each piece of fabric in half right sides together, matching the short ends, and sew using a stretch stitch or serge. Again, notice the subtle shaping. Turn ONE of the pieces right side out.
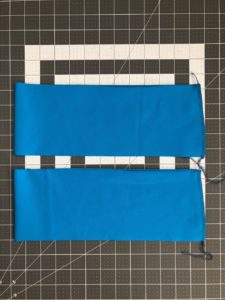
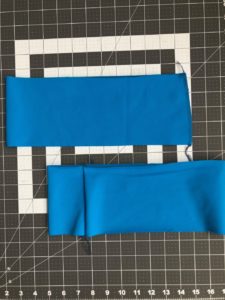
Now place the piece you just turned right side out INSIDE the unturned piece, being certain that the tapered end is at the top on both pieces and that your seams are lined up. I like to turn one SA to one side and the other SA to the other side so that I have less bulk in the seam. (Unfortunately I didn’t get a photo of this.) Be sure your pieces are now right sides together and pin along the top of the waistband. Sew using a stretch stitch or serge along the top.
Now open up the waistband and finger press the SA you just created to one side.
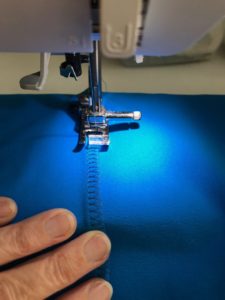
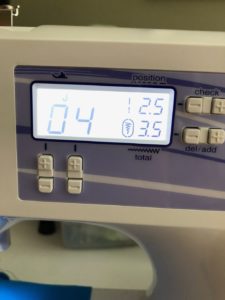
Using a medium sized zig zag stitch (because a waistband needs stretch), stitch down the SA to what will become the inner waistband. I used a length of 2.5 and a width of 3.5. It doesn’t matter which side you chose to be your inner waistband, you just need to be sure your stitching doesn’t wander onto the other side because this other side will be your outer waistband. In my photo below, the outer waistband is on the left of my foot and the inner waistband is under and to the right of my foot.
Now fold your waistband wrong sides together with the outer waistband on the outside and the inner waistband (with the visible zig zag stitch) on the inside.
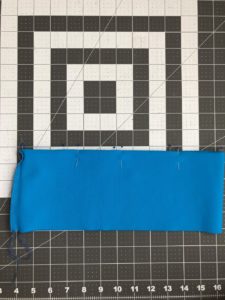
Using the back SA as one of your quarter points, quarter the bottom of the waistband and continue with the Fit Pants pattern instructions at the point where you attach the waistband to the pants.
Thanks for hanging in there! You deserve an adult beverage (or a nice cup of coffee or tea if that’s your thing)! Maybe you could wear your new Fit Pants by MCDI in supplex from Phee Fabrics as you enjoy that beverage. Hmmmmm…that sounds like fun!
Happy sewing!
Mary Kaye
This blog post contains affiliate links. If you click on a link and it is an affiliate link, I may earn a small percentage of the sale from the seller. This does not cost you anything, and it helps fund my pattern and fabric addiction. My spoiled rotten grandchildren thank you.


1 thought on “Alternative Waistband for Women’t Fit Pants”
Thank you so much for this tutorial! Been wanting a waistband like this and haven’t been able to find a pattern. Questions….did you cut down the top of the pants to accommodate the wide waist band? If so, how did you do it? Or is the waistband a high rise? I’d love it to be a mid rise.