
What is Bias Tape?
Bias tape is a strip of fabric that is cut at a 45° angle. By cutting the fabric on an angle it gives it a little bit of stretch. This stretch is perfect for sewing curves and finishing the raw edges of your fabric. Bias Tape is a great option for finishing your neckline and armholes. Bias Tape comes in different colors, widths and styles.
Types of Bias Tape
There are 2 different types of Bias Tape; Single Fold and Double Fold.
Single fold bias tape is made by folding each raw edge to meet in the center. This type of bias tape can be used in place of a facing on a garment. It can be used on the neckline and armholes of your tops and dresses and will not be shown on the outside.
Double Fold Bias Tape is made by folding each raw edge to meet in the center and then folding in half again so the 2 edges meet. It is a great option for projects that you would like to see the binding from both sides of your project. Some examples are: quilts, swaddling blankets, apron ties etc.
Why make your own?
The best thing about making your own bias tape is that you are not limited to the colors they sell at the store. You can coordinate your bias tape to match your project fabric. You can use solid colors, as well as, fabrics with a pattern. You can make about 3 yards of Bias Tape with just an 18″ x 18″ scrap of fabric. This is a great way to use up fabric you already have in your stash.
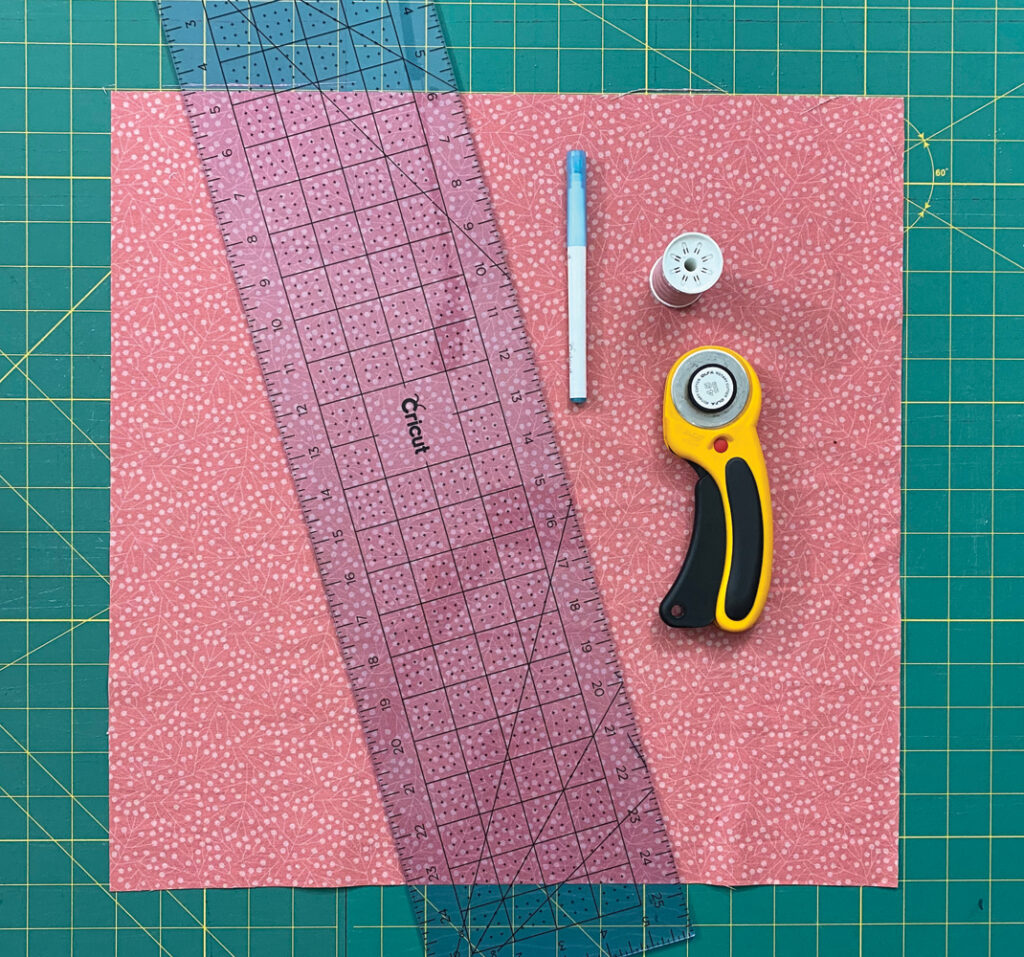
Here’s what you need to get started:
18″ x 18″ piece of WOVEN FABRIC – Light-weight fabrics work best like quilting cotton.
IRON & IRONING BOARD
SCISSORS
ACRYLIC RULER
SEWING MACHINE & THREAD
MARKING PEN
OPTIONAL, BUT HIGHLY RECOMMENDED
BIAS TAPE MAKER
ROTARY CUTTER
CUTTING MAT
Step 1: Cut your fabric square
You can make your fabric square any size you’d like. I wouldn’t recommend going smaller than 10″ x 10″ because you will wind up with too many seams. For this tutorial I’m going to use an 18″ x 18″ square. Fat quarters work great for this.
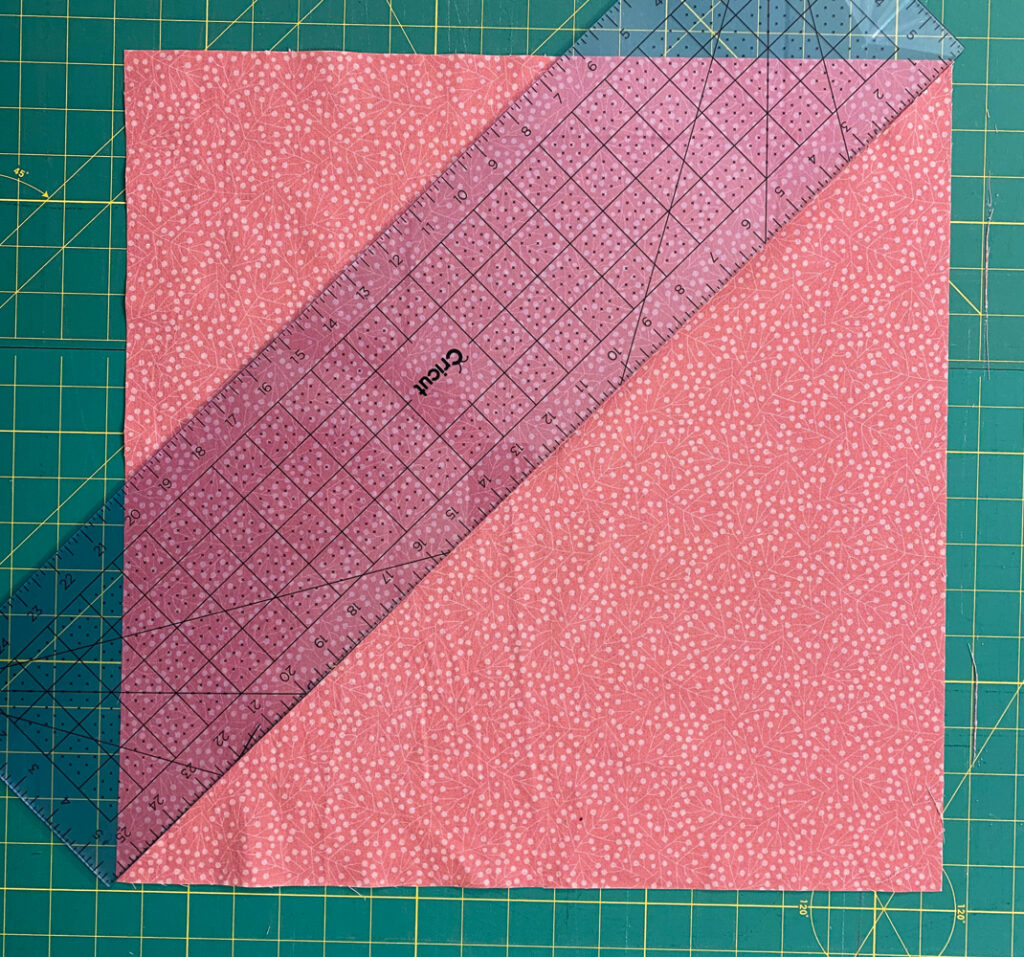
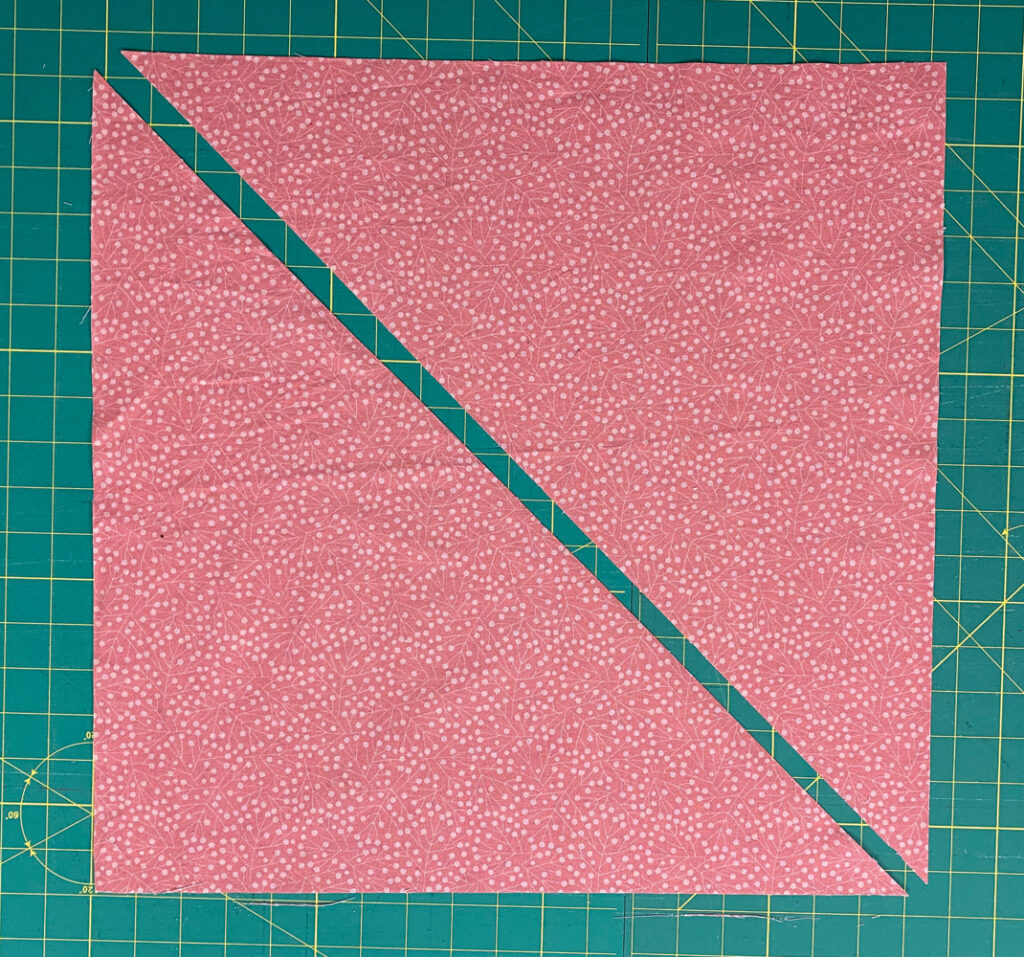
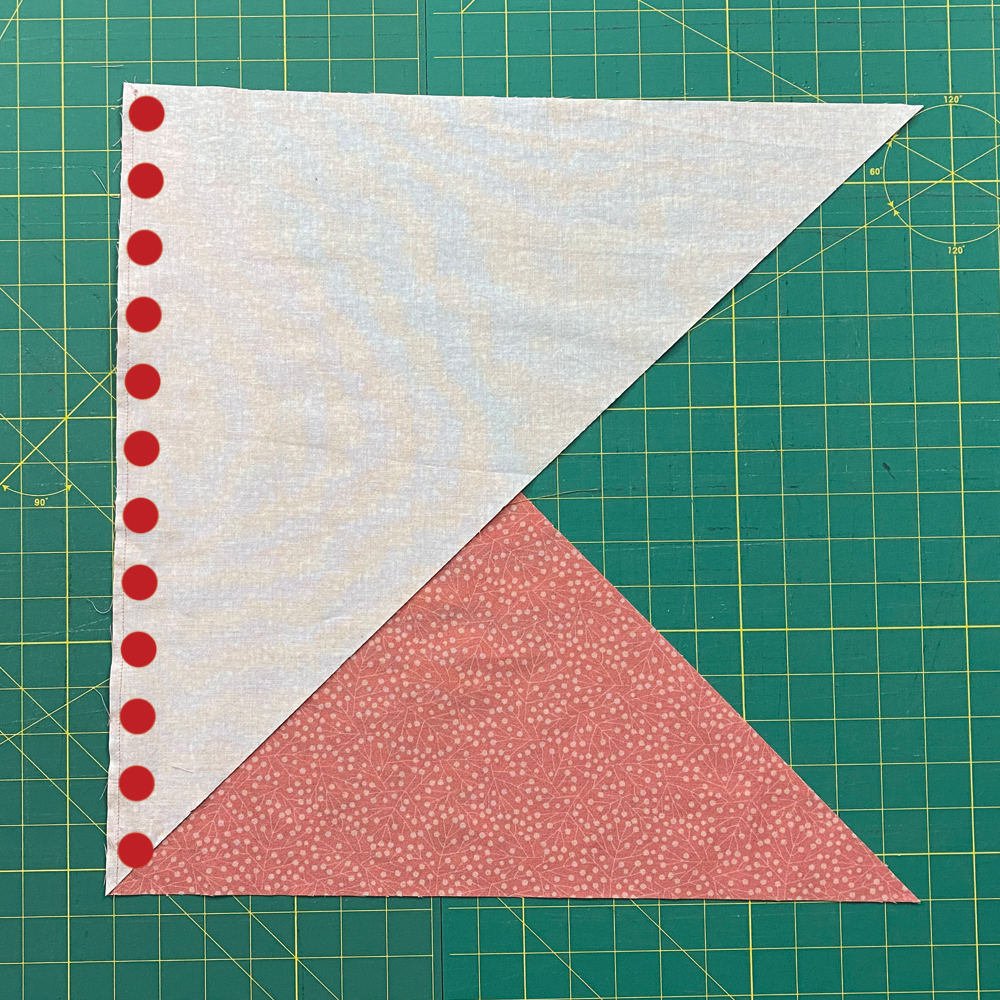
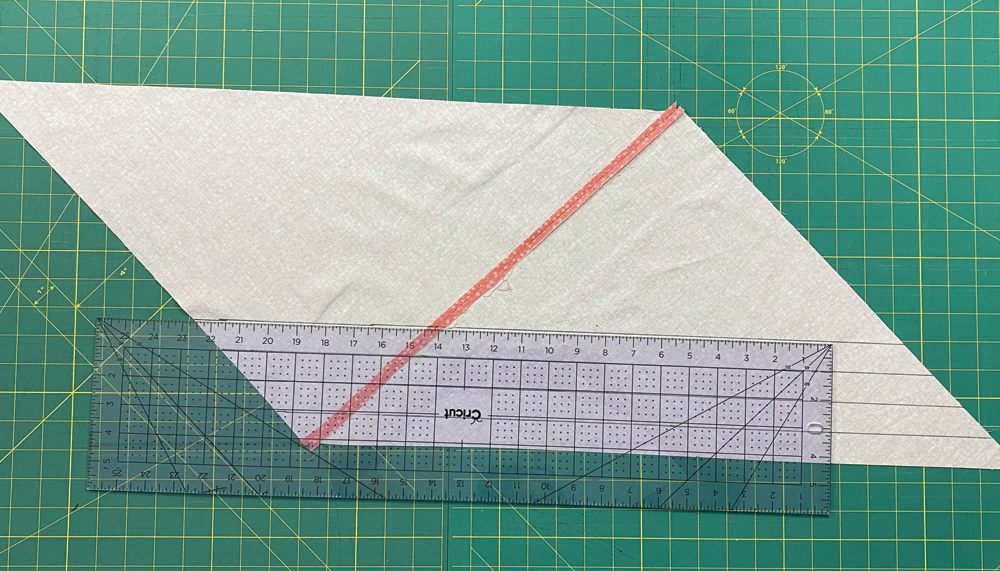
Cut your square in half along the diagonal. With RIGHT sides together flip one triangle to align along the bottom edge.
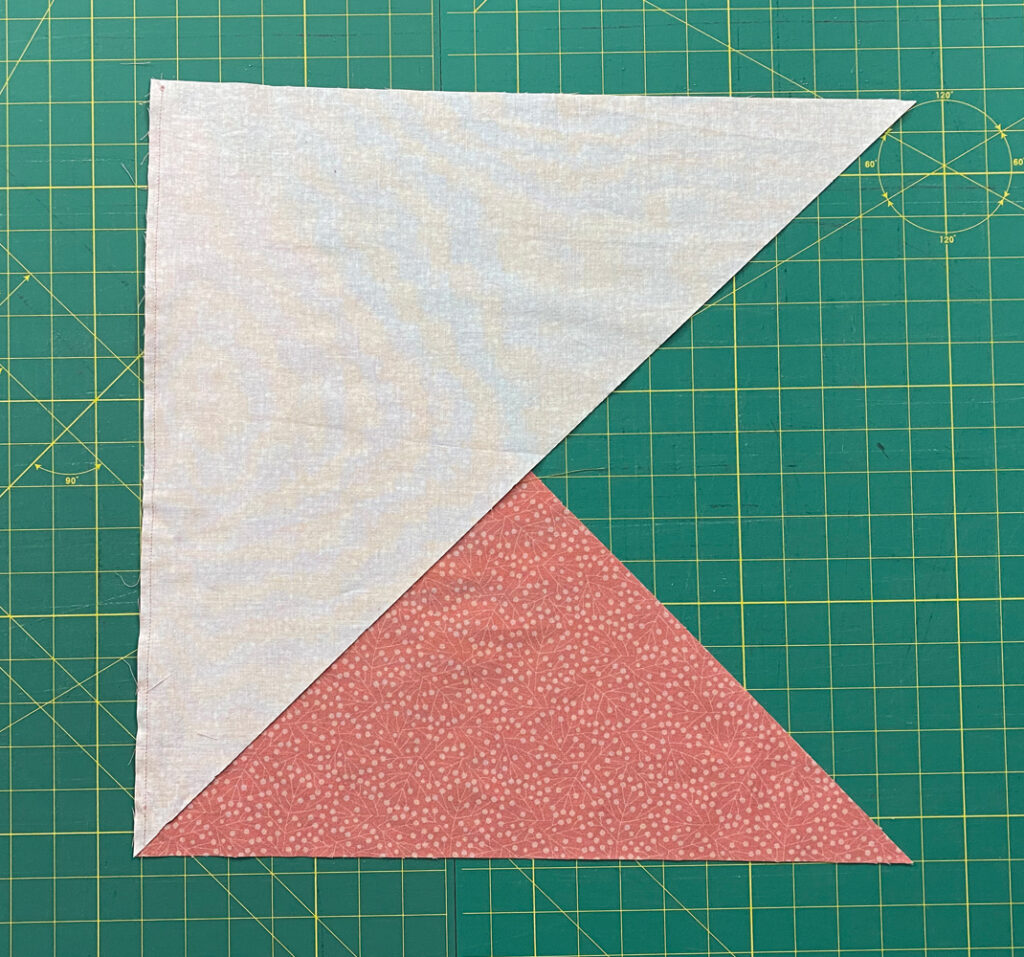
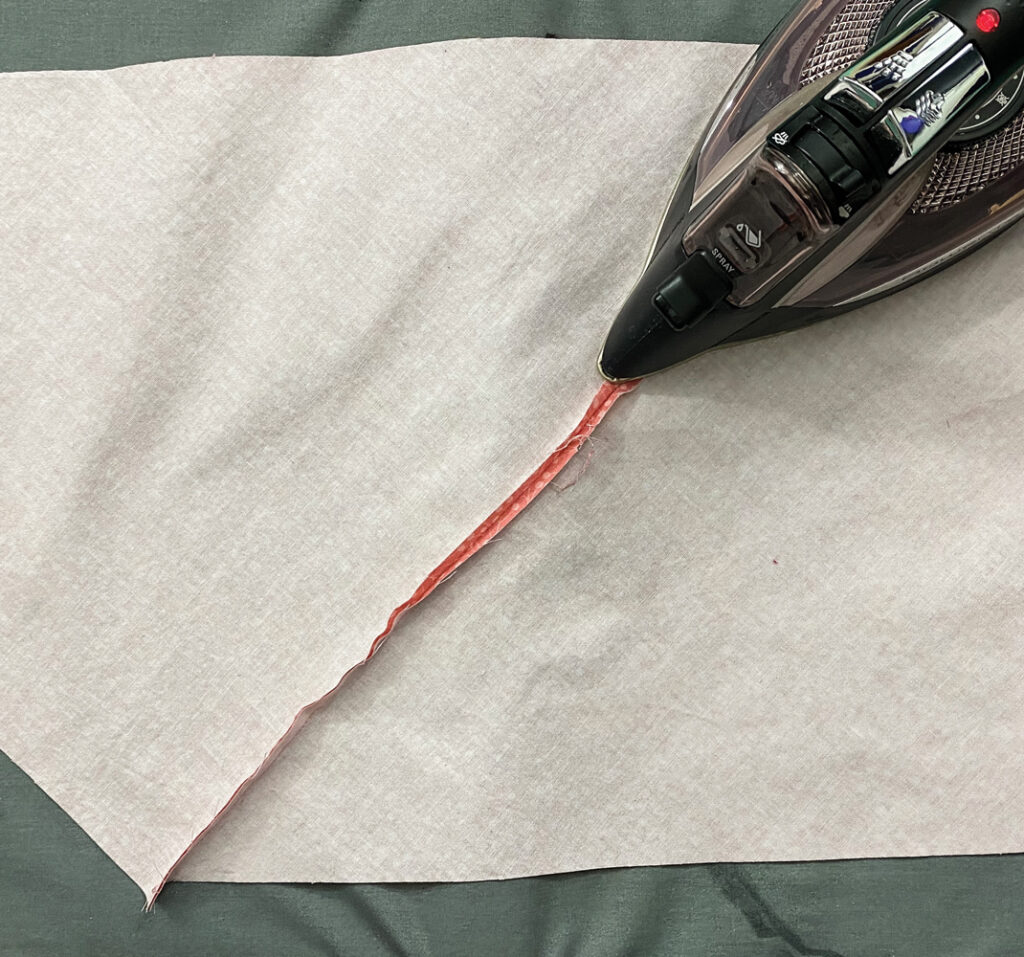
With a 1/4″ seam allowance, stitch together. Place fabric WRONG side up and press seam allowance open.
Now it’s time to decide what finished size bias tape you want to make. The final width of single fold bias tape will be half the width of your original strip. Double fold bias tape will be 1/4 the width of your original strip. For example: if you cut your strips 1″, which is what i’ll be using for this tutorial, it will make 1/2″ single fold or 1/4″ double fold bias tape.
In this handy chart below we have some standard widths and what you should cut your fabric to help you get started.
| Your Fabric Width | Single Fold (Finished Width) | Double Fold (Finished Width) |
| 3/4″ | 3/8 inch | 3/16 inch |
| 1″ | 1/2 inch | 1/4 inch |
| 1 1/2″ | 3/4 inch | 3/8 inch |
| 2″ | 1 inch | 1/2 inch |
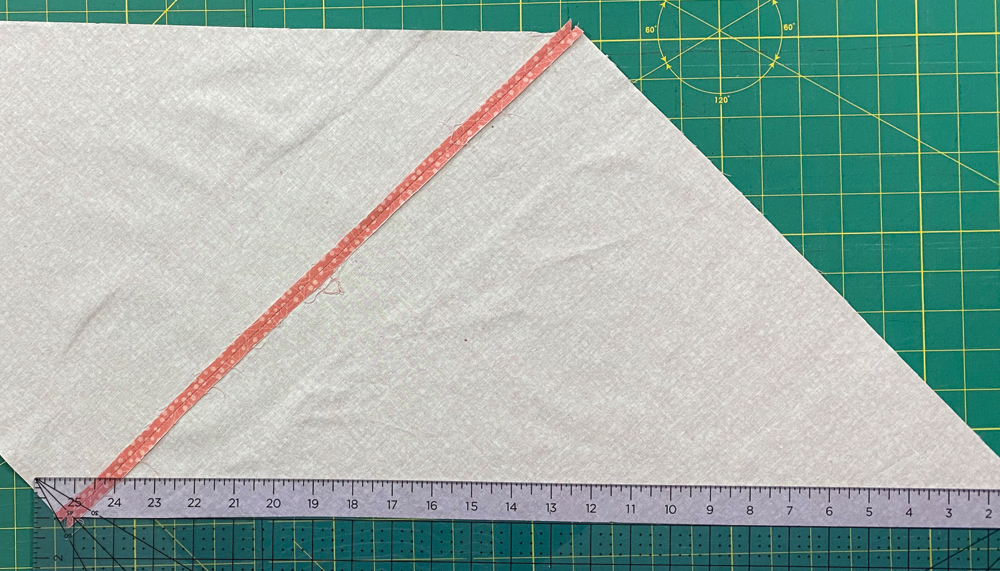
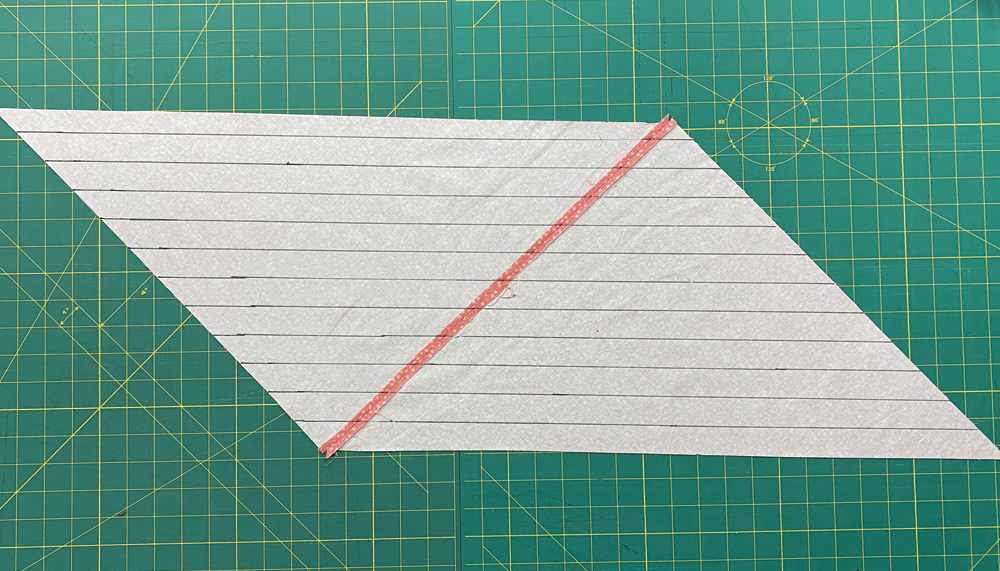
I am working on a our Classy Woven Tank pattern so I am going to make 1/2″ single fold bias tape to finish the neckline and armholes. I will make my fabric strip 1″ wide. Starting at one long edge of the parallelogram mark your lines every 1″. You can use a fabric marker or something else to draw your lines. It will be hidden once we fold it so it really doesn’t matter. Just make sure it doesn’t bleed and permanently stain your fabric. I used a washable marker which worked pretty well.
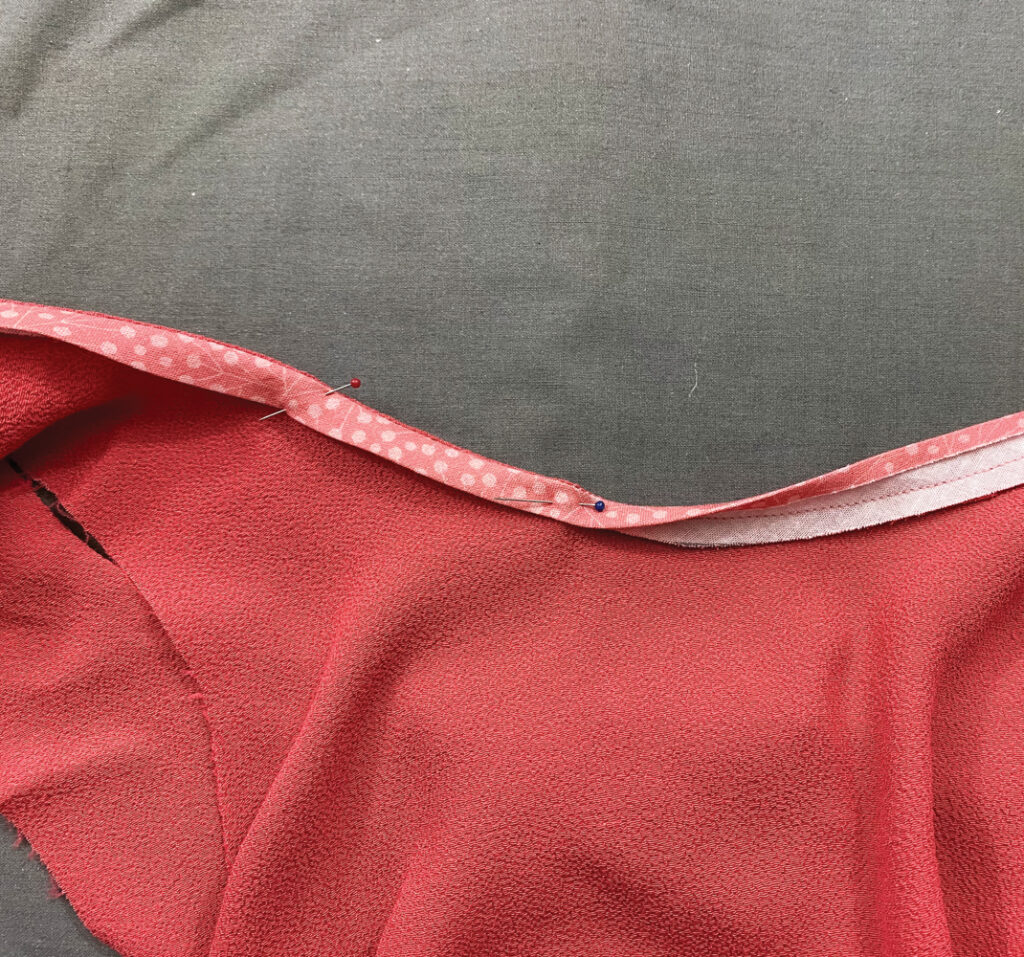
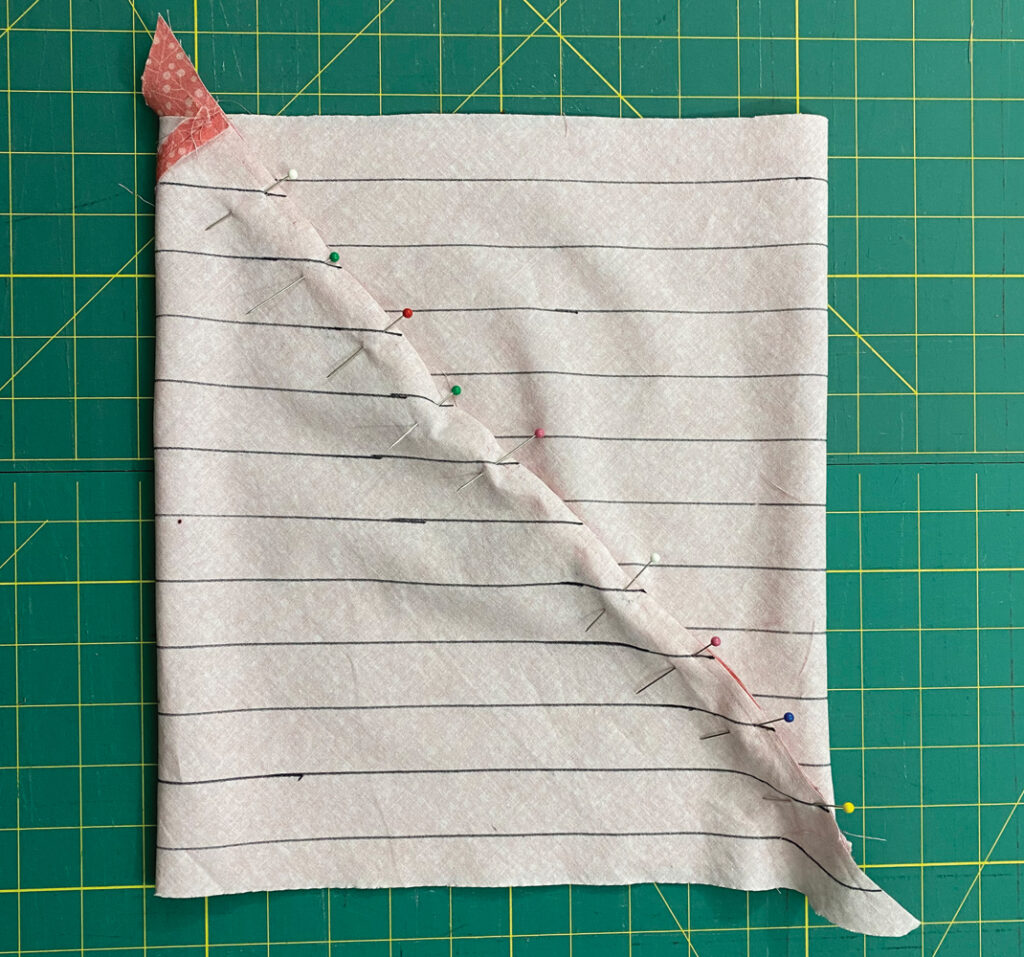
Once you have all of your guide lines drawn, with RIGHT sides together bring the 2 sides together. You will offset the lines by 1. Place a pin at each line and make sure that the lines are intersecting at 1/4″ from edge. It’s important for the lines to line up so take your time. Stitch 1/4″ from edge and press seam allowance open.
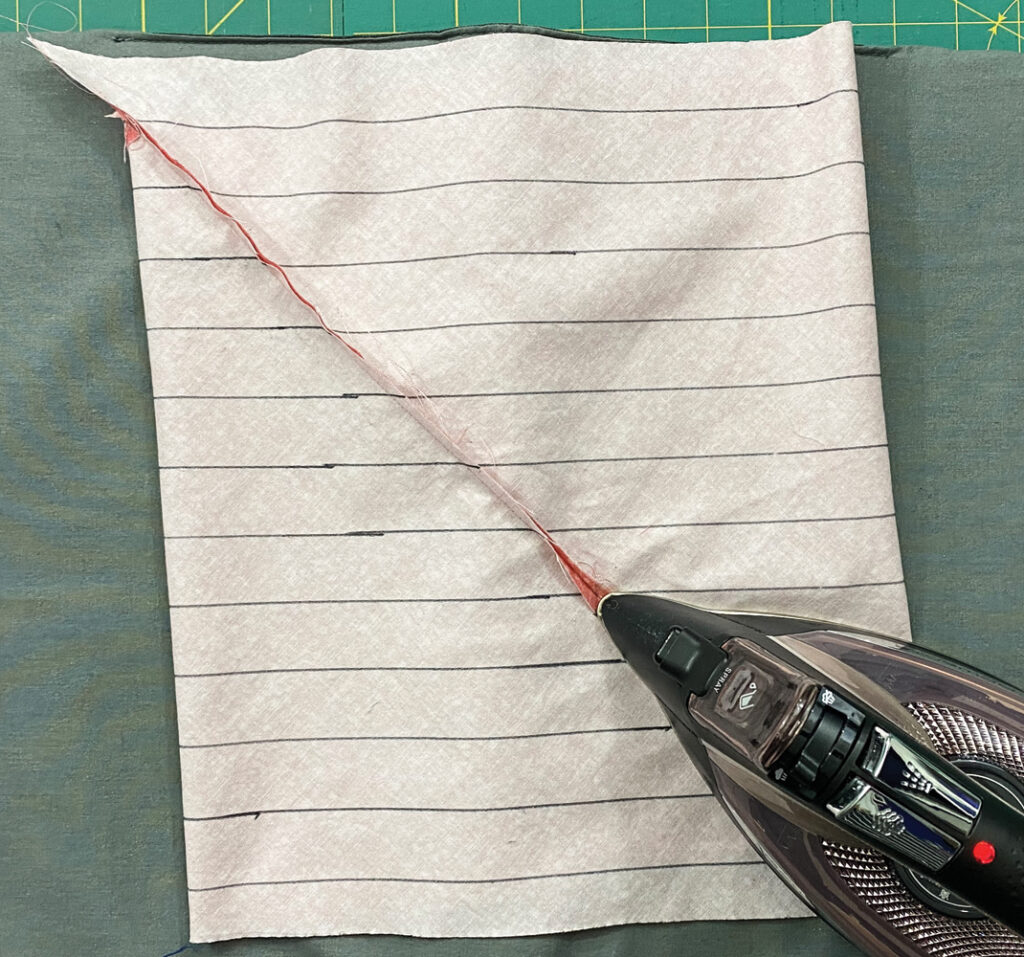
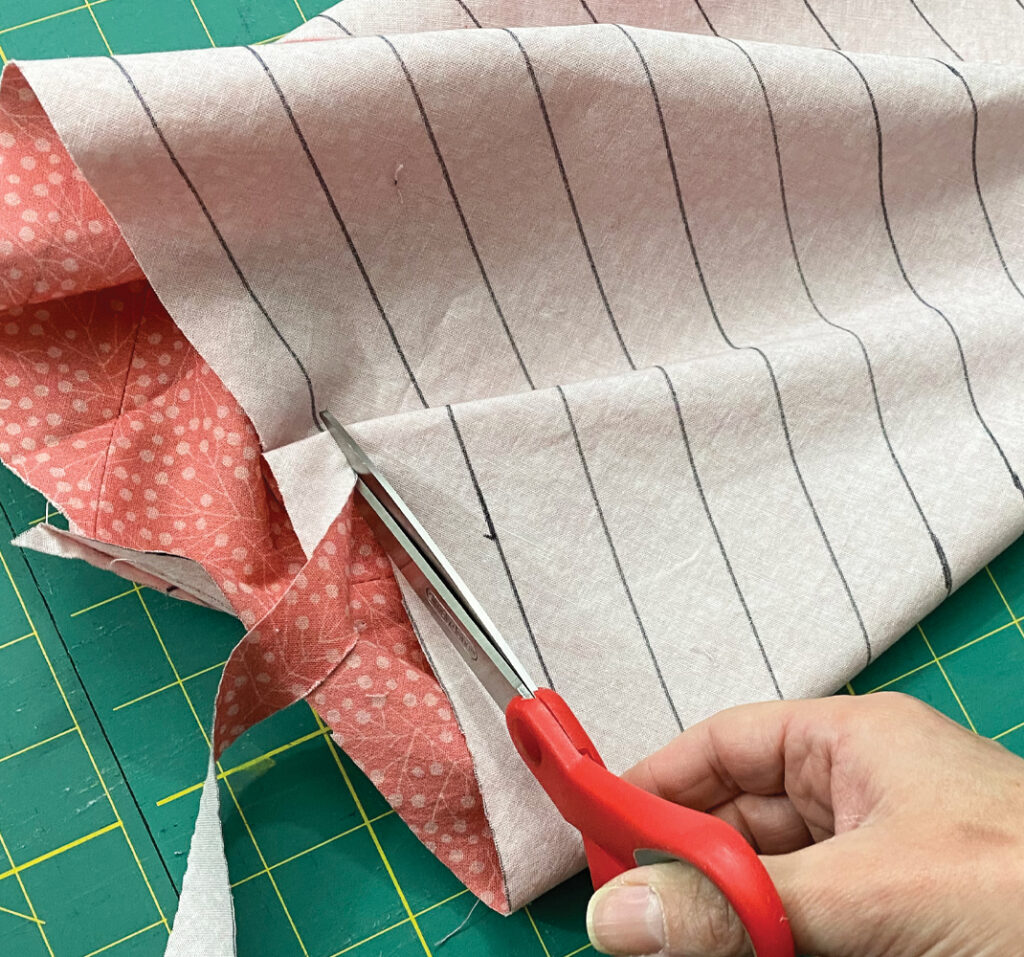
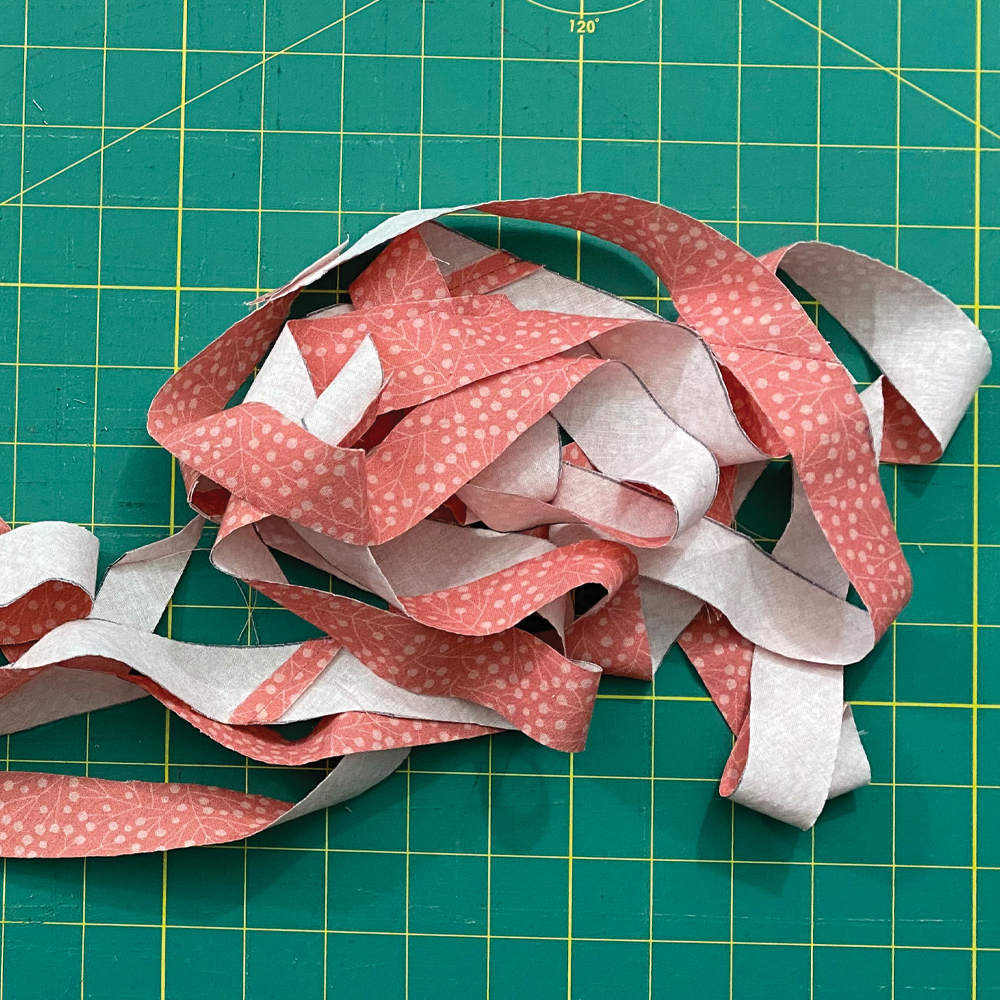
Starting at one end and only cutting through one layer of fabric, cut along the guide lines to create one long strip.
Making your strip into Single Fold Bias Tape
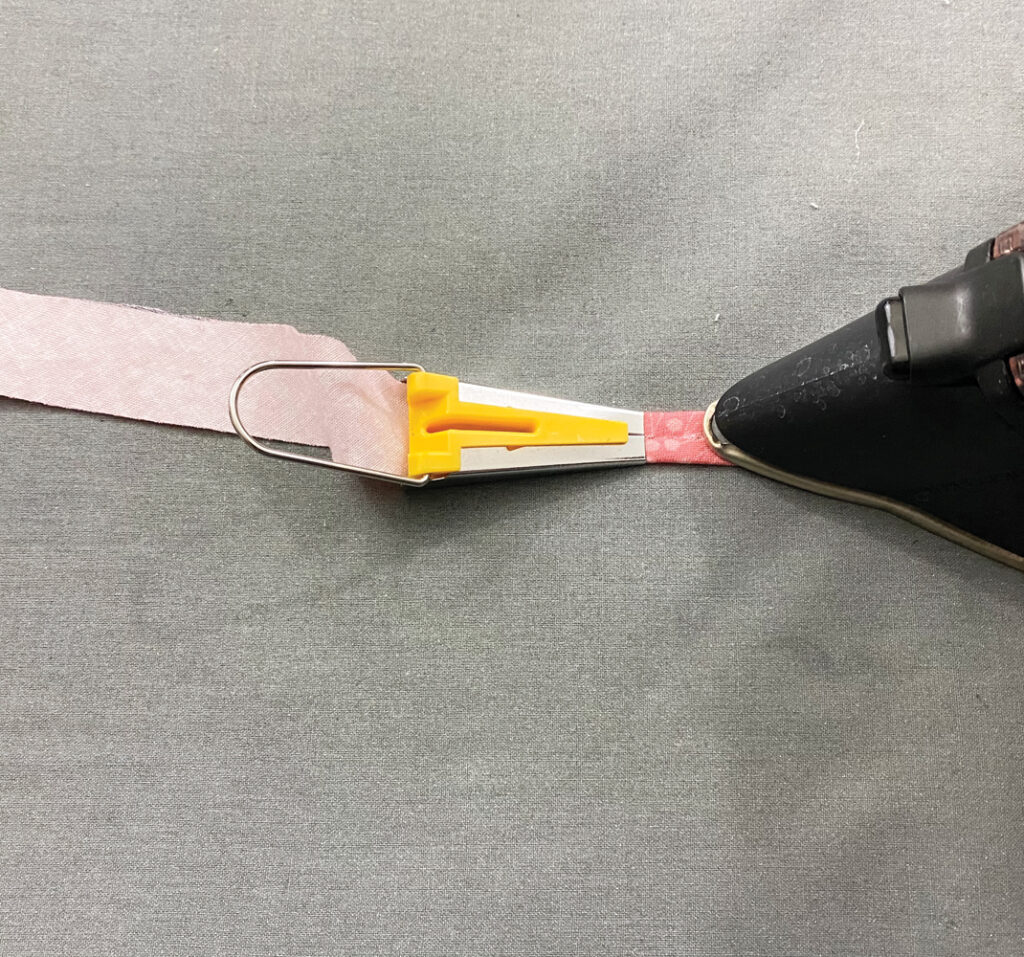
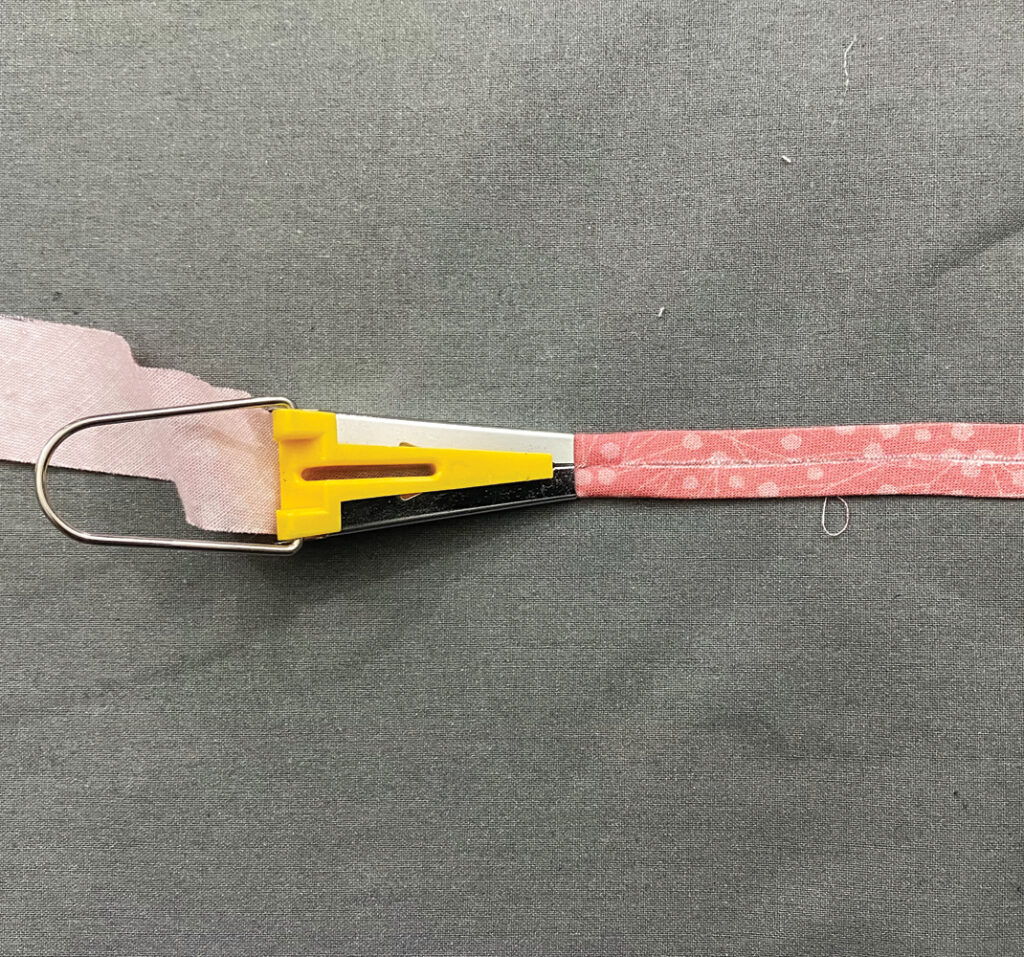
Now that you have one long strip of fabric it is time to turn it into bias tape. To make Single Fold bias tape push one end of the fabric through the end of the bias tape maker. As you feed the fabric through, make sure the 2 sides are folding toward the center. Press the fabric as you pull it through the bias maker. Use a lot of steam. If your fabric is not pressing well you can use a little starch. Continue pulling the fabric through and pressing until you have done the whole strip.
Don’t have a bias tape maker? No problem.
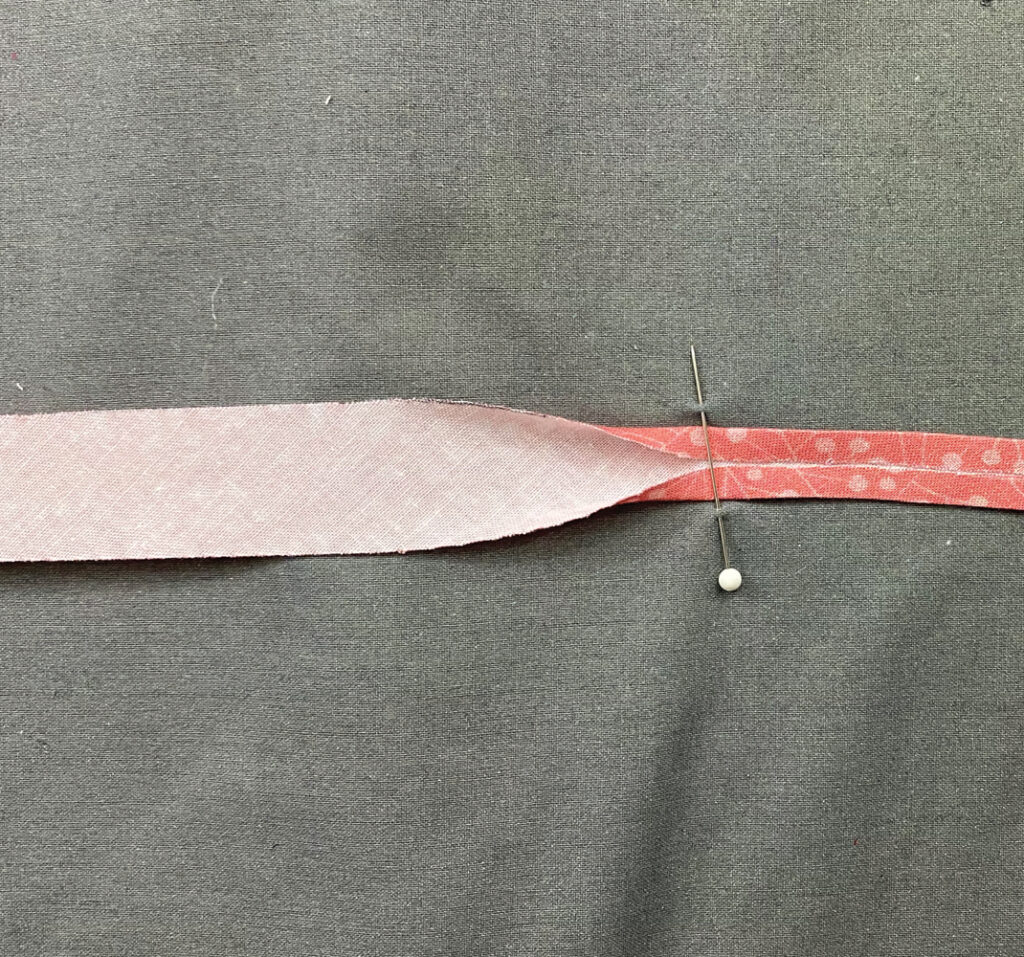
Get the end of your fabric started by folding each side to center and press. Insert a pin into the pad of your ironing board and position it so that your folded fabric is underneath and moves freely. Pull the fabric from under the pin and press as you pull it through.
Making Double Fold Bias Tape
To make Double Fold Bias tape simply fold your Single Fold Bias Tape in half again and press. It’s that easy!
Next Up: Learn how to add Bias Tape to your neckline and armholes.
Join us on Facebook, Instagram, Twitter, Youtube, and Pinterest.
Affiliate links were used in this post which means a percentage of the sales go to me when you make a purchase. It does not cost you anything to use them and it helps me to keep making new patterns and tutorials for you!


