
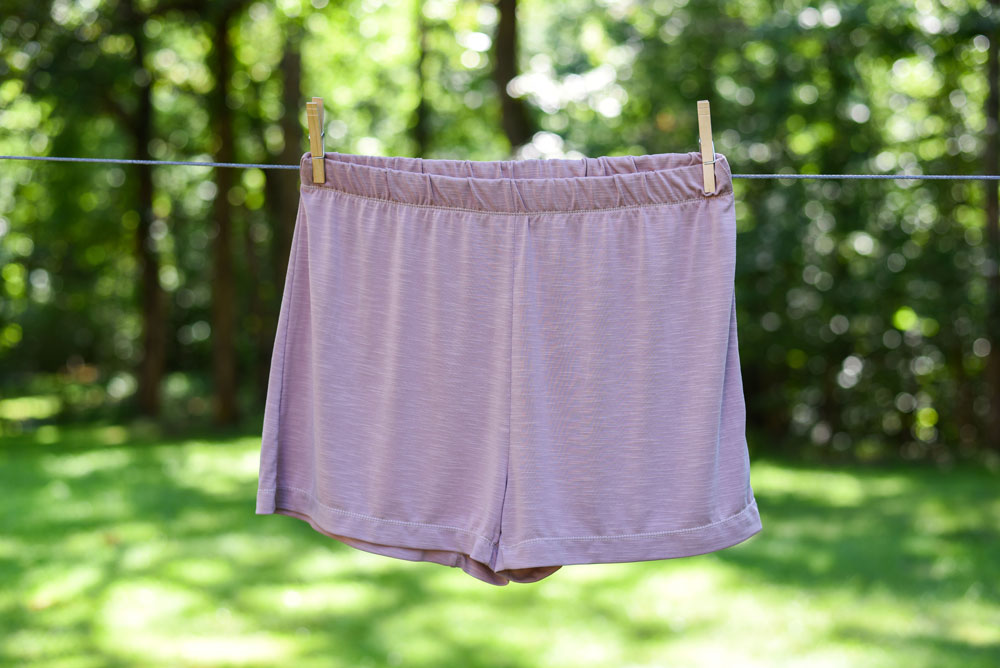
 Getting the perfect fit for the new Mamma Can Do It Knit Boxers and Lounge Shorts starts with correctly measuring the body. Even adult body measurements fluctuate. I know mine do especially around and after holidays and vacations! This blog post will look at how to measure you or your model’s body and how to best choose a size using the sizing chart and finished measurements.
It is important to wear either form fitting garments when measuring or measure yourself or your model while wearing underclothes. When measuring myself with jeans on it adds an extra inch or two! It is also helpful when measuring yourself to use a mirror to make sure the measuring tape is not slipping out of place. If you need an extra hand, try using tape to hold one end of the measuring tape. My favorite helper is painter’s tape!
Measuring Your Body
Full Hip
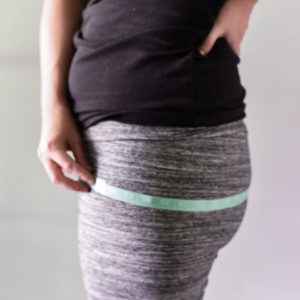
- Measure your full hip girth at the largest point. Usually this is around the booty. Try to make sure the measuring tape is as horizontal as you can get it. A mirror helps with this.
High Hip/Lower Waist
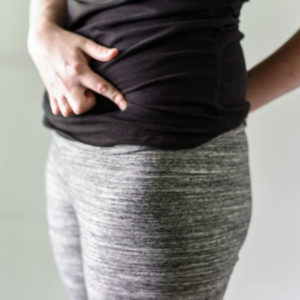
- Find the top of your hipbones.
- Measure your high hip girth at this point.
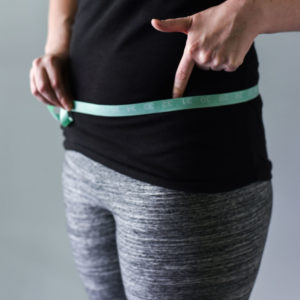
Crotch Length
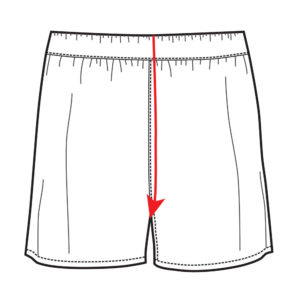
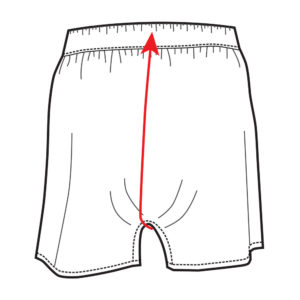
- Measure crotch length from the center front point starting at where you measured your lower waist/high hip going down through your legs.
- Pull the measuring tape back up to center back. This measurement will help you decide if you would prefer the higher rise or the lower rise option.
Choosing Your Size & Pattern Options
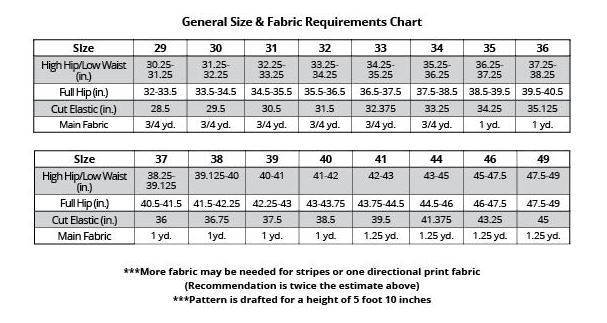
Men’s Sizing Chart from the MCDI Knit Boxer and Lounge Shorts
Full Hips
Using the full hip measurement, look at the chart above and see what size that measurement falls into. My hip measurement is 41″ which puts me in a size 37. This pattern has built in positive ease. Positive ease in a pattern simply means that it is meant to fit larger than your exact body measurement. Looking at size 36 in the sizing chart, the hip measurement is only 0.5″ smaller and I know that I like my shorts a little more form fitting. To double check myself though, I check the finished measurements in the tutorial for full hip so I know that if I size down my hips will have plenty of room.
In the tutorial there are also finished measurements for thigh, long/short length, and high/low rise crotch lengths which makes it very easy to adjust the pattern in other areas. If going by my full hip measurement, I will make a size 36.
Waist/High Hip
The pattern gives a high hip/lower waist measurement in the sizing chart. The majority of testers for this pattern preferred their shorts to be at the lower waist or high hip. High hip is right where you feel the top of your hipbones. There is positive crotch ease built into the pattern so don’t worry if you like to pull your shorts up a little higher. My high hip measurement is 36.75″ which puts me into a size 35. Remember that my full hips are a size 36. It is very easy to adjust the pattern to fit my body measurements. Check out this post here on how to grade the pattern from a smaller waist size to a larger hip size.
Grading between sizes can be very helpful when your measurements put you into two different sizes! If I decided not to grade or adjust my pattern, I would cut the elastic length of the size 35. Since my high hip/lower waist is only a one size difference from my full hip this also works really well especially in a loose fitting pattern like this one where the elastic brings the fabric in at the waist.
You can even customize your elastic length exactly from your waist measurement by taking the low waist/high hip measurement and multiplying it by 0.93. For example take my measurement of 36.75″ x 0.93 = 34.125″. I will cut my elastic at 34.125″. Tip: Try your elastic on for size before sewing!
Crotch Length/Rise
In the MCDI Knit Boxers and Lounge Shorts pattern there are finished crotch length measurements in the tutorial for both the higher rise and the lower rise options. This is especially helpful if you measure taller than the drafted for height of 5′ 10″. However, each person carries length in different areas of the body. Some are longer in the torso and some carry most of their height in the legs. When finished measurements are given in a pattern it is easier to see if an adjustment is needed.
I am 5’7 and I carry most of my height in my legs. My crotch length is 22″ and for the size 36 the finished high rise crotch length is 25.5″ and the finished low rise crotch length is 22.5″. This means that there will be about 3.5″ of positive ease in the high rise version and about 0.5″ in the low rise version. Since I will be using these as sleep shorts and I like to wear them a little higher than where I measured my high hip, I decided on the higher rise option. If you see that you need to add or remove rise, there is an add/remove rise marker on the front and back of the pattern pieces. If you would like more information on how to use these pattern markers to adjust the rise check out this post here.
Length/Height
After figuring out what size and rise option to make, it is time to choose a length. There are two hem lengths in this pattern, and the finished measurements for these lengths are given in the tutorial.
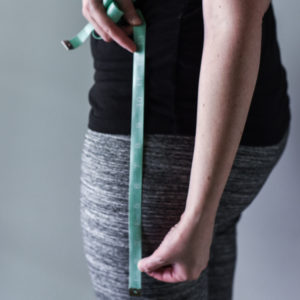
To figure out which length to use, measure along the outer leg starting at the high hip where you measured your waist and go down to see where each length falls at your outer thigh. The longer finished length for size 36 is 14″ and the shorter is 12.5″. I prefer the shorter length which falls right above mid thigh for me.
After looking at all my measurements I decided to make a size 36 (full hip measurement) with the cut elastic from the size 35 (high hip/waist measurement). I love how this one turned out! Don’t forget to share your MCDI makes in our Facebook Group! If you need more help in adjusting your pattern then check out our blog post here!
Disclaimer: Affiliate links were used in this blog post. This just means that a percentage of sales go to me when you purchase. They do not cost you anything to use. This helps me make more beautiful things for my family.


1 thought on “Knit Boxers: How to Measure and Choose the Perfect Size”
Pingback: Knit Boxers: Fitting and Pattern Adjustment Tutorial | Mamma Can Do It Sewing Blog