
One of my most favorite things about sewing is that I can sew something to fit my body perfectly. I’m tall for a lady, I married a tall man, and I have super tall skinny kids. Store bought clothes do not fit us well as a family. That’s why I’m glad my super power is sewing.
Each and every one of us is different and I want to show you my best tips and tricks for adjusting the Mamma Can Do It Knit Boxer and Lounge Shorts for your body or for the loved ones you sew for.
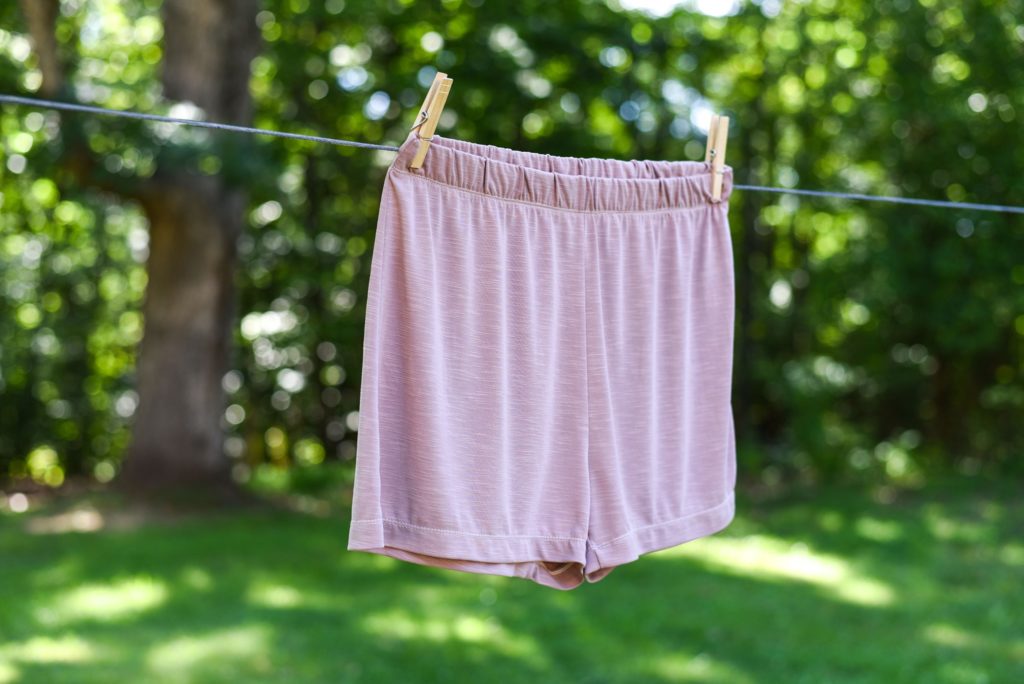
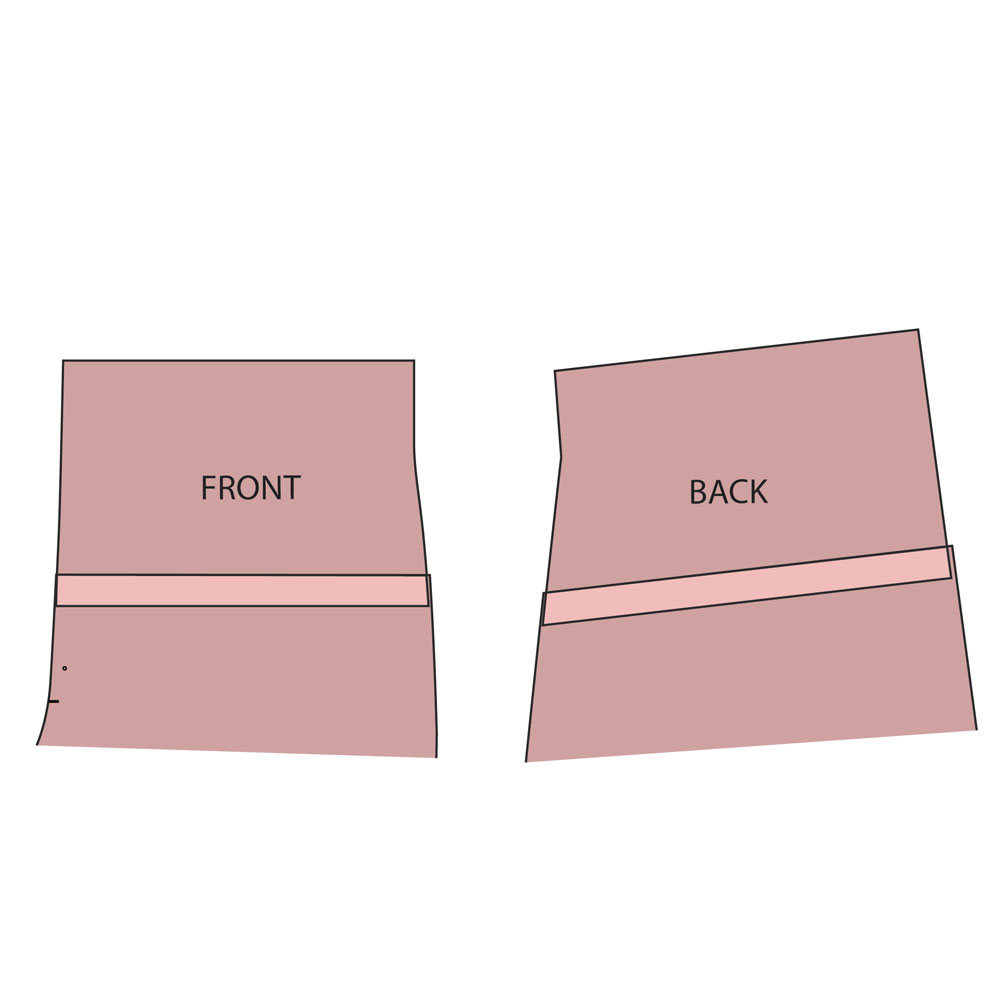
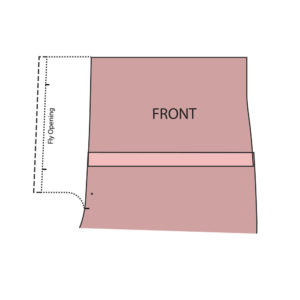
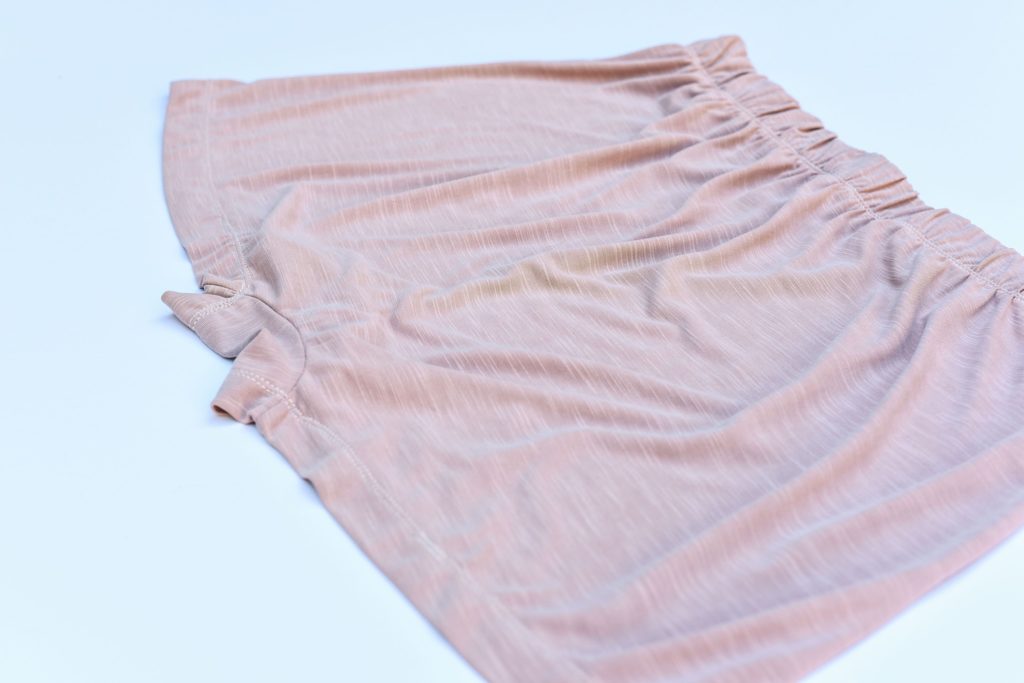
This pattern follows our Men’s Sizing Chart shown below, however, anyone can make this pattern. I made this one for my lovely sister in a dreamy slub cupro fabric from Bow Button Fabrics. If you have never tried cupro, you should! It’s breathable, feels like silk, and it’s very easy to sew!
Adjusting the Pattern
For the MCDI Knit Boxers and Lounge Shorts, grading between sizes and adjusting the crotch length were the two most common adjustments needed. I decided to focus on these two adjustments and discuss some fitting issues that are common with shorts in general and how to fix them.
Grading Between Sizes
Sometimes it is necessary to grade or blend between sizes if your waist and hip measurements fall into different sizes.
Step 1: Print out both sizes you will be blending by using the layering feature which lets you only print out the sizes you need. 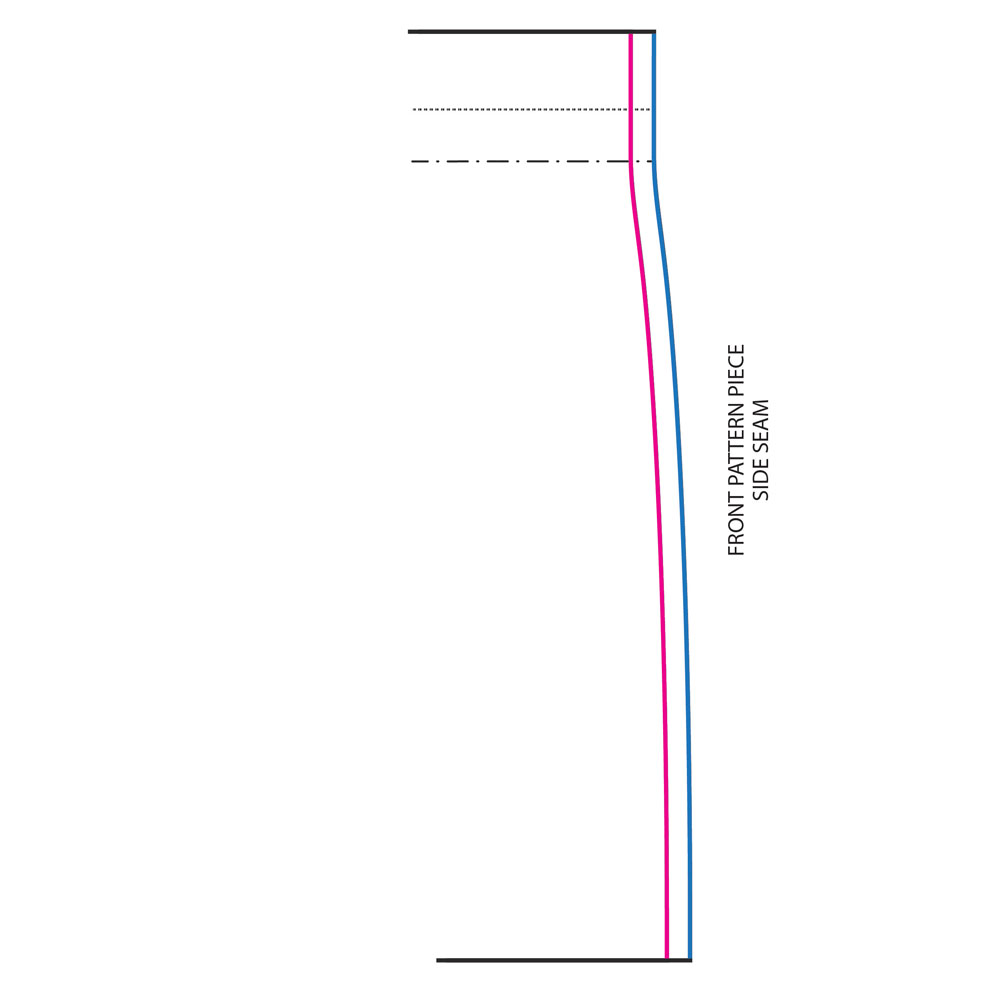
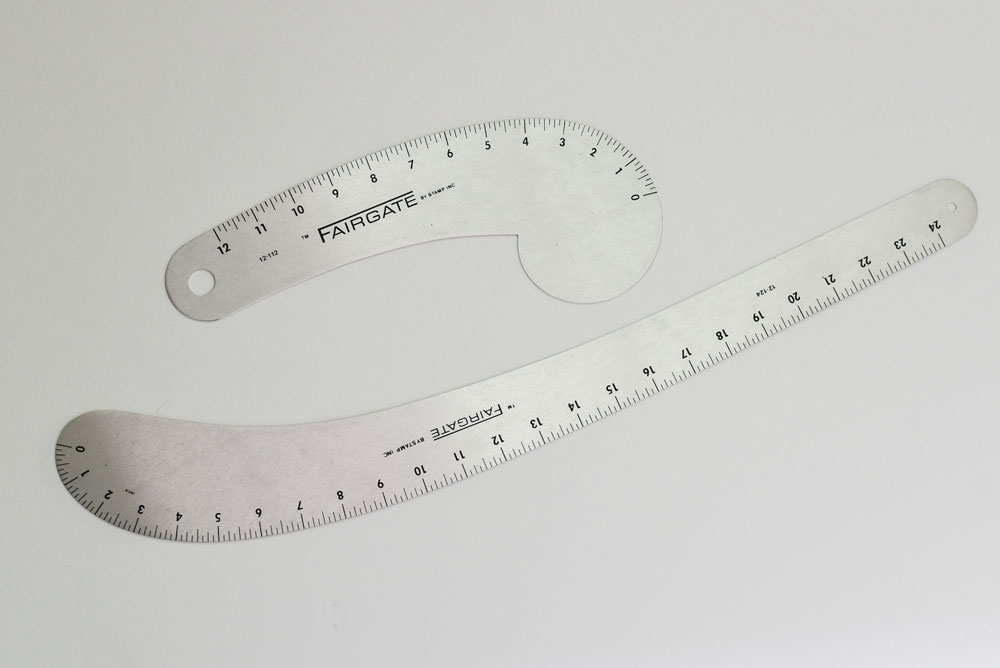
Step 2: I have highlighted the size 35 side seam in pink and the size 36 side seam in blue. Draw a line (orange in diagram below) starting with the size 35 waist and grade out to the size 36 at the hip. Make the line as gradual as you can. A french curve or hip curve (shown below the diagram) is very useful when making smooth lines between sizes.

Step 3: Repeat the same method with the back pattern piece so that your side seams match up.
Step 4: Cut out your new pattern pieces.
Adding/Removing Crotch Length
The MCDI Knit Boxers and Lounge Shorts have finished crotch length measurements in the tutorial for both the high and low rise pattern options. If you need more information on how to measure crotch length click here. The pattern is meant to have some positive ease (extra length) in the crotch area. Positive ease just means that the crotch length should be a little longer than your exact body measurement. However, if you need to add or remove crotch length then follow these steps. This will also add or remove length from the shorts.
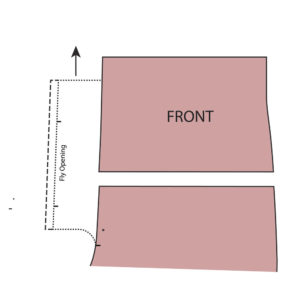
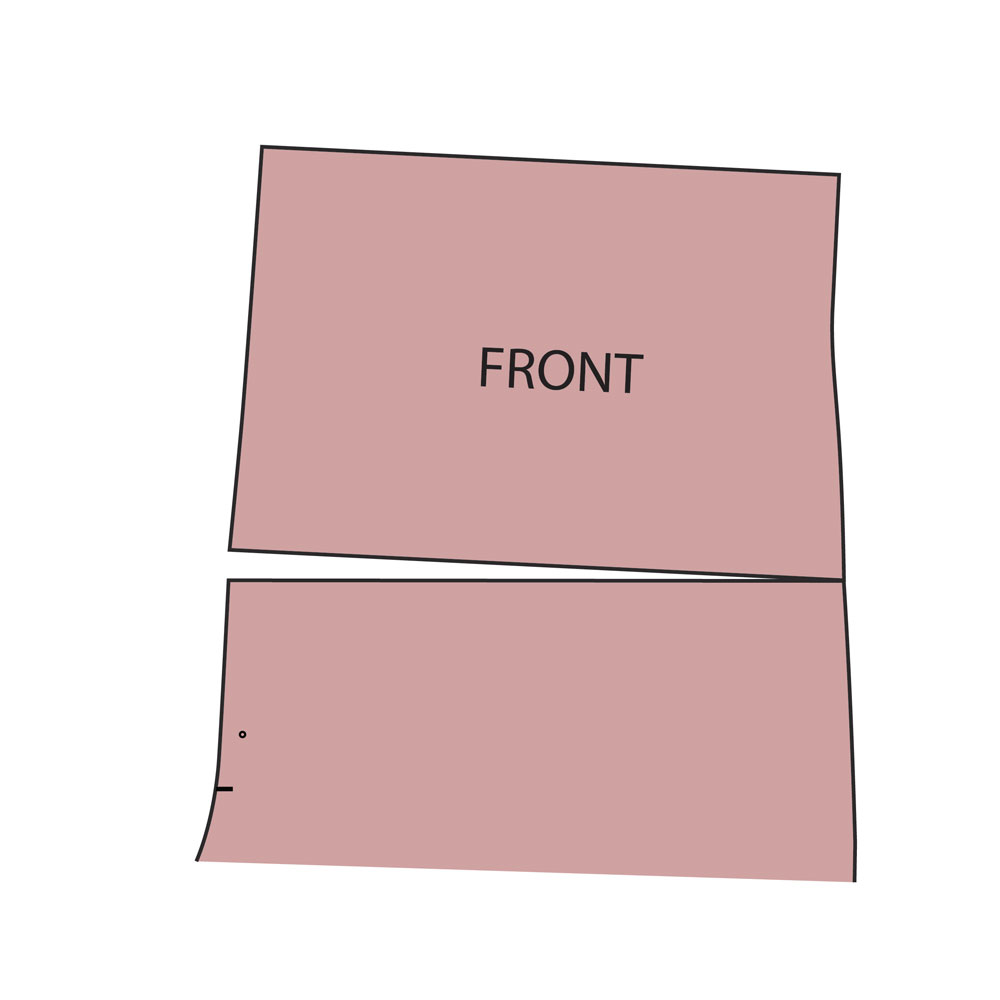
Step 1: Find the add/remove rise marker on the front pattern piece, and draw a line (red in the diagram below) directly across the pattern to the side seam.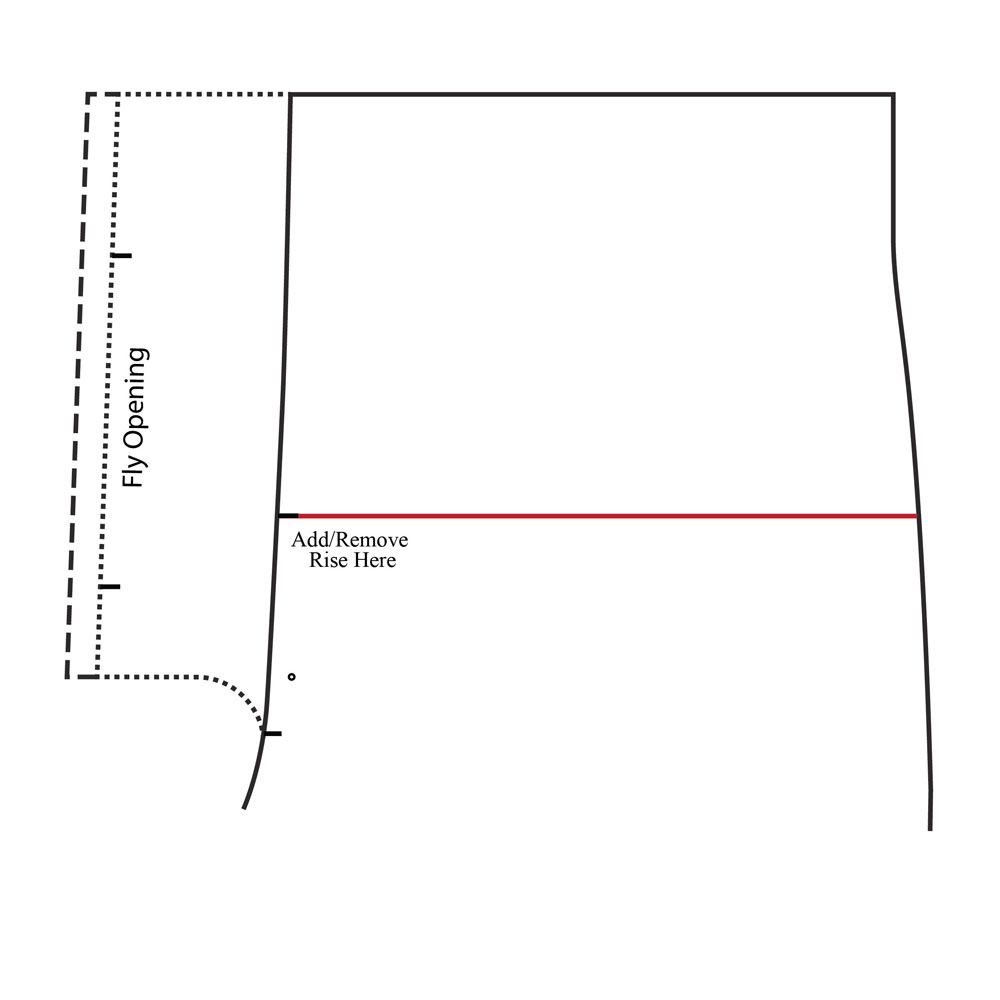
Step 2: Find the add/remove rise markers on the back pattern piece, and connect the two markers (red in the diagram below).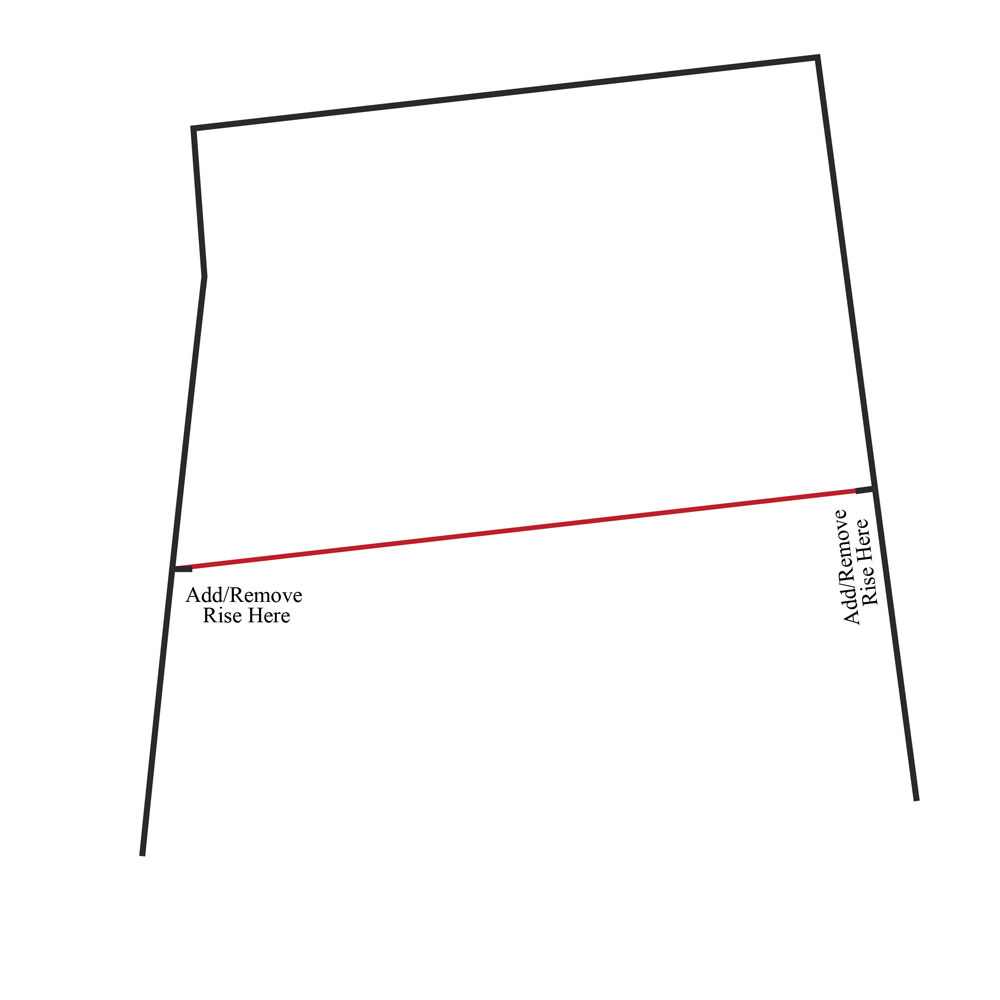
Step 3: This step is only if you are sewing a boxer with a fly. Cut the fly piece off at the crotch curve.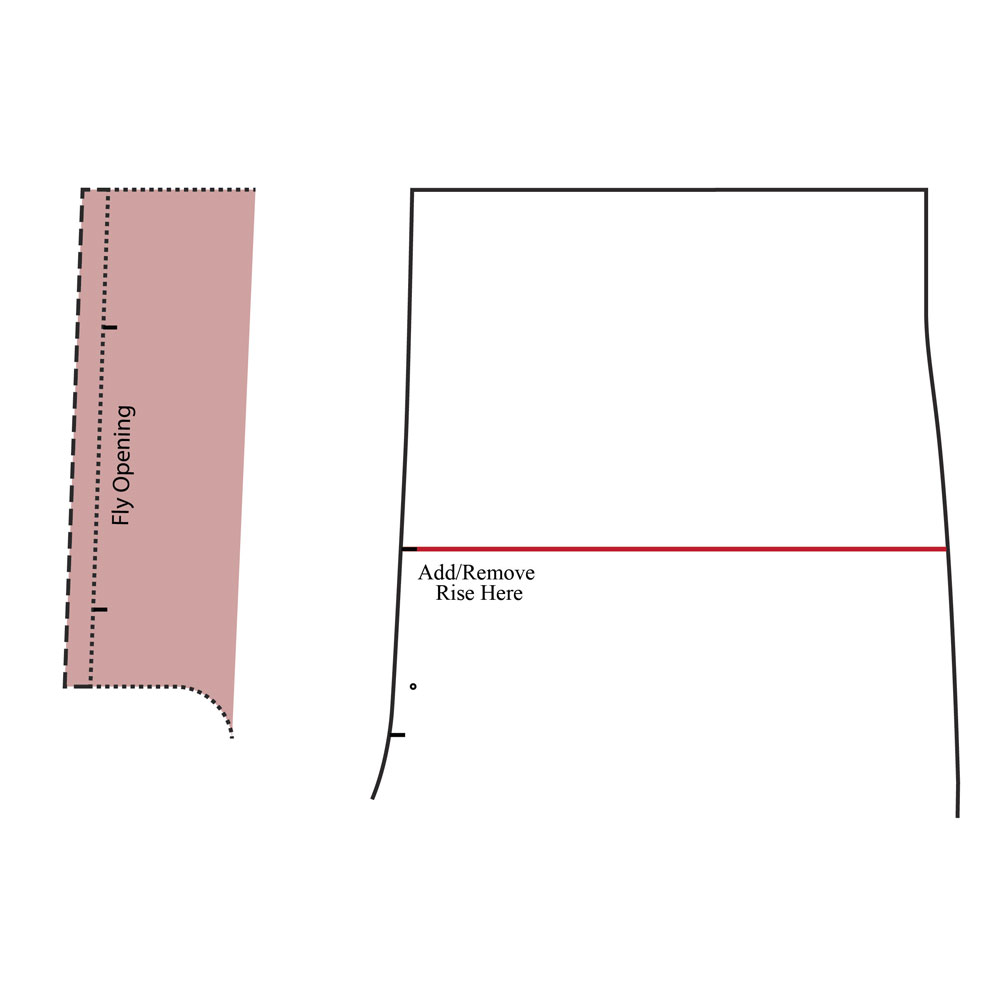
Step 4: Divide the amount of crotch length that you want to add/remove by 2. You will add this amount to both the front and back. Example: I want to add 2 inches. 2 divided by 2 = 1. I will add 1 inch to the front and 1 inch to the back.
Step 5: Cut along each line you have drawn on both the front and back.
 Step 6:
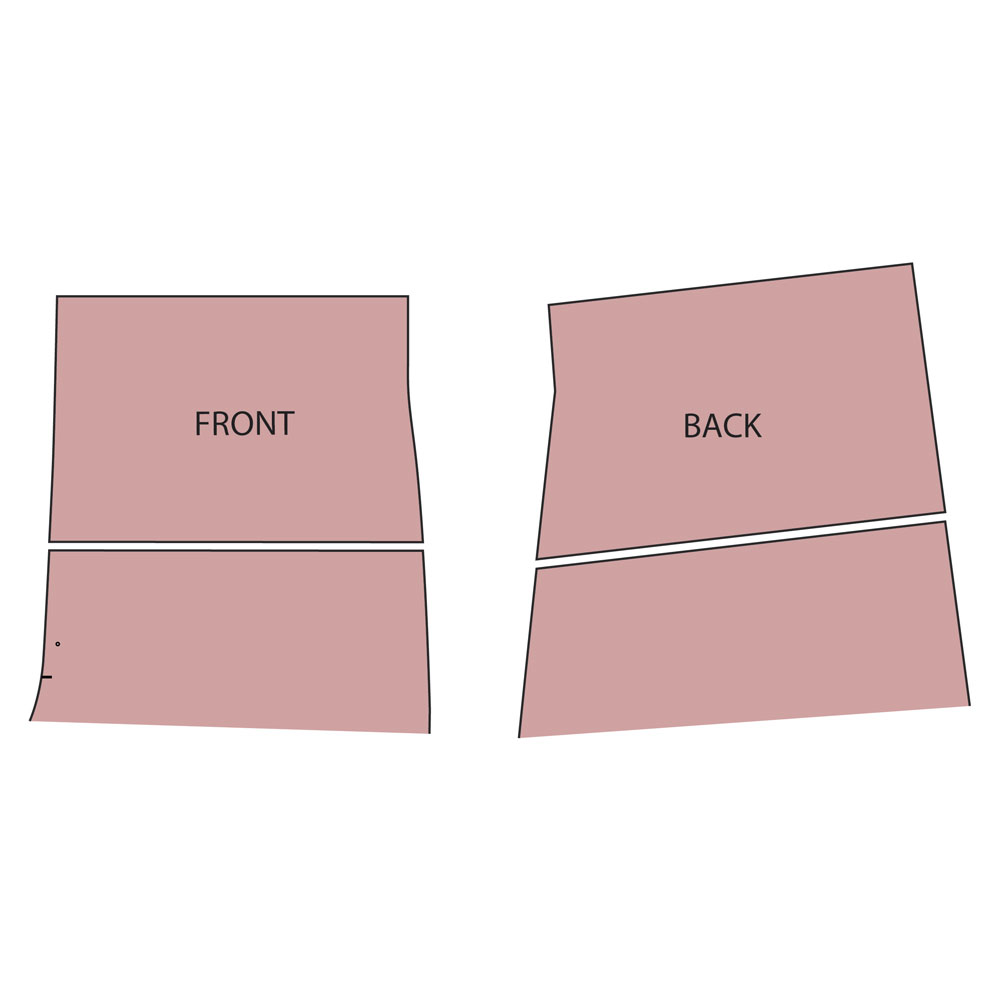
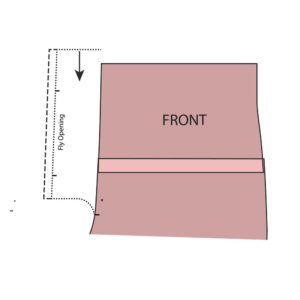
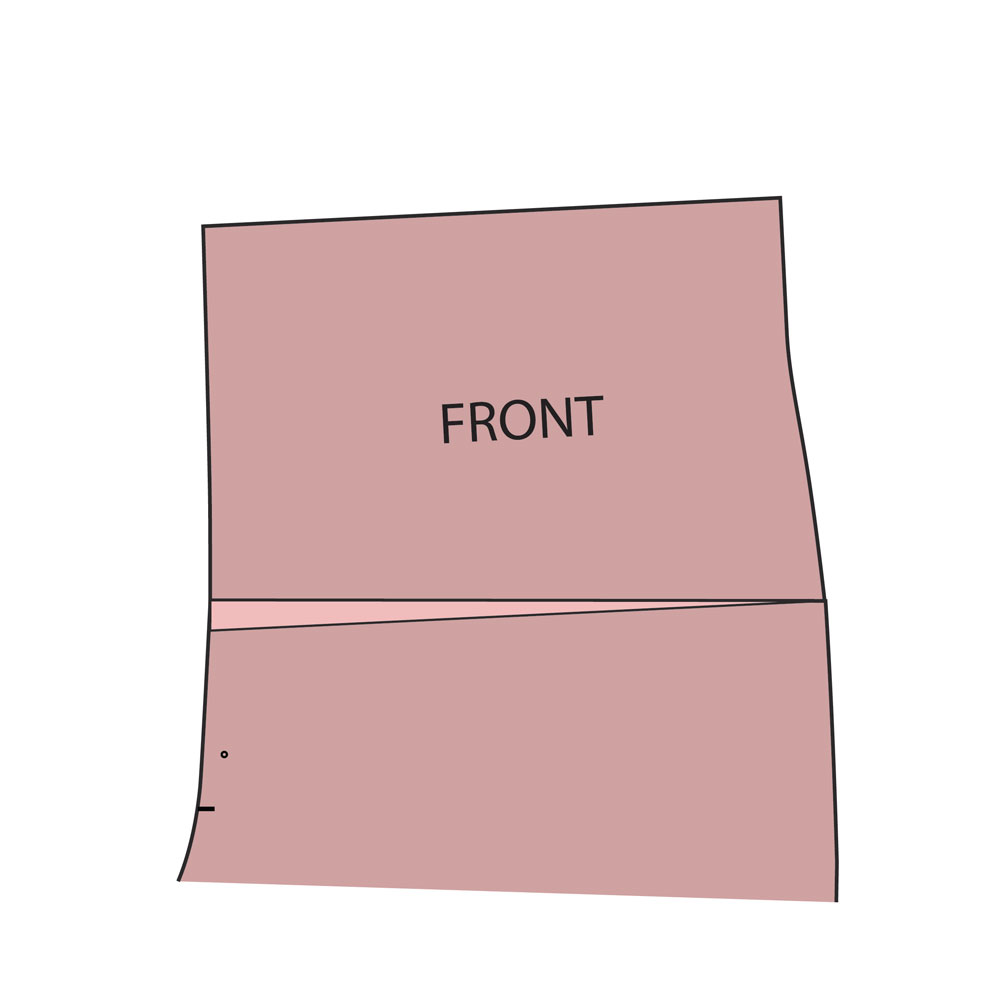
- Add length by separating the pattern pieces (diagram below). Place a piece of paper behind your pattern and tape your pattern pieces to the paper. Redraw your front crotch curve or your back crotch line. Make sure that you have added/removed an equal amount from both the front and back so that your side seams match up again.
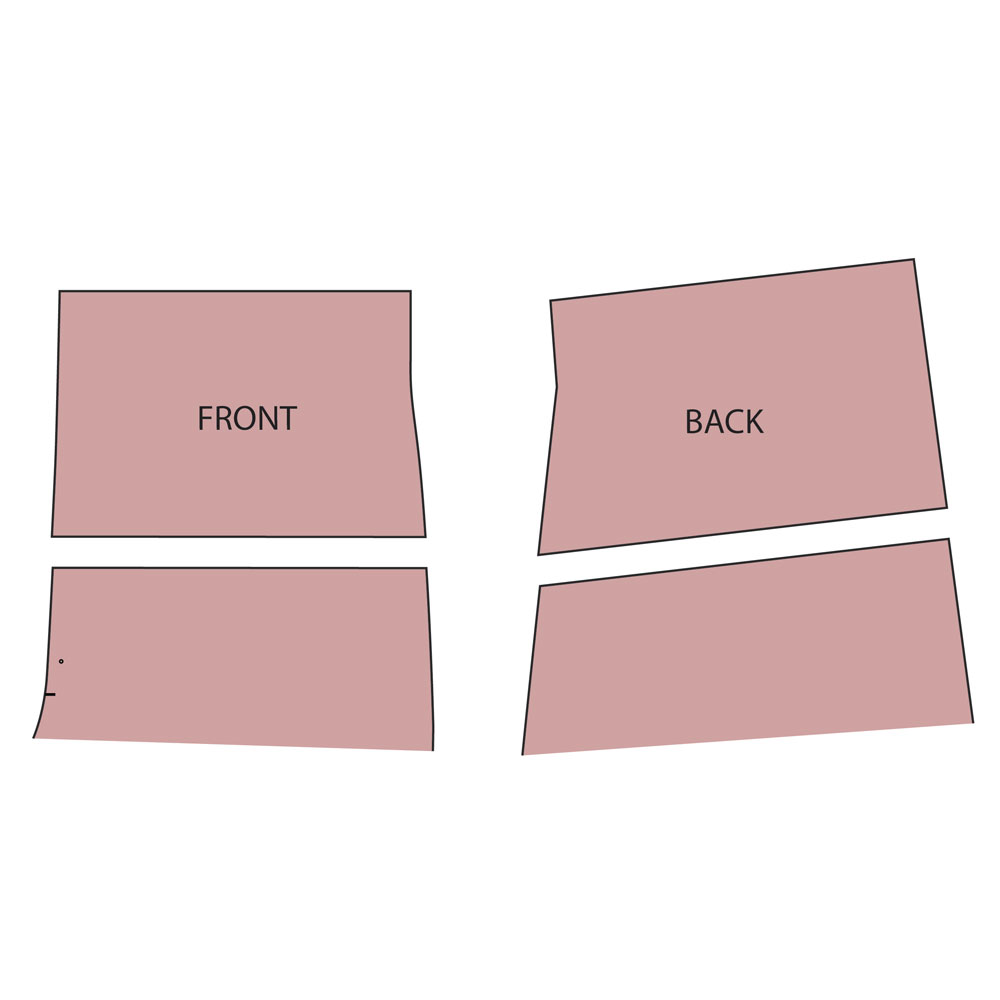
- Remove length by overlapping the pattern pieces (diagram below). Redraw your front crotch curve or your back crotch line. Again make sure that you have added/removed an equal amount from both the front and back so that your side seams match up again.
Step 7:
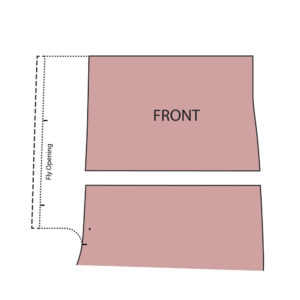
- This step is only if you are sewing a boxer with a fly. Take the fly piece that you cut off in step 3 and align it back onto the front pattern piece like in the diagrams below.
- Adjust the top of the fly either down if you subtracted crotch length or up if you added crotch length.
 Common Fitting Issues
It is always recommended that you make a muslin of any new pattern. This just means that you sew up a trial garment using less expensive fabric in order to check the fit and to see if any adjustments need to be made. You will be able to see exactly how much to add or take out when making the pattern next time with better fabric. Two of the most common shorts or pants fitting issues that I see are when the front rise is too long or the back rise is too short.
Front Rise is Too Long
You will be able to see if the front rise is too long if the back looks good, but there is extra fabric in the front crotch area. This is a common adjustment if you are shorter than the 5’10” height the pattern is drafted for. For this adjustment you will only be changing the front pattern piece.
Step 1: Find the add/remove rise marker on the front pattern piece, and draw a line directly across the pattern to the side seam (diagram below).
Step 2: This step is only if you are sewing a boxer with a fly. Cut the fly piece off at the crotch curve. There is a diagram of this in the previous section: How to Add/Remove Crotch Length Step 3.
Step 3: Cut across your line starting with the add/remove rise marker. Do not cut all the way across to the side seam. Leave enough so that it acts like a hinge for the top portion of the pattern to move up or down.
 Step 4: The best way to know how much rise to take out is by making a muslin or a trial garment. You can easily pinch the extra fabric at the front crotch and that will be the amount you will take out. Pivot the pattern piece down to remove rise. You can also add front rise by pivoting the pattern piece up.
 Step 5: Redraw your crotch curve with a gradual line. A french curve can be a very inexpensive and helpful tool in making smooth pattern lines.
Step 6: This step is only if you are sewing a boxer with a fly. Take the fly piece that you cut off in step 3 and align it back onto the front pattern piece. Adjust the top of the fly either down if you subtracted crotch length or up if you added crotch length. There are diagrams of this in the previous section: How to Add/Remove Crotch Length Step 7.
Back Rise is Too Short
Since the MCDI Knit Boxer and Lounge Shorts pattern has a back without a seam, it makes it a little more difficult to adjust only the back rise. However, to help with this there is a gusset that can be adjusted very easily to add back rise. You can tell that your back rise is too short if the back looks like the fabric is being pulled into the crotch and the inner thigh fabric is twisting.
Step 1: If you have made a muslin sample and you find that the fabric is pulling into the crotch area from the back and the inner thigh fabric is twisting, see if you can pull the front down to relax the back. Measure the amount that you pulled down and that should be the amount you need to add to the gusset width. You can even seam rip the gusset where it meets the back pattern piece and measure the amount it needs to relax the fabric.
Step 2: Add width to the gusset pattern piece. Be aware though that using this method will also add to the thigh finished measurement. If you already made a muslin, cut a new wider gusset and replace the old one.
I hope this fitting tutorial has been helpful in getting the perfect fit for your shorts! I look forward to seeing what you make! If you have any other questions about fitting adjustments, be sure to check out our Facebook Group here. I love our community of sewists who are always happy to answer questions if you need help!
Disclaimer: Affiliate links were used in this blog post. This just means that a percentage of sales go to me when you purchase. They do not cost you anything to use. This helps me make more beautiful things for my family.


1 thought on “Knit Boxers: Fitting and Pattern Adjustment Tutorial”
Pingback: Knit Boxers: How to Measure and Choose the Perfect Size | Mamma Can Do It Sewing Blog