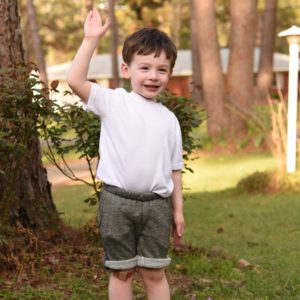
I LOVE sewing for my boys! It makes me SO happy when I find a pattern that works for me AND my kids like it! I am loving the new Boy Fit Pants by Mamma Can Do It. Check this pattern out here. I love getting a great fit, and really love that they get to wear clothes different from what I’m finding in the stores. I love creating things that I actually like, rather than just purchasing whatever is in the store in their sizes. Because, let’s face it, I obviously have very different taste from what is available to purchase.
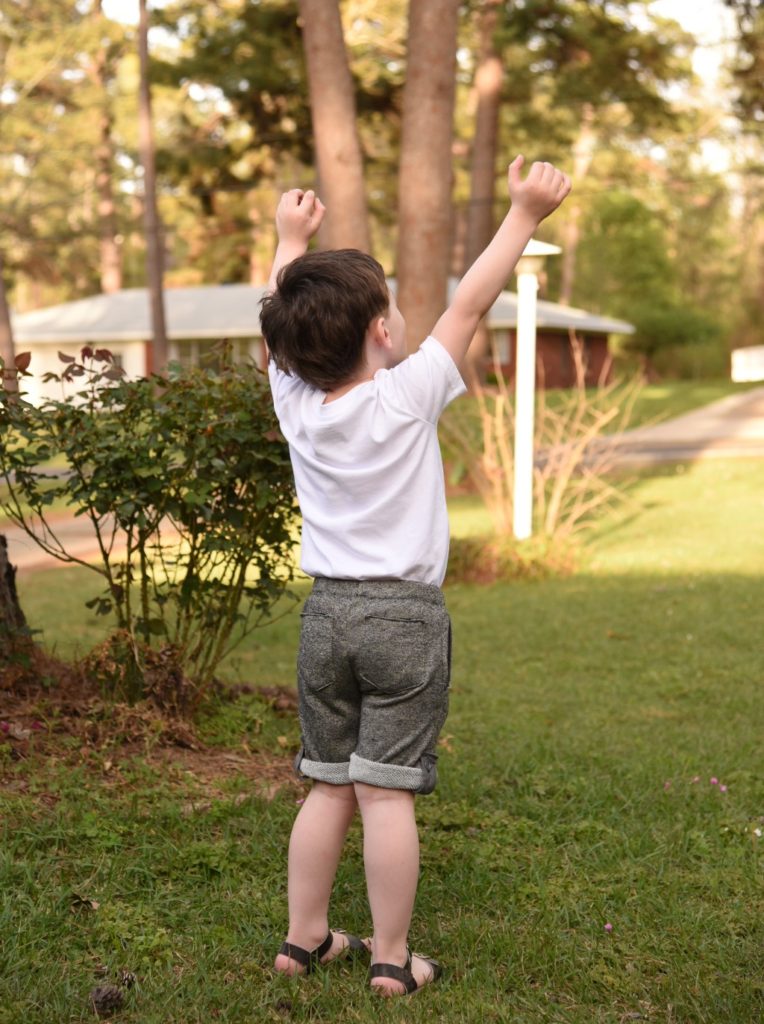
My three year old is at a hard age… He no longer will wear whatever I put on him. He has developed OPINIONS. You know a pattern is a win when I enjoy sewing it, think it’s cute, AND he likes it! For real, these pants are EASY to sew, cute on, and SUPER COMFY!!
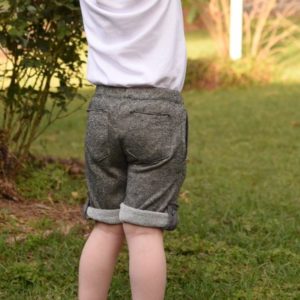
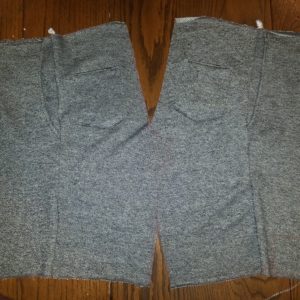
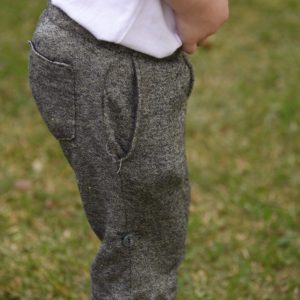
BUT, since I can’t leave patterns alone, I HAD to change something up, just a little! I’m going to tell you today HOW I added a button-up tab to my shorts. I tend to like shorts a little above the knee on my boys, but not quite as short as the bike short line. So I have two options… (1) Hem them shorter, or (2) Roll them. I actually LIKE the rolled look, because you get a little contrast from the other side, but they don’t stay rolled, so I decided to add a little button up tab to the outer leg on these.
So, let me tell you how I did this!
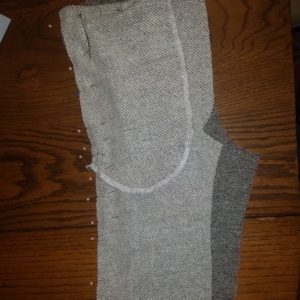
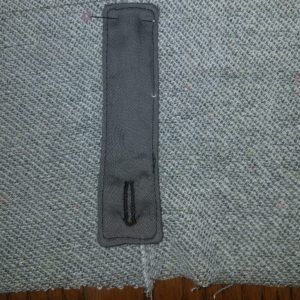
STEP 1: You will need to create your tab pieces first. I think I made my pieces about 5.5″ tall by 1.75″ wide. You will need to cut FOUR pieces exactly alike!

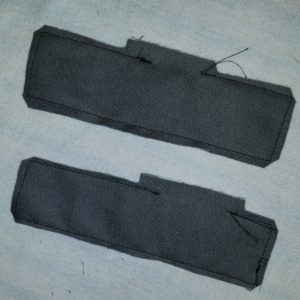
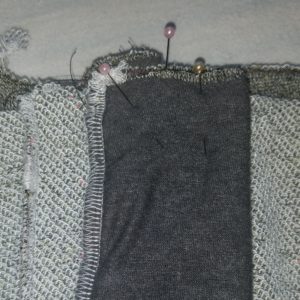
Step 2: Apply a lightweight interfacing to TWO pieces. Then, right sides together pin together one interfaced piece with one non-interfaced piece. Your pieces should look like this!
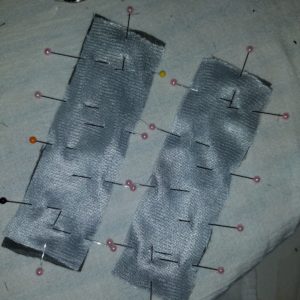
Step 3: Now we will stitch around the edges of our pieces, using a 1/4″ seam allowance. You will need to leave a turning hole on one side of each piece! When you are finished stitching, your pieces should both look something like this.
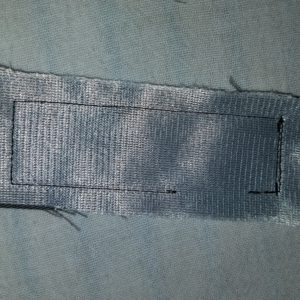
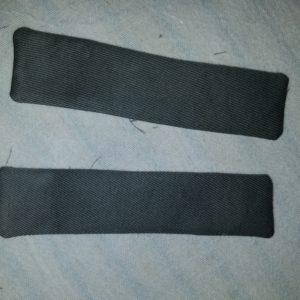
Step 4: Now, clip the corners and trim the edges to reduce bulk when we turn them right side out.
Step 5: Go ahead and turn your pieces right sides out and press. HINT: I use a bodkin to turn my pieces more easily!
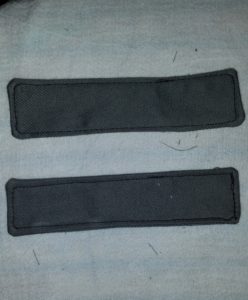
Step 6: Topstitch very close to ALL edges of your tabs. By doing this, you will be closing your turn hole as well!
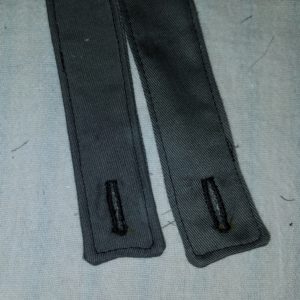
Step 7: Now make a mark in the center of one of the ends of each of your tabs about 1/2″ from the end of the tab. You need to sew a buttonhole from that mark towards the center of each tab. Once your buttonholes are sewn, open them using small scissors or a seam ripper. HINT: Stick a pin through the end of your buttonhole at one side – this will keep you from tearing your fabric past your buttonhole!

Set your completed tabs aside for now!
Okay, now we are going to construct the pants, BUT we are going to switch up the order of the instructions a bit. So, pay attention!! I promise it still works!
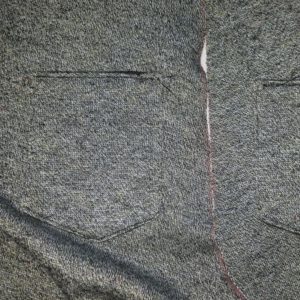
Step 8: POCKETS!
Skip ahead and look at the instructions for your pattern on constructing pockets! Go ahead and do the front and back pockets, if you are using pockets per the instructions! Your pocket pieces should be attached to your front and back pants pieces before you move on!
Your front and back pants pieces are all still separate! The faux fly is NOT done yet, and the crotch curves are NOT sewn together yet. You should have FOUR separate leg pieces with pockets attached!!
Step 9: Baste Front Pockets
You may want to go ahead and baste your front pocket. Don’t sew it all the way down though, because we don’t want it to get in the way when we construct our faux fly piece (or front crotch piece if you’re not doing the faux fly).
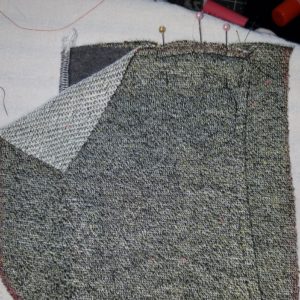
Step 10: Attach front pant legs to back pant legs.
We still have TWO separate front and TWO separate back pant pieces. Now, we will pin one front pant leg to one back pant leg and sew them down on the outside seam, matching waist and hem of leg.
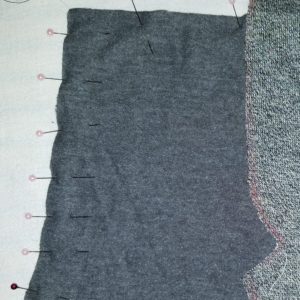
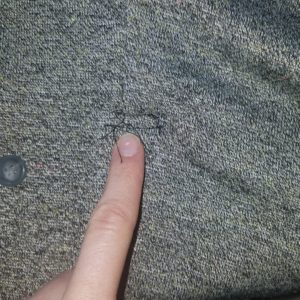
Step 11: Open Pant legs up and get ready to attach tab to inside! You can place the tab wherever you think you want it, but I didn’t want my tab to show from the outside if my pants are unrolled, so I measured 1″ from the bottom to account for the hem that we will do in a few minutes. I put the bottom of my tab (the side with the button hole) down where the bottom hits 1″ above the bottom of the shorts.
Step 12: Buttons! We will now flip our pants over to the right side. Find the stitches where we sewed the tabs down. Sew the buttons right on top of those stitches on the side seam to the pants.
Then trim strings, and clean it up! 😉
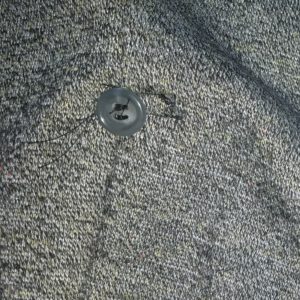
HINT: Did you know that you can sew buttons on using your sewing machine?!?! If you’ve never tried this, it’s life changing!! If you have an automatic/ computerized machine, you may have a button sewing stitch and a special foot, but it works with any machine that has a zig zag stitch… I’ve tried! Drop your feed dogs, use a zig zag stitch and adjust the stitch length so that it fits between your holes on your buttons! 🙂
Step 13: Constructing the Pants
Now, I want you to pin the pocket piece back so that it will not get in the way of you constructing your faux fly or front crotch piece. Fold it and pin it towards the outside seam of pants! We will flip it back and baste it down once the front of the pants is constructed.
Now you can construct the front and back pieces of the pants.
HINT: I would strongly suggest that you start with the front if you are doing the faux fly version. It’s super hard to do the faux fly if you’ve already sewn the back crotch curve. Trust me, I would know!! 😉 HA!
When you have the front of the pants constructed, go ahead unpin and baste the rest of the pocket piece down to the front part of the pants.
Finish constructing your pants and hemming per the instructions in the pattern. When you go to hem, be sure you do not catch your button tab in your stitches!!
Step 14:
Admire your beautiful new creation! See, it’s not that hard to adapt something to be exactly what you want, right? This pattern is AMAZING!


If you choose to sew a pair of these pants or shorts, PLEASE share them in the Mamma Can Do It Facebook Group. The ladies there would LOVE to see what you make!
https://www.facebook.com/groups/Mammacandoit/
Also, be sure to follow MCDI on Instagram!
https://www.instagram.com/mammacandoit/
Thank you SO much for reading this post! Please be aware that I have included my affiliate link for this pattern throughout this post. I would really appreciate you using it I persuaded you in any way to purchase the pattern! 😉
Fit Pants Pattern | Boy Sizes 2T-20
Love, Laura <3


