
Hi there! Kelsey from Mamma Can Do It here to give you a quick and fun hack for any of the Relaxed Peplum Patterns. This hack will also work well with all of Mamma Can Do It’s Adalynn Dress collection! Adding a sash is a fun way for any girl or lady to add a bow to the back of a dress or top or if you are like me and make all my kid’s clothing in bigger sizes because they grow so fast, it’s an easy addition that can bring in a larger sized dress with a tie at the back or front. I also think that a sash can give a pop of color, especially to my own outfits. I love to make my sash long so that I can bring it around and tie a knot at the front.
Let’s get started!
Cutting Your Sash Pieces
You will be cutting your top or dress pieces from your pattern of choice the exact way the tutorial asks you to make them. You will want to also cut out your sash pieces. I cut mine 4.75″ (0.375 seam allowance) by 30″. Cut 2–one for each side of your dress or top. For little girls or babies I would recommend a smaller width of 2.75″ (0.375 seam allowance). You can always trim your sash to the length you would like. I think I might go with a 3.75″ width on my next one. You can always play around with what you think will look best.
Creating your Sash Pieces
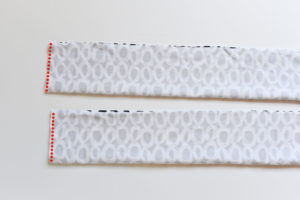
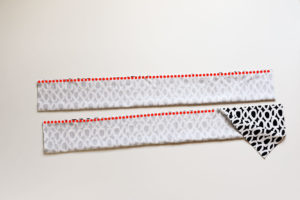
With right sides together sew the short end first using a 0.375″ seam. Make sure you use a stretch stitch or serger unless you are using a woven material which is possible with this sash. Next, sew down the long side of your sashes. Turn your sashes right side out and press well with an iron.
Attaching your Sash to the Bodice
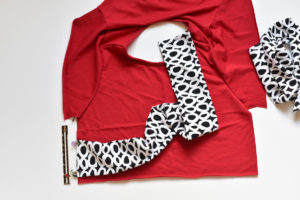
Sew your bodice according to the tutorial by attaching shoulder seams and sleeves. Place your sash about 0.75″ up from the bottom of the bodice front making sure that the bodice is positioned with right side facing up. Repeat with the other sash on the other side of the bodice front.
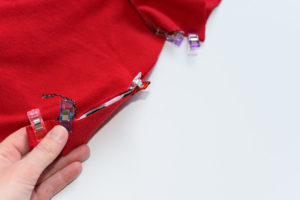

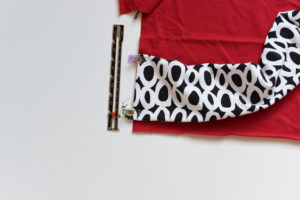
Bring the back bodice piece over top of the sash sandwiching the sash pieces between them. Your bodice will be inside out with your sash pieces inside. Sew the side seams of your bodice by sewing from the sleeve to the bottom of the bodice.
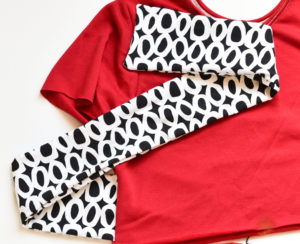
When you turn your bodice right side out your sashes will be attached to the side of your new top or dress! Finish your piece according to the tutorial.
I can’t wait to see what you create! Happy sewing!
Disclaimer: Affiliate links were used in this post which just means that a percentage of sales go to me when you make a purchase. It does not cost you anything to use them and it helps me to make more beautiful things for my family.


1 thought on “Adding a Sash to the Relaxed Peplum”
Pingback: The Relaxed Peplum -So Many Options | Mamma Can Do It Sewing Blog