In this blog post, I will show you how I hacked the Mamma Can Do It Breezy Shorts. Please know that I have inserted my affiliate link throughout.
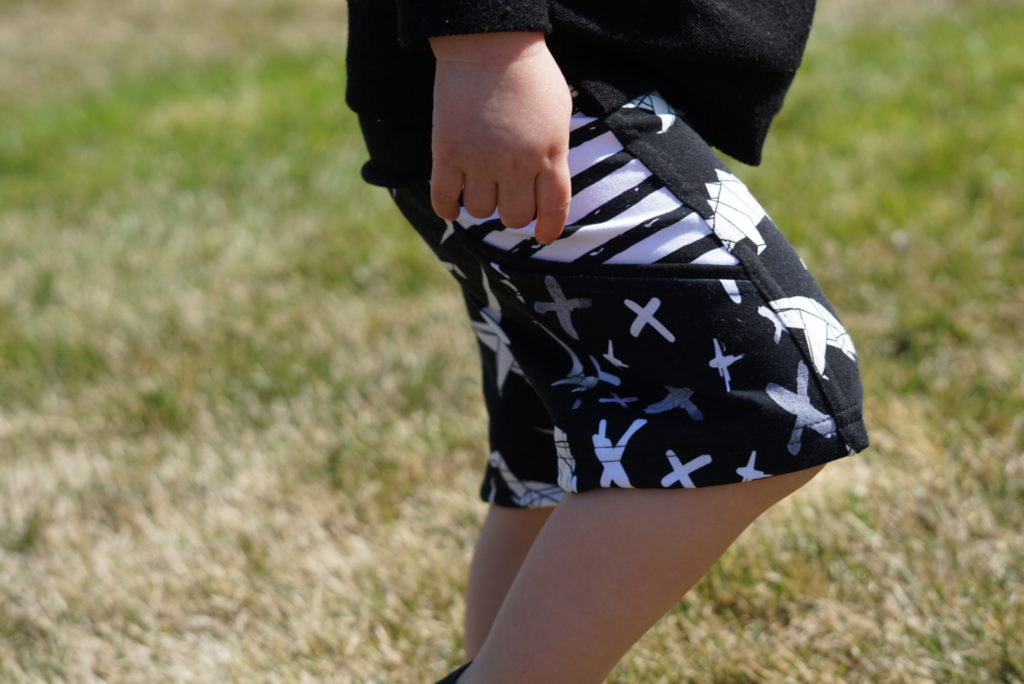
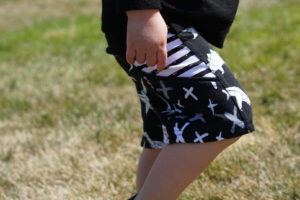
The Mamma Can Do It Breezy Shorts are a new staple in our household! My son has quite a few pair now. However, when you have a curious and adventurous toddler, you may also need to add some pockets!
Ill show you in a few pictures how I took the pattern and added in some fun pockets for my little man so he can feel free to carry cars or rocks (shake my head) with him anywhere he chooses.
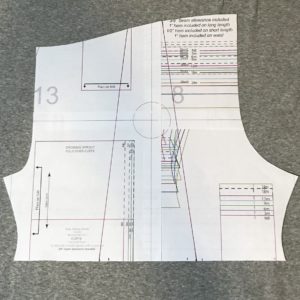
First you need to make sure that you buy the MCDI Breezy shorts, you can do so here. Then you need to tape the patter together and make sure that you cut out out your pattern you desire. You could honestly do this with any style, I chose to do the Slim Fit Knit version.
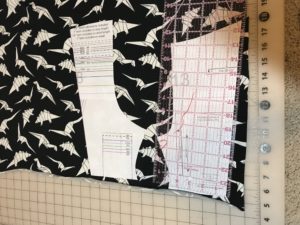
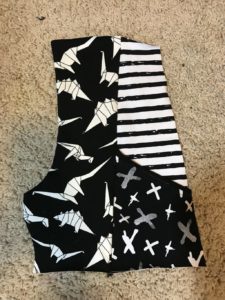
After I had all my pieces taped and the size I needed cut out, I made a plan of how I wanted to cut my pocket. This can be done in any way you want. I did a color-block option for ease of just adding in a pocket and sewing it into the seam. Please note I used scrap paper and this is the back, the printed pattern in on the front side of this. The Triangle/trapezoid red lines that I drew is what I wanted my color-block shape to be.
After this, I cut it into three pieces. I made my lines straight so I could easily add seam allowance with a straight edge, rather than redrawing or cutting a new pattern piece. The next two show what I mean. First the cut apart pieces and then one how I laid the print down on my fabric and used the straight edge to add seam allowance. You can use whatever you want for seam allowance. I used 1/4″.
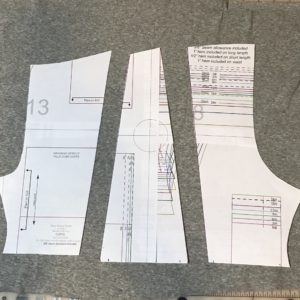
**Make sure to add seam allowance to ALL FOUR STRAIGHT EDGES.
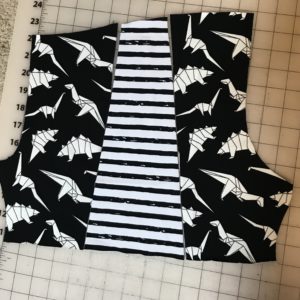
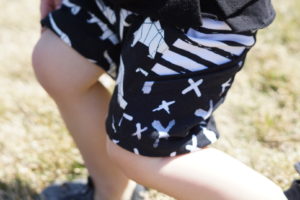
After I had all my fabric cut. I laid them out to see how it looked. Then I decided how I wanted to have my pocket on the bottom. I opted to make a slanted pocket. Keep in mind when selecting where to cut your pocket, that these shorts will still need to hem hemmed 1″.
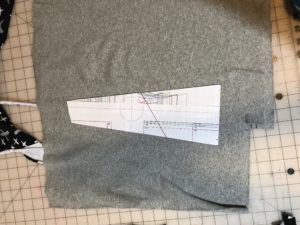
On that gray piece you can see that I drew another red line across the pattern That will be where I wanted my pocket. After cutting that. I only needed the bottom piece of that. I cut the shape out of a contrasting fabric and then I cut a strip of plain black to go across the top (rather than hemming it).
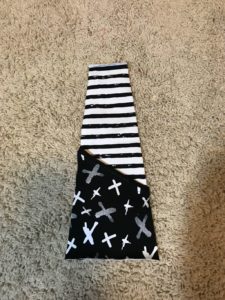
***Don’t forget to add seam allowance again to the sides of this since we will be sewing it all into the seams together.
***The strip I used was 1″ wide and I made it plenty long enough and sewed across and cut off the extra.
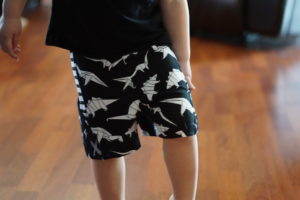
This is what we have now. plus the two side pieces. Now we lay the together, right sides facing and sew!
 This is one side sewn together, now repeat on the other side and then complete assembly as you would normally.
I cant wait to see some funky pockets out there or even leaving off the pocket and just adding a fun color block to the side pockets.


