
Let’s talk about making bloomers for boys! I love bloomers on baby boys! I live in the South, and it’s a common style here.
When I was trying to decide what I wanted to make my sweet little boy to wear to his first birthday party, I looked through all the patterns I have and ones I don’t have trying to decide. I really wanted to sew a Mamma Can Do It Pattern, because I’ve loved all of the others I have tried so far. For real, you can’t go wrong with Mamma Can Do It!
I didn’t have a ton of time, because I procrastinate. Oops! Well, I saw the bloomer pattern, but it was for girls. And it’s obviously girly, with the cute little ruffle on the leg. But, I couldn’t get the idea of bloomers out of my mind. I knew I wanted to make him bloomers. So… I decided to come up with a “hack” to make the pattern more suitable for boys.
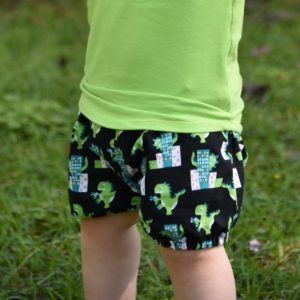
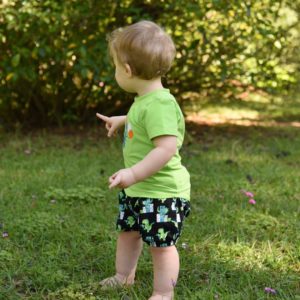
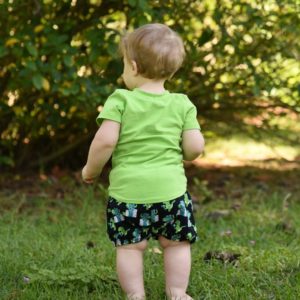
Isn’t this adorable?!
Don’t worry… It’s SUPER EASY!
Here is what I did!
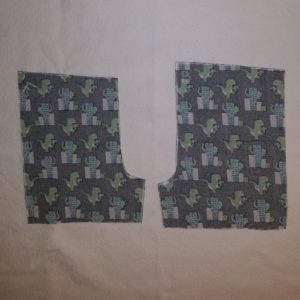
Step 1: cutting
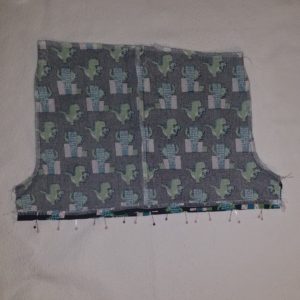
Cut all of your pieces out. You’ll have two front pieces and two back pieces as shown.
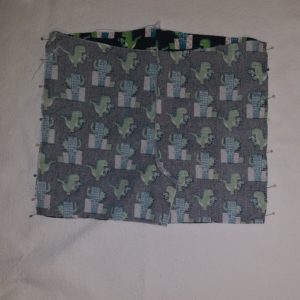
Step 2: match and sew crotch seams
Sew the crotch seams on both the front and back.
Step 3: match and sew side seams
Lay your front shorts on top of your back shorts. Pin and sew the side seams.
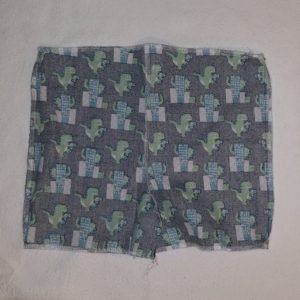
Step 4: finish raw edges
I like to serge my raw edges so there won’t be any fraying. You can also zig-zag stitch if you don’t have a serger. Finish the top edge and the bottom edge of your shorts (the leg holes and the waist).
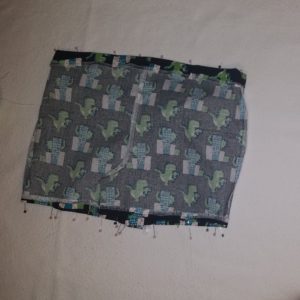
Step 5: press and pin hem and waist
Press your hem in place, according to the pattern instructions. I believe mine was 1/2″.
Press and pin your waist in place, according to the pattern instructions.
Step 6: sew hem and waistband; add elastics
Sew your hem and waistband.
For your waist, BE SURE you leave a gap to thread your elastic through!
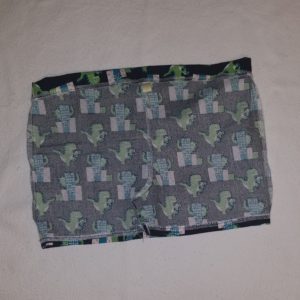
I like to add a ribbon tag in the back so that it’s easy for daddy to tell which side is the back 🙂
Step 7: elastics
Use the chart measurement for the elastic length. I recommend adding 1/2″ to the elastic length, because the way we will case it, we lose a little length, compared with the girl version.
Take a safety pin and thread the elastic through your casing on your shorts. Stitch it in place on both sides. You will have about 1/4″ hanging out of each side of the shorts casing/hem. Stitch it in place at both sides of your hem/ casing.
Then finish your elastic waistband according to the pattern instructions.
Step 8: inseam
Match the hem of your short legs, match the crotch seams, and sew the inseam of the bloomers.
YOU’RE DONE!
Wasn’t that easy? In just a few steps, you have modified the girls’ bloomer pattern into some super cute bloomers for your boy!
ENJOY! 🙂
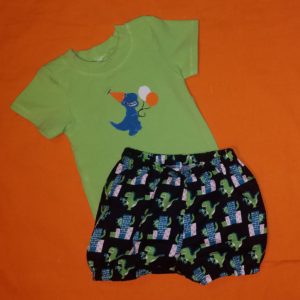
Might I recommend pairing them with the baby fitted tee? I think this makes the cutest set!
Thanks so much for reading <3

**Please be aware that I have included my affiliate link for these products in this post. I would so appreciate you using it if you decide to purchase 😉 Help support a fabric purchase :)**
The Mamma Can Do It Site: http://MammaCanDoIt.com?aff=60
The Bloomers: https://mammacandoit.com/collections/baby-patterns/products/baby-bloomers-pattern?aff=60
The Tee: https://mammacandoit.com/collections/baby-patterns/products/fitted-baby-shirt-pattern?aff=60


