I’m so excited about the release of the Mamma Can Do It Relaxed Fit Peplum pattern!
I’m Laura, I usually blog at www.KittyMakesIt.com but I’m happy to do a guest piece here for the new MCDI Peplum top! You can follow me on Instagram @KittyMakesIt
This pattern was so fun to test! I love working with Mamma Can Do It because I can customize the fit and look of the pattern to my body and life! I like the smooth look of a perfectly fitting bust and I also like the put-together look of a pleated peplum for work.
MCDI graciously let me do both and I’m sharing my how-to with you!
Here’s my post on the pleated skirt hack.
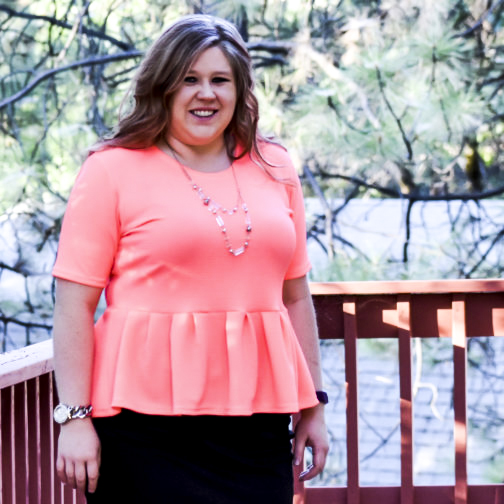
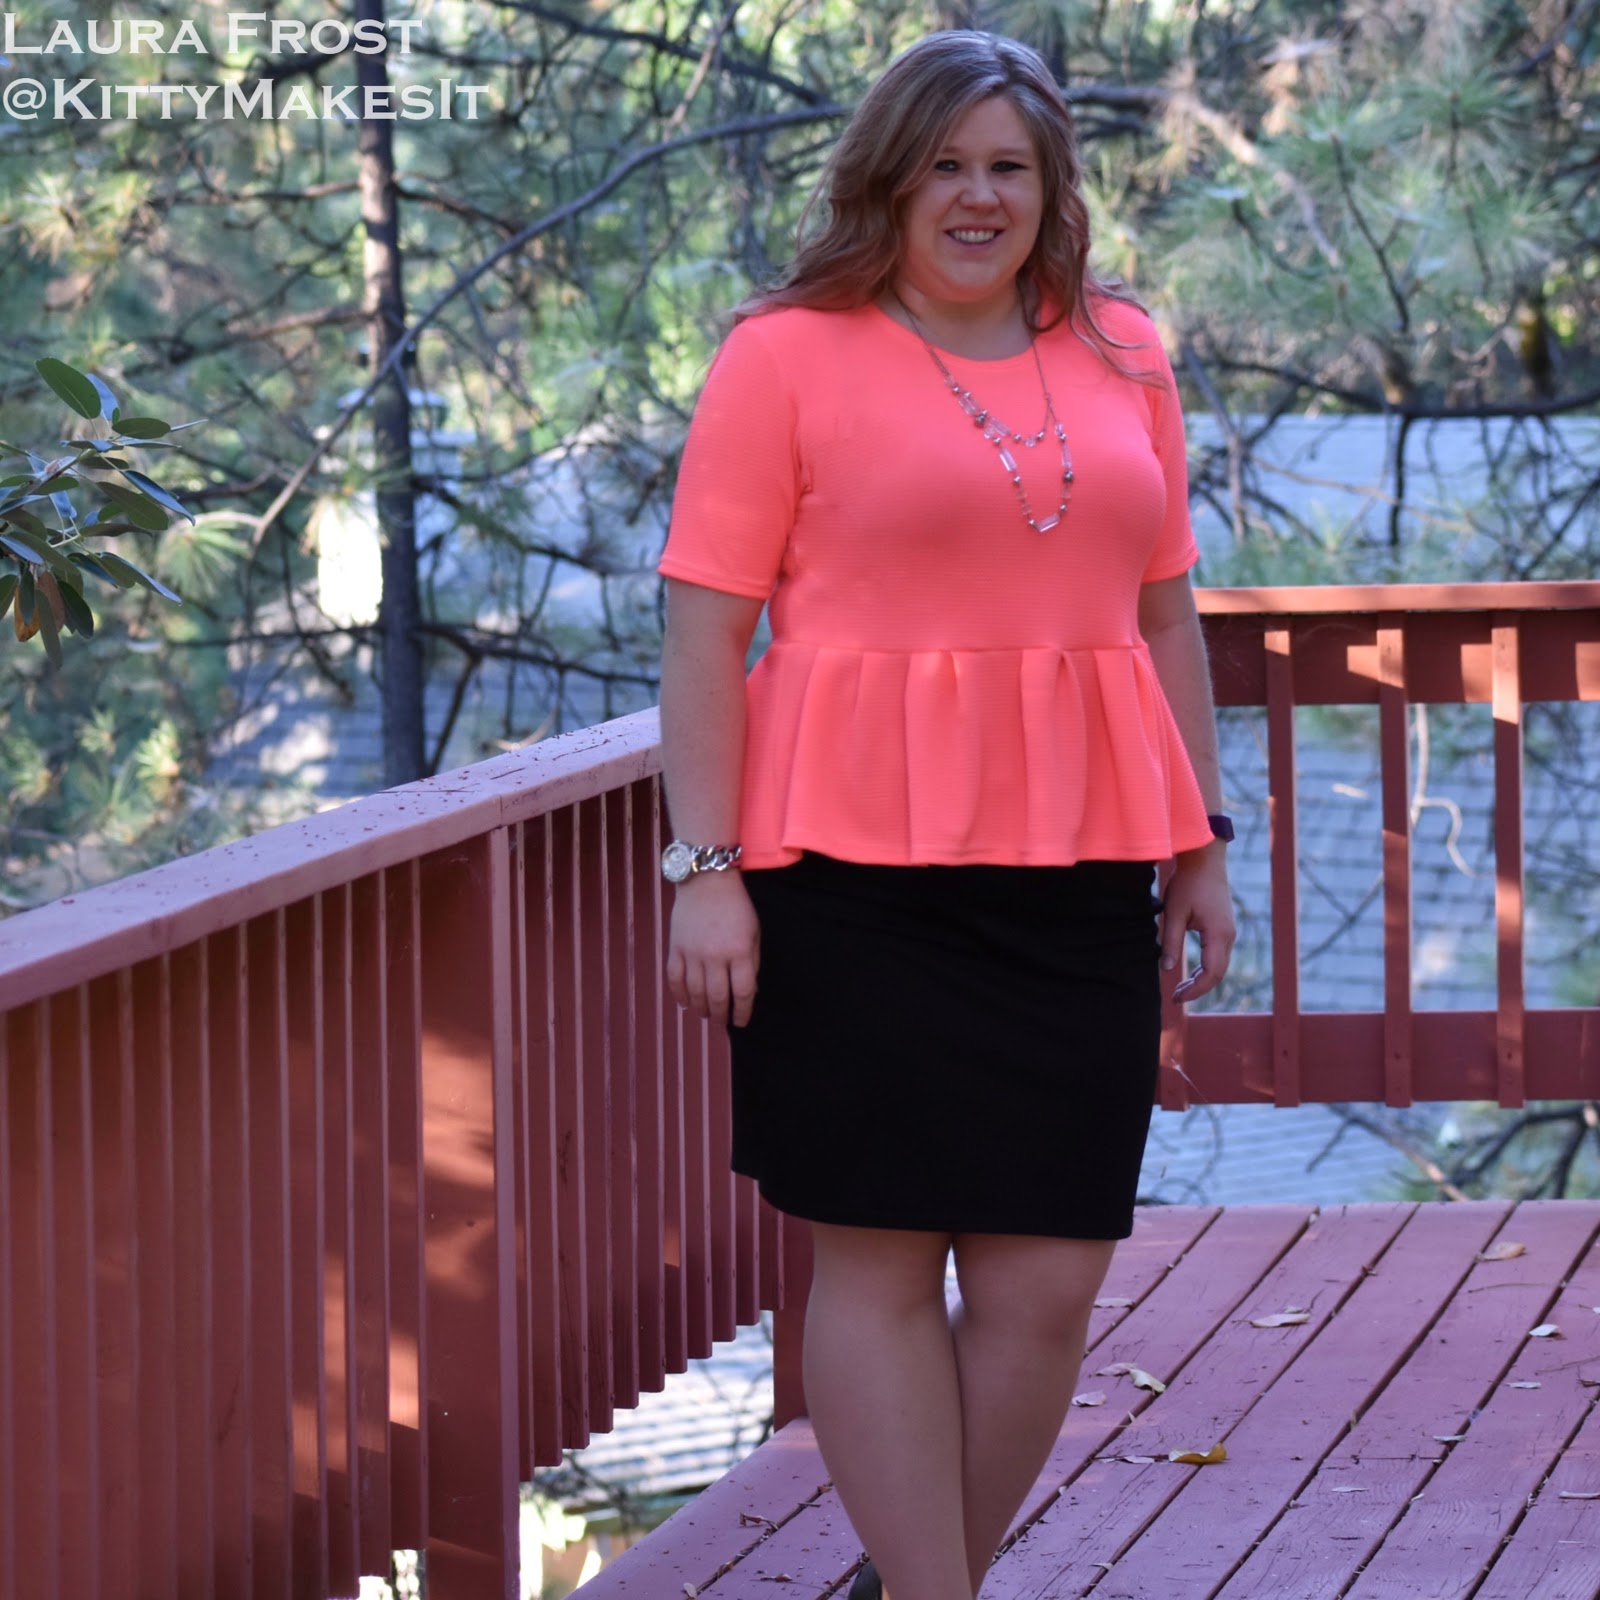
Isn’t this pattern just fantastic? I love the look!
I chose this pattern for writing a tutorial because the bodice is a block, which means you can use this tutorial’s method on almost any dress or top.
Fabric Choice
Do I need a Full Bust Adjustment?
That’s a difficult question to answer. The rumor/rule I’ve always heard is if your upper bust and full bust measurements are more than 4″ apart then you would need a FBA. But it really depends on the designer, the fit of the pattern, etc. I would recommend that you check out the size chart. If you’re one size larger in the full bust than the upper bust, then you should use the smaller size and do a FBA.
Another easy way to know would be if you have made the garment already and you’re noticing your side seam being pulled forward and always having to dug your blouse down.
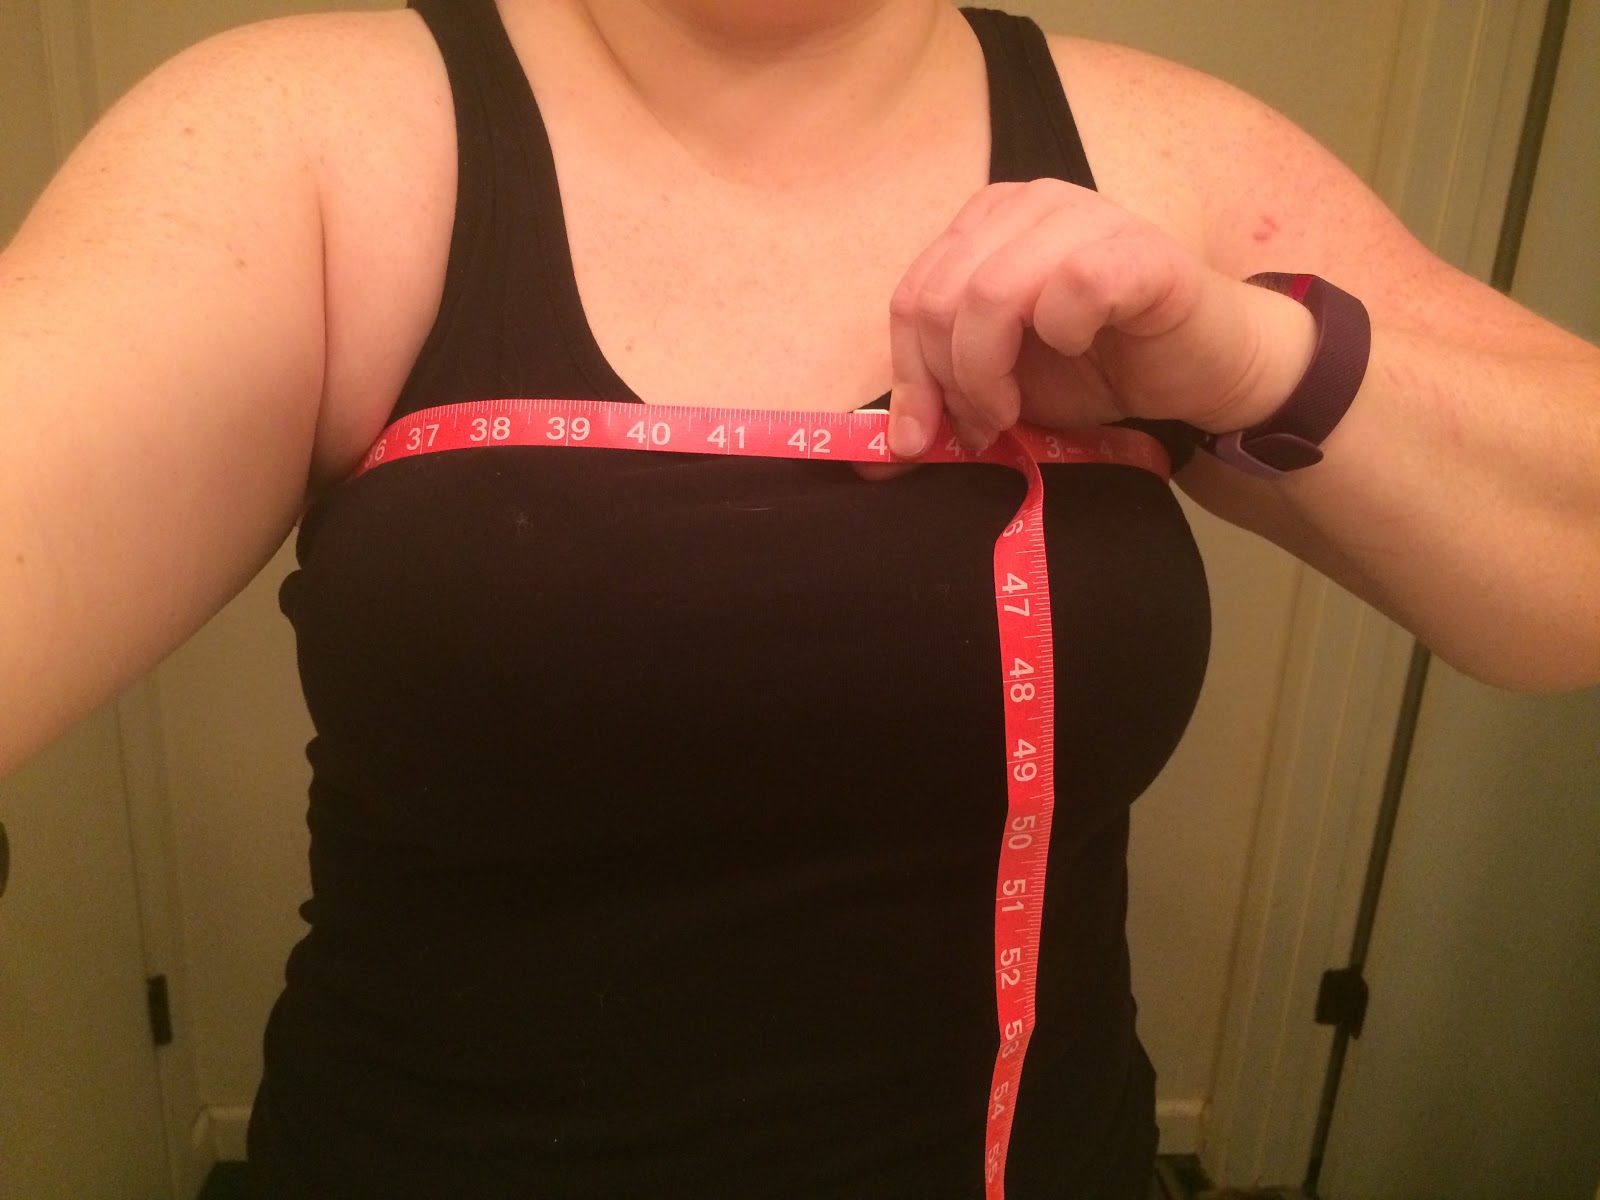
Measure your bust!
Upper bust – measure just under your armpits, across the top of your chest. This should be a fairly snug measurement.
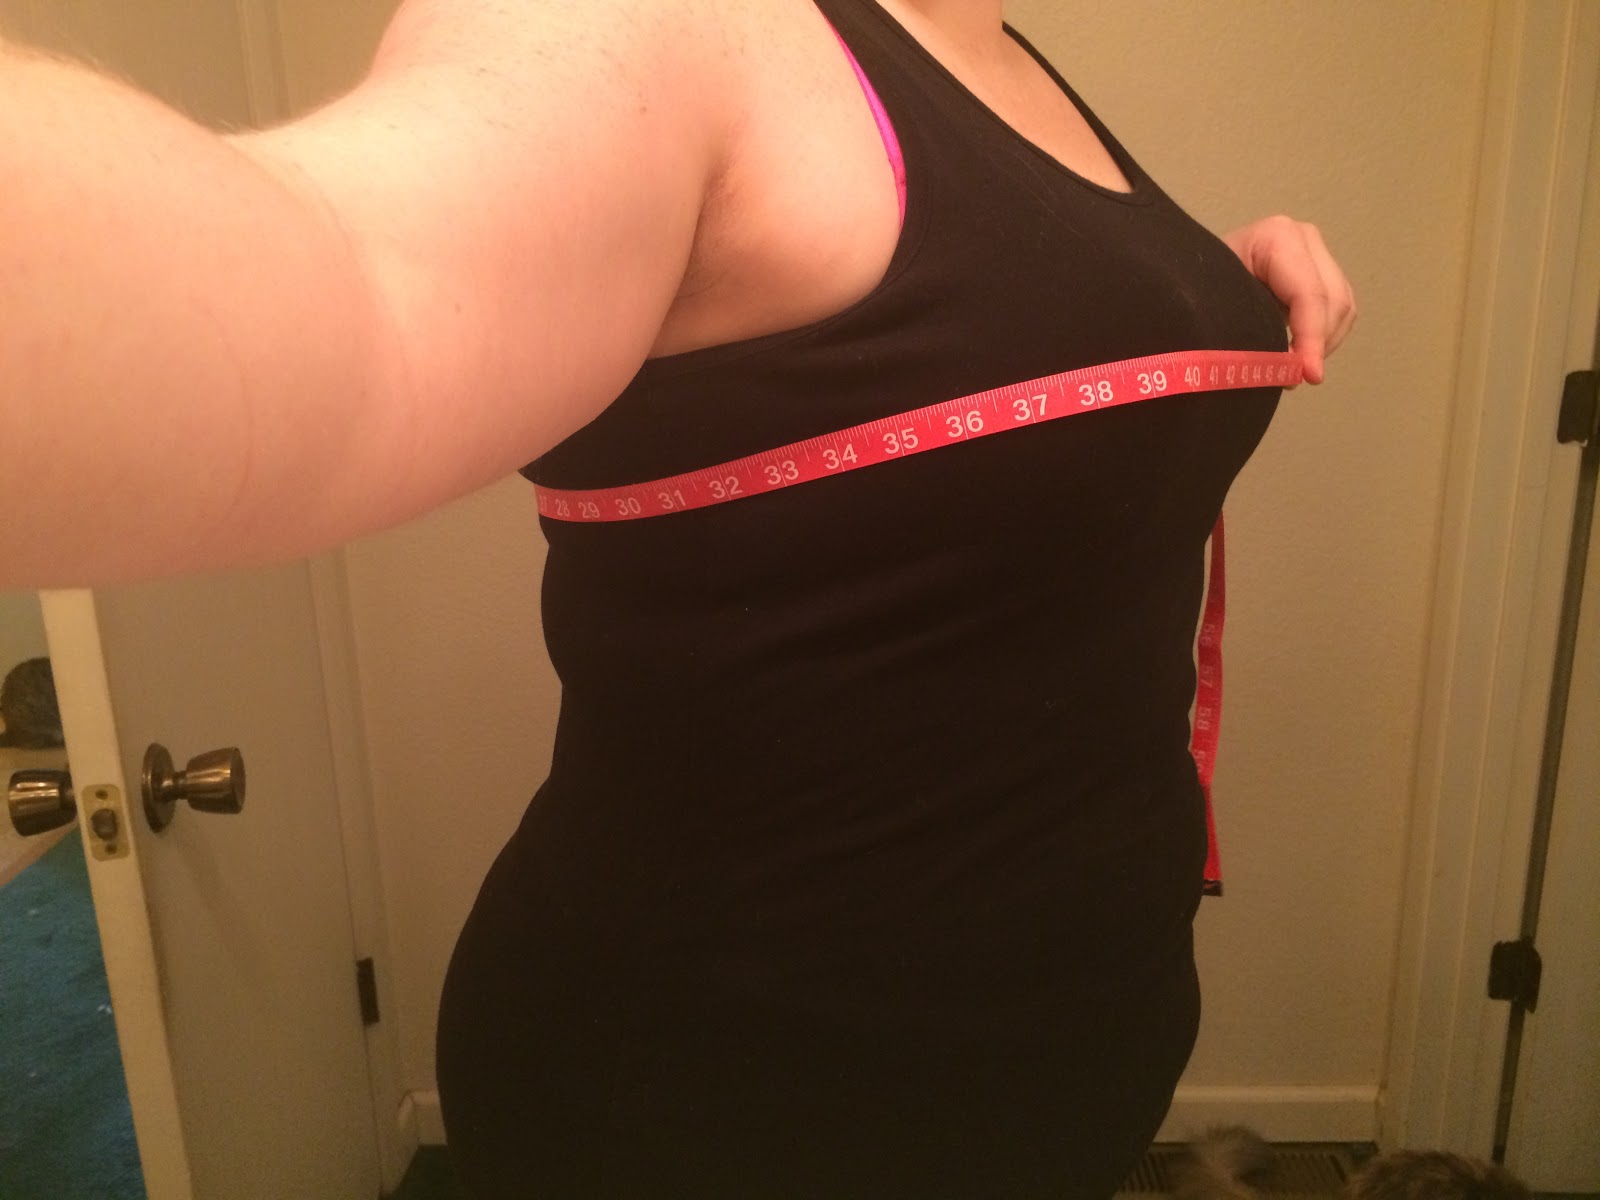
Full bust – measure across the fullest part of your chest, wearing your usual bra.
Subtract your upper bust from your full bust.
Mine is about 46.5″-42.5″ which is right about 4″.
Getting started
Print and assemble your pattern
The great thing about layered PDF patterns is that you can print just your size or sizes if you’re going to grade.
I want to grade to a lower size at the waist for a more fitted look, so I’m printing both my normal size and the size below it.
Be sure to choose the size that matches your upper bust. Since you’re doing a FBA, the bust measurement on the chart for your size will no longer be a constraint.
Slash and Spread
Another great thing about PDF patterns is that you can reprint, unlike a tissue pattern where you can’t afford to mess up.
I recommend printing two bodices. It’s really helpful for reshaping the armcye after we do the FBA.
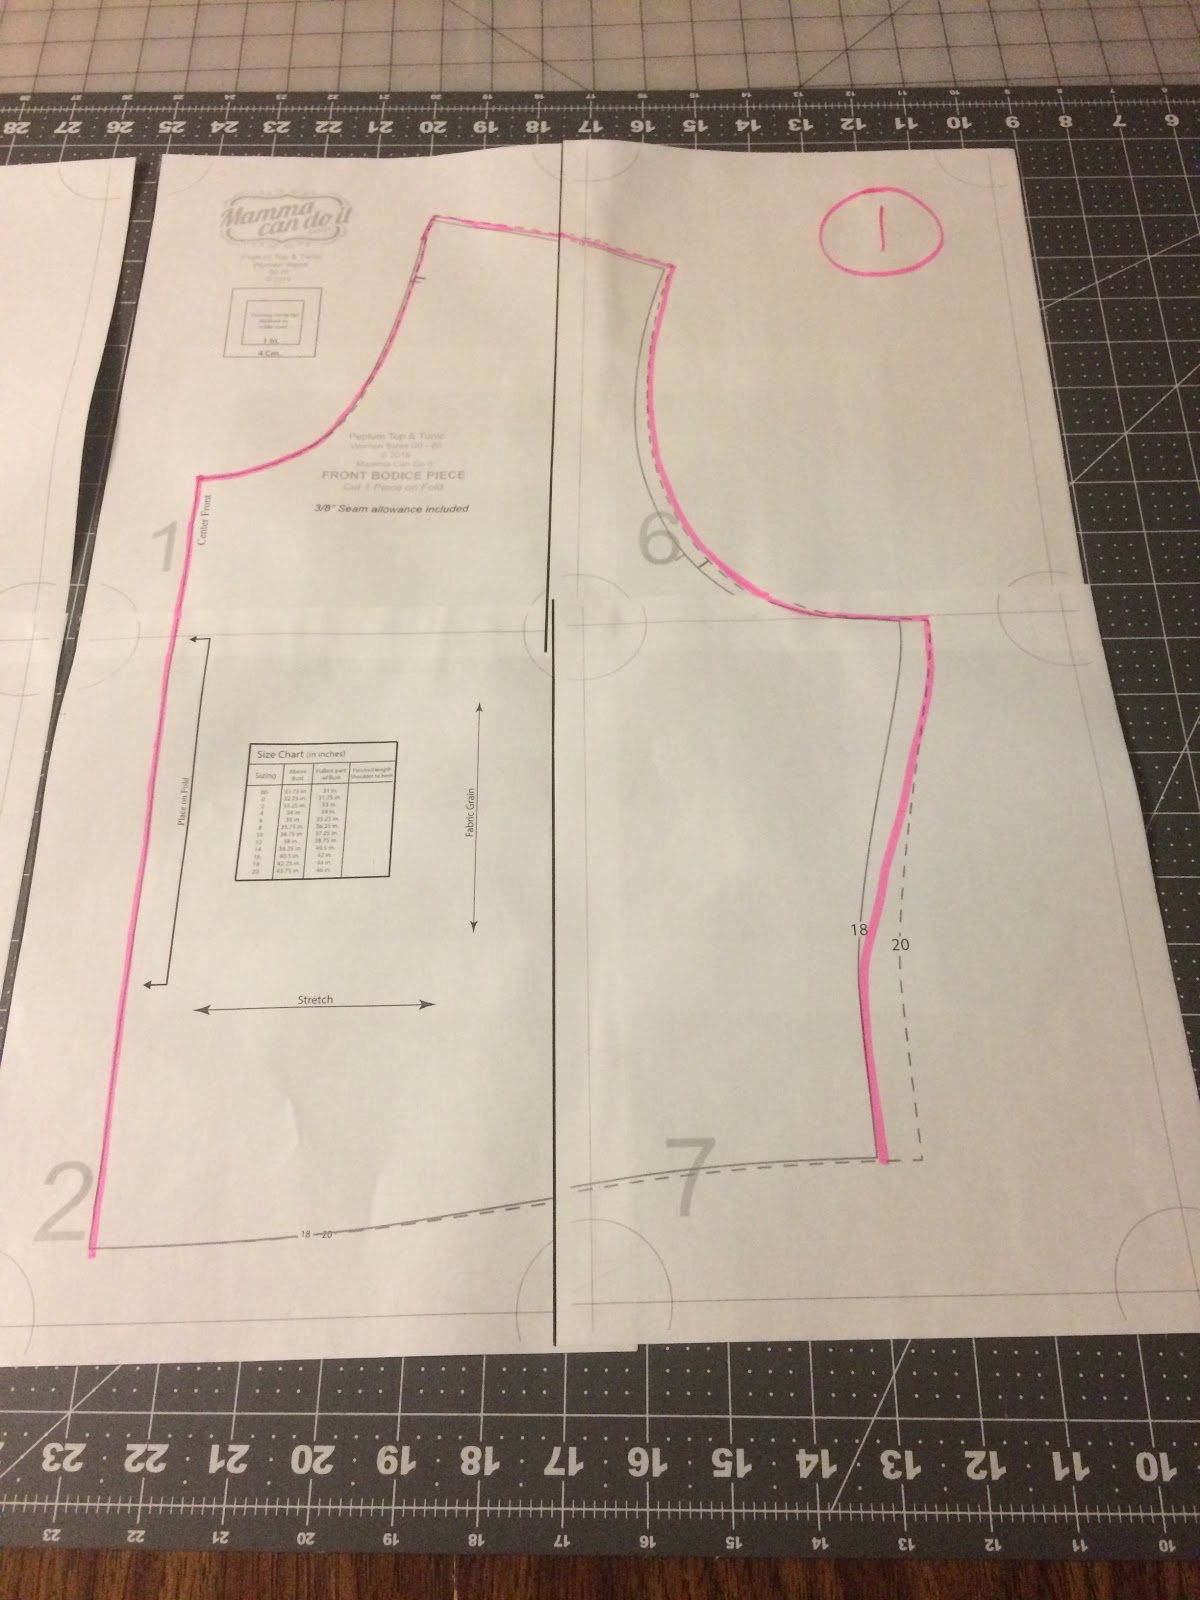
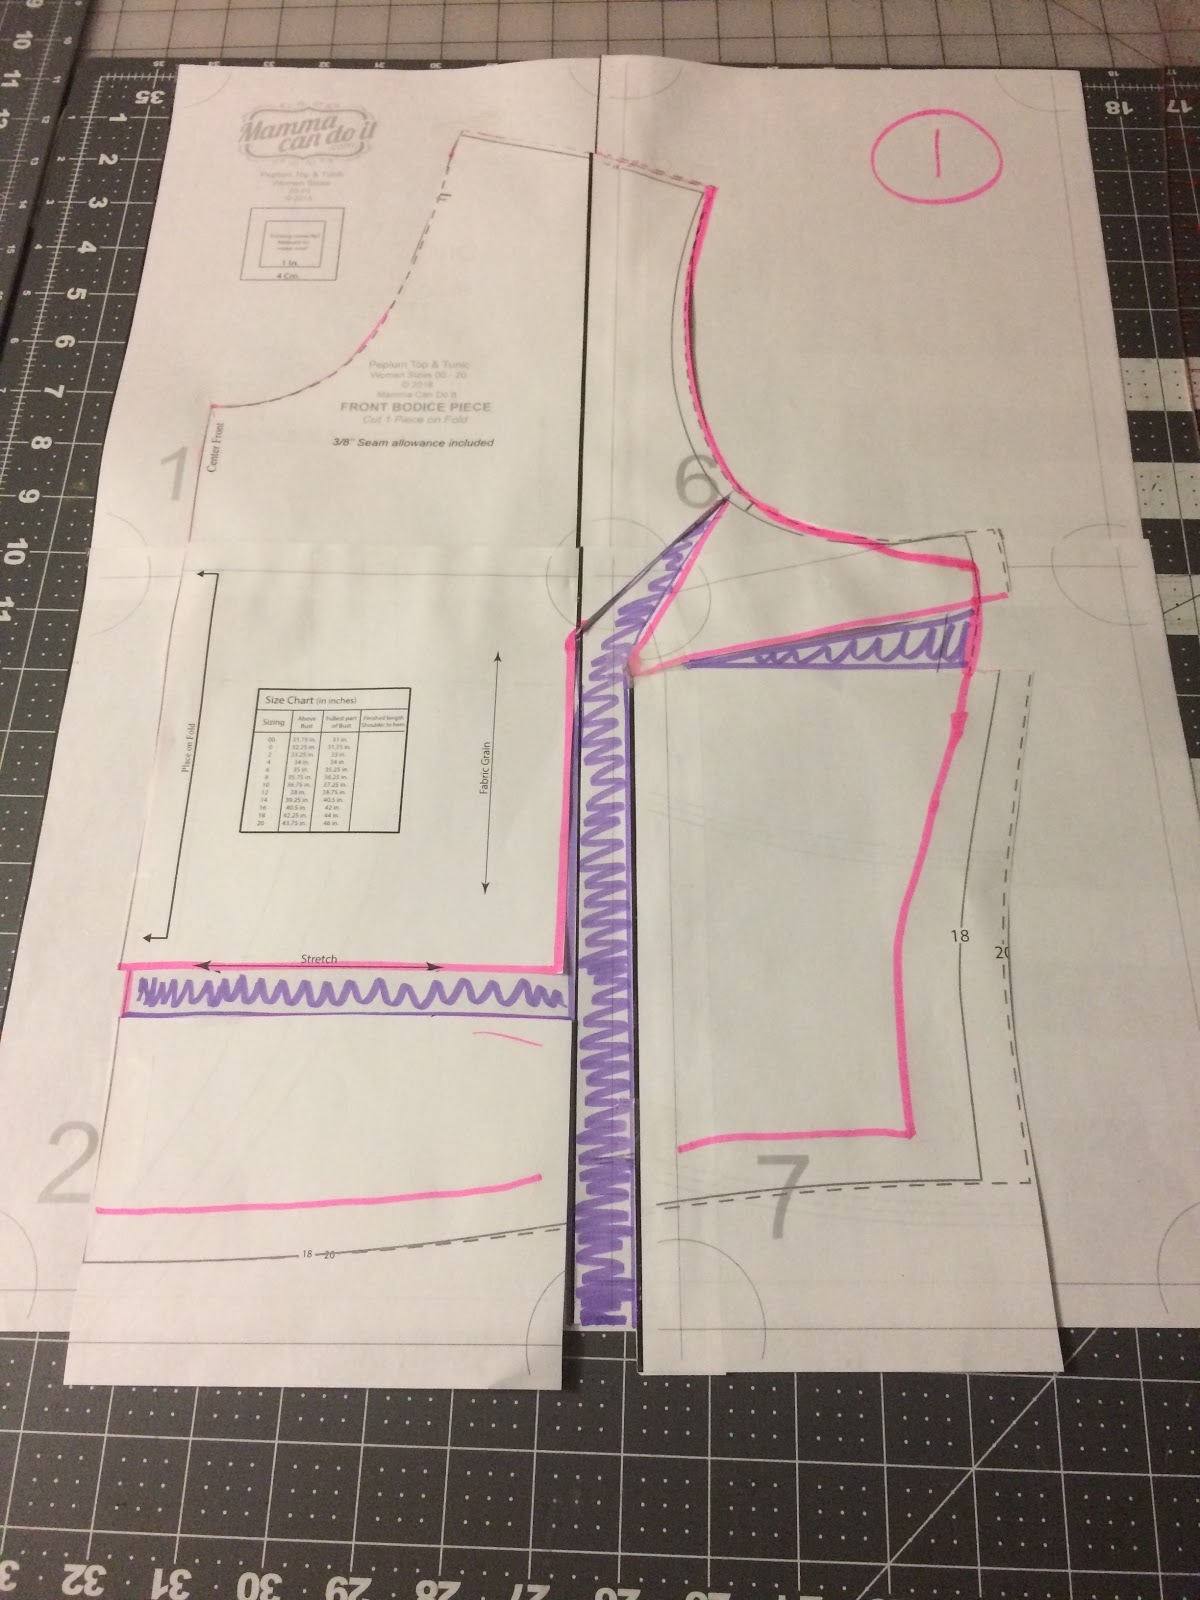
I numbered this bodice 1. It has my grading down at the waist and I’ve marked the outlines of the original pattern piece.
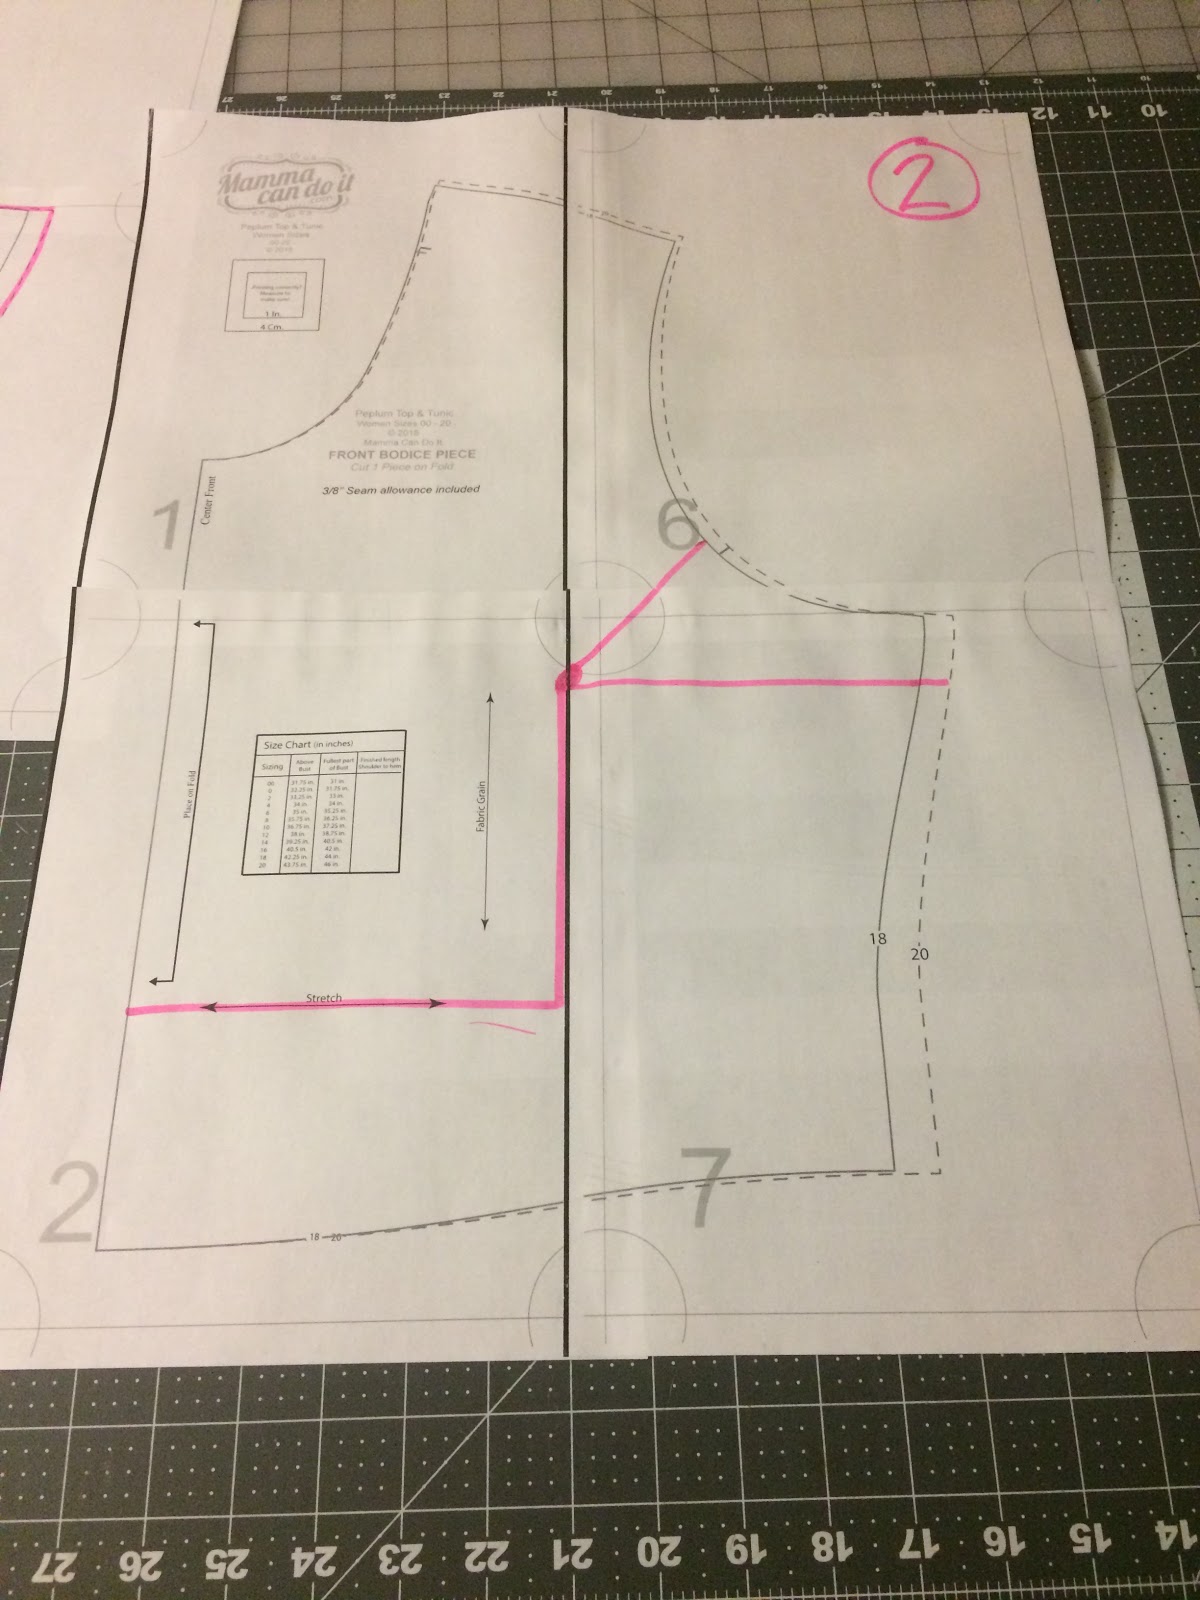
Here’s bodice number 2. On this one, I start by marking a dot in the center of the bust. I hold the pattern piece up to me to double check the location.
Then draw a straight line to the side seam in line with the bust.
Then connect the center bust point to the bottom center of the armcye.
Finally, mark a line on the inside (fold side) just below the waist. (this protects the waist shape)
Cut the pattern apart at each of these locations.
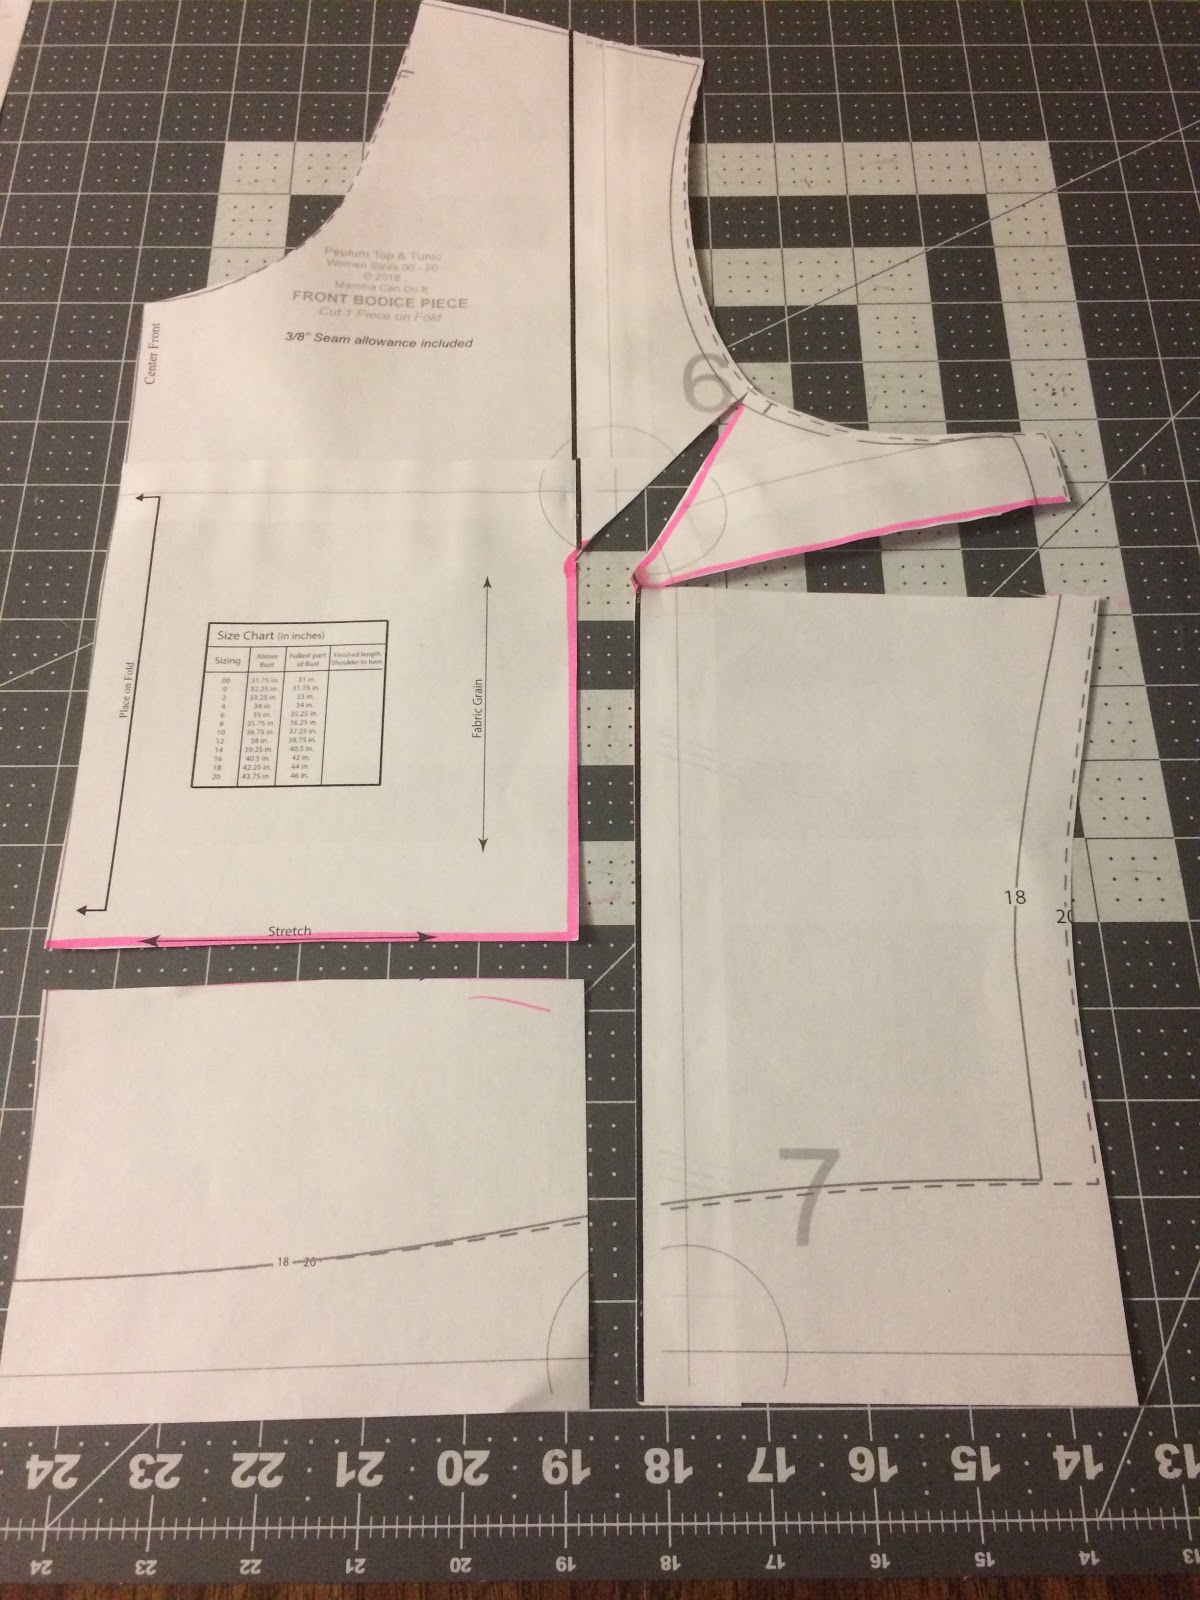
Hinge from the bust point to add space at the bust. Add space based on how much more than 4″ difference you have between upper and full bust. I need a minimal adjustment.
Unroll some pattern paper, enough to fit this piece. If you don’t have pattern paper, you can tape together several pieces of blank paper or tape it to bodice #1 if you printed two.
I marked with purple where I’m adding space.
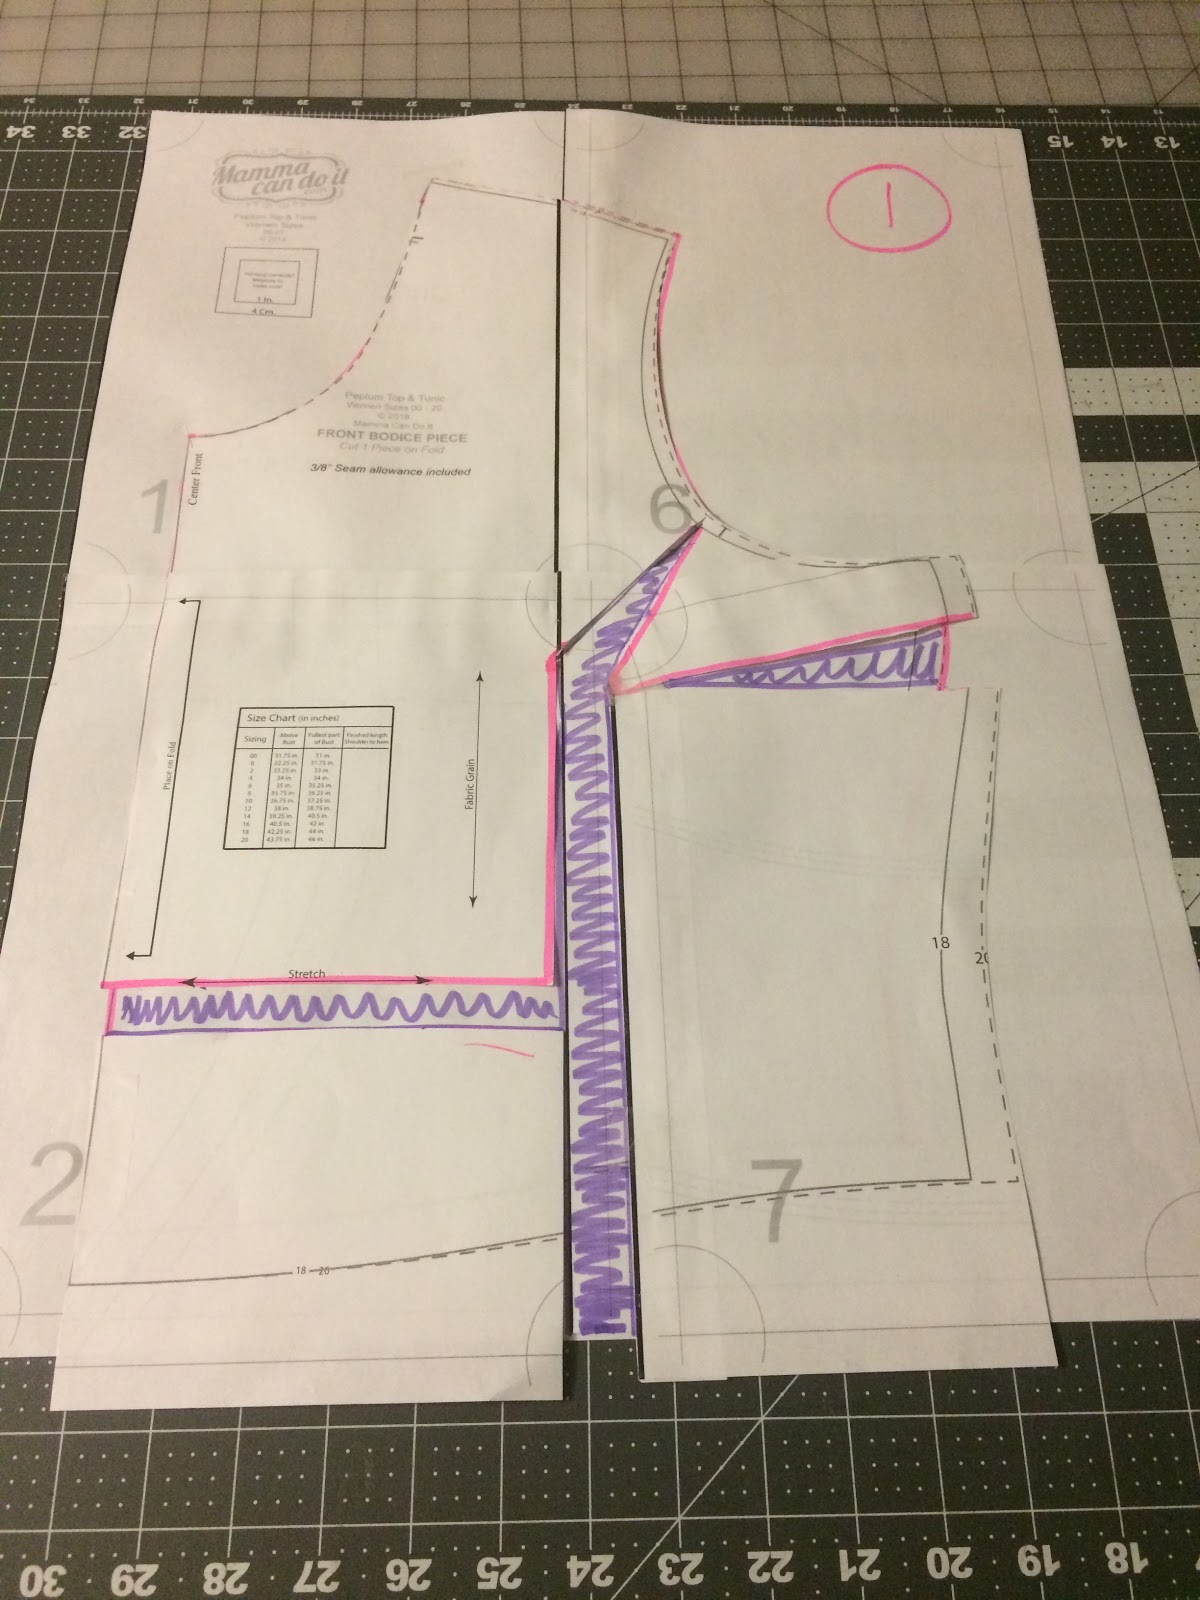
If you’re confused about the waist space by the fold, it’s to keep the bottom of the bodice aligned and offset the space being added just below the armcye.
I marked in pink where the original bodice was. We need to reshape the pattern piece to match the original armcye and waist.
I use a french curve to help draw the armcye back in.
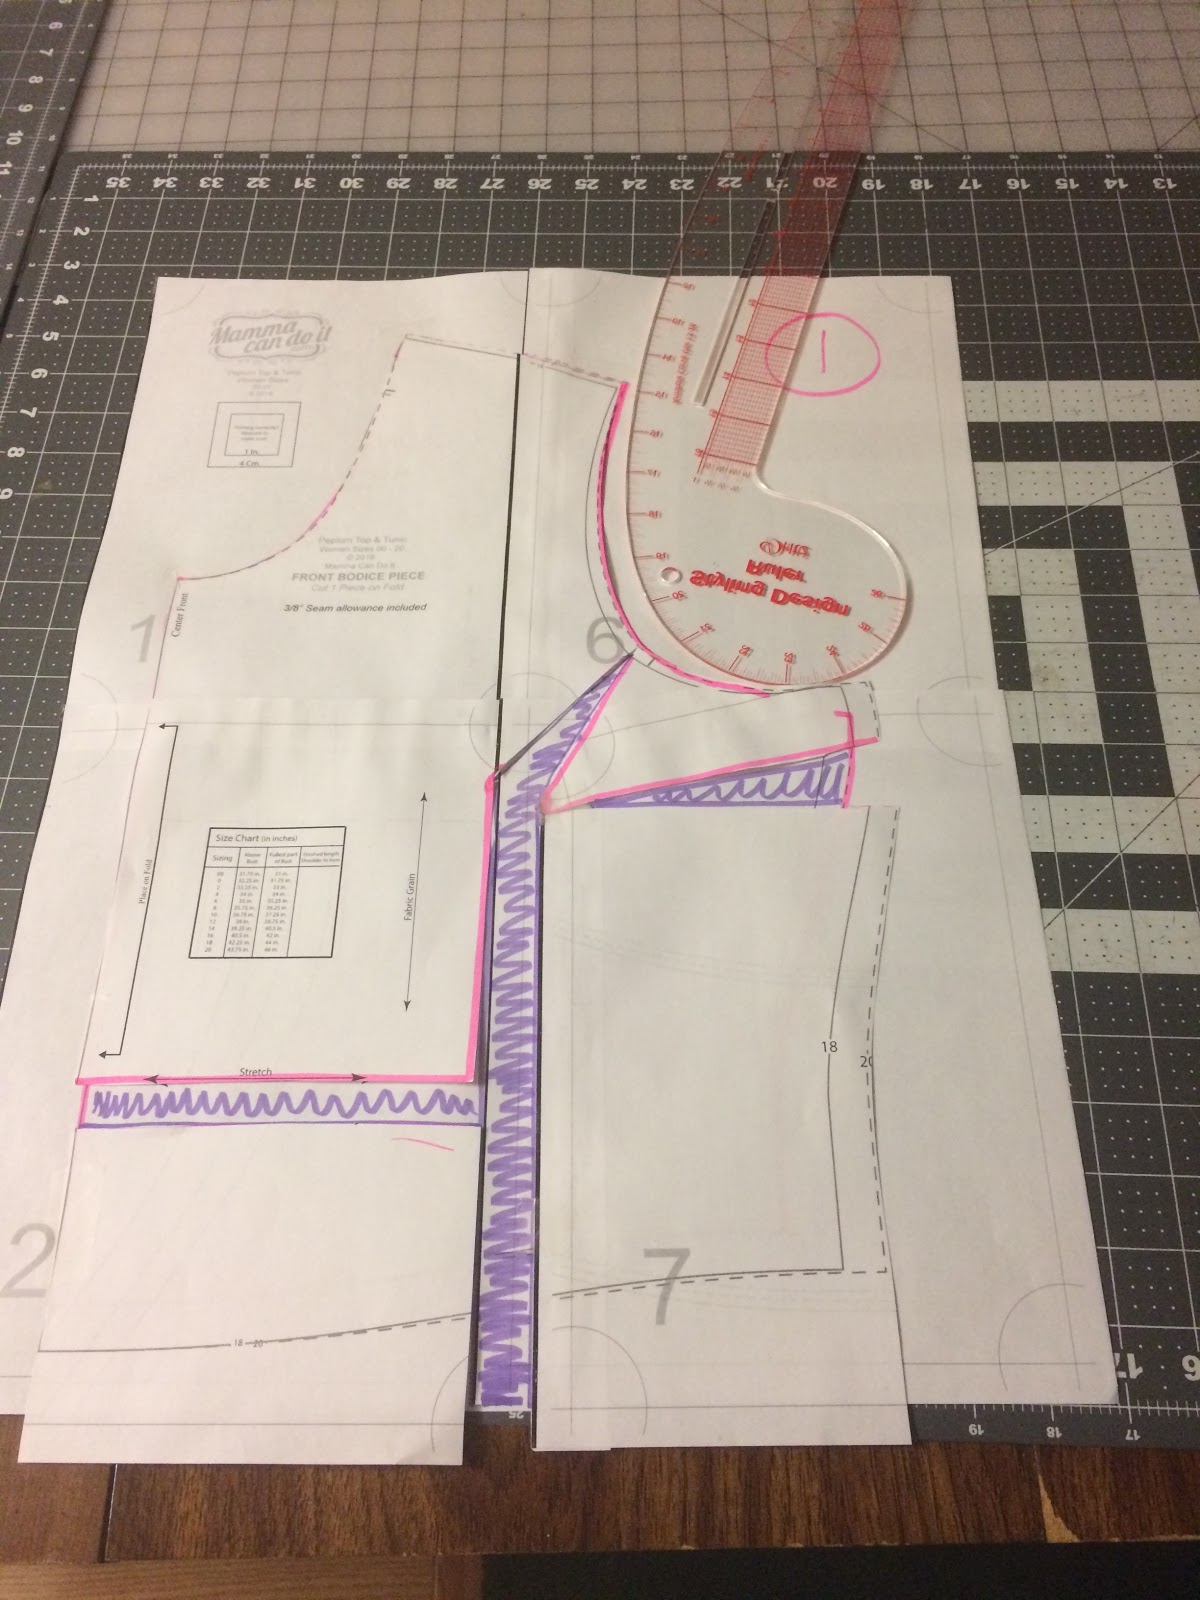
You can either use the curve or a straight ruler to connect the waist and armcye. Use the straight side to connect the waist to armcye.
Here’s what mine looks like –
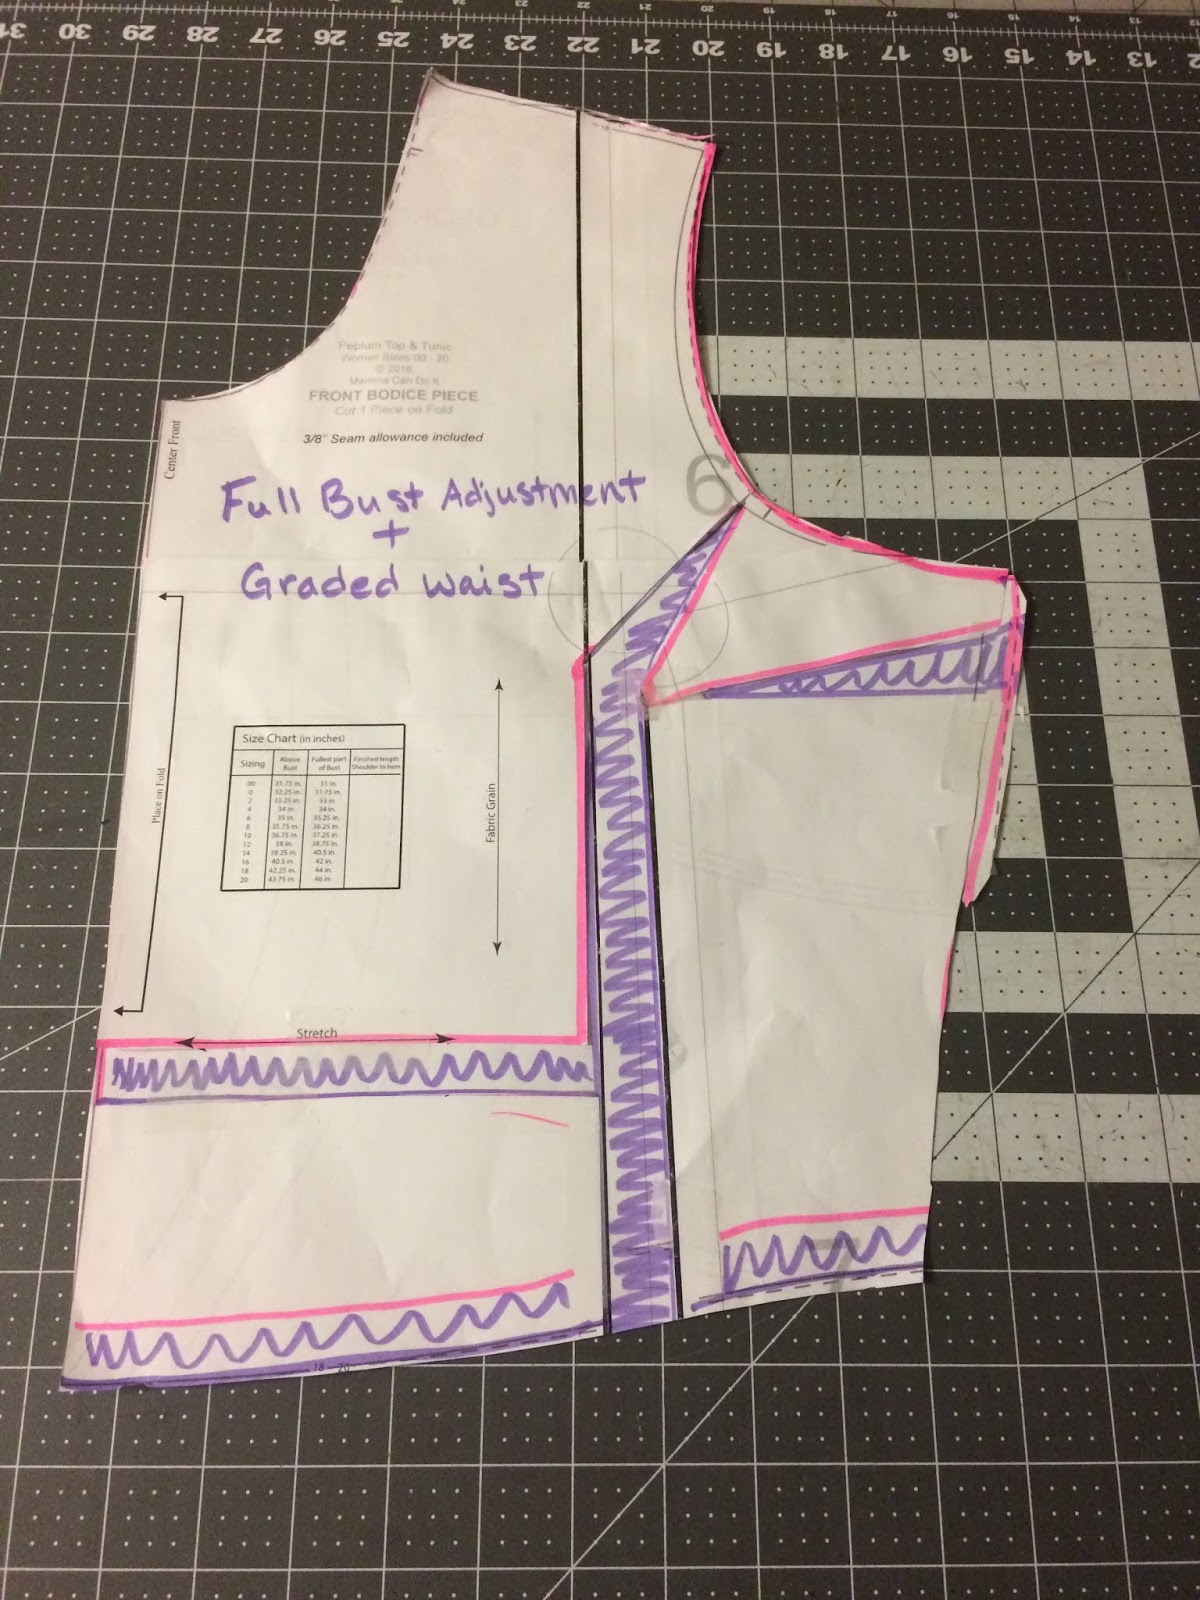
Now you can cut your fabric with your new bodice piece and proceed!
Here’s mine. I also pleated the skirt using this hack.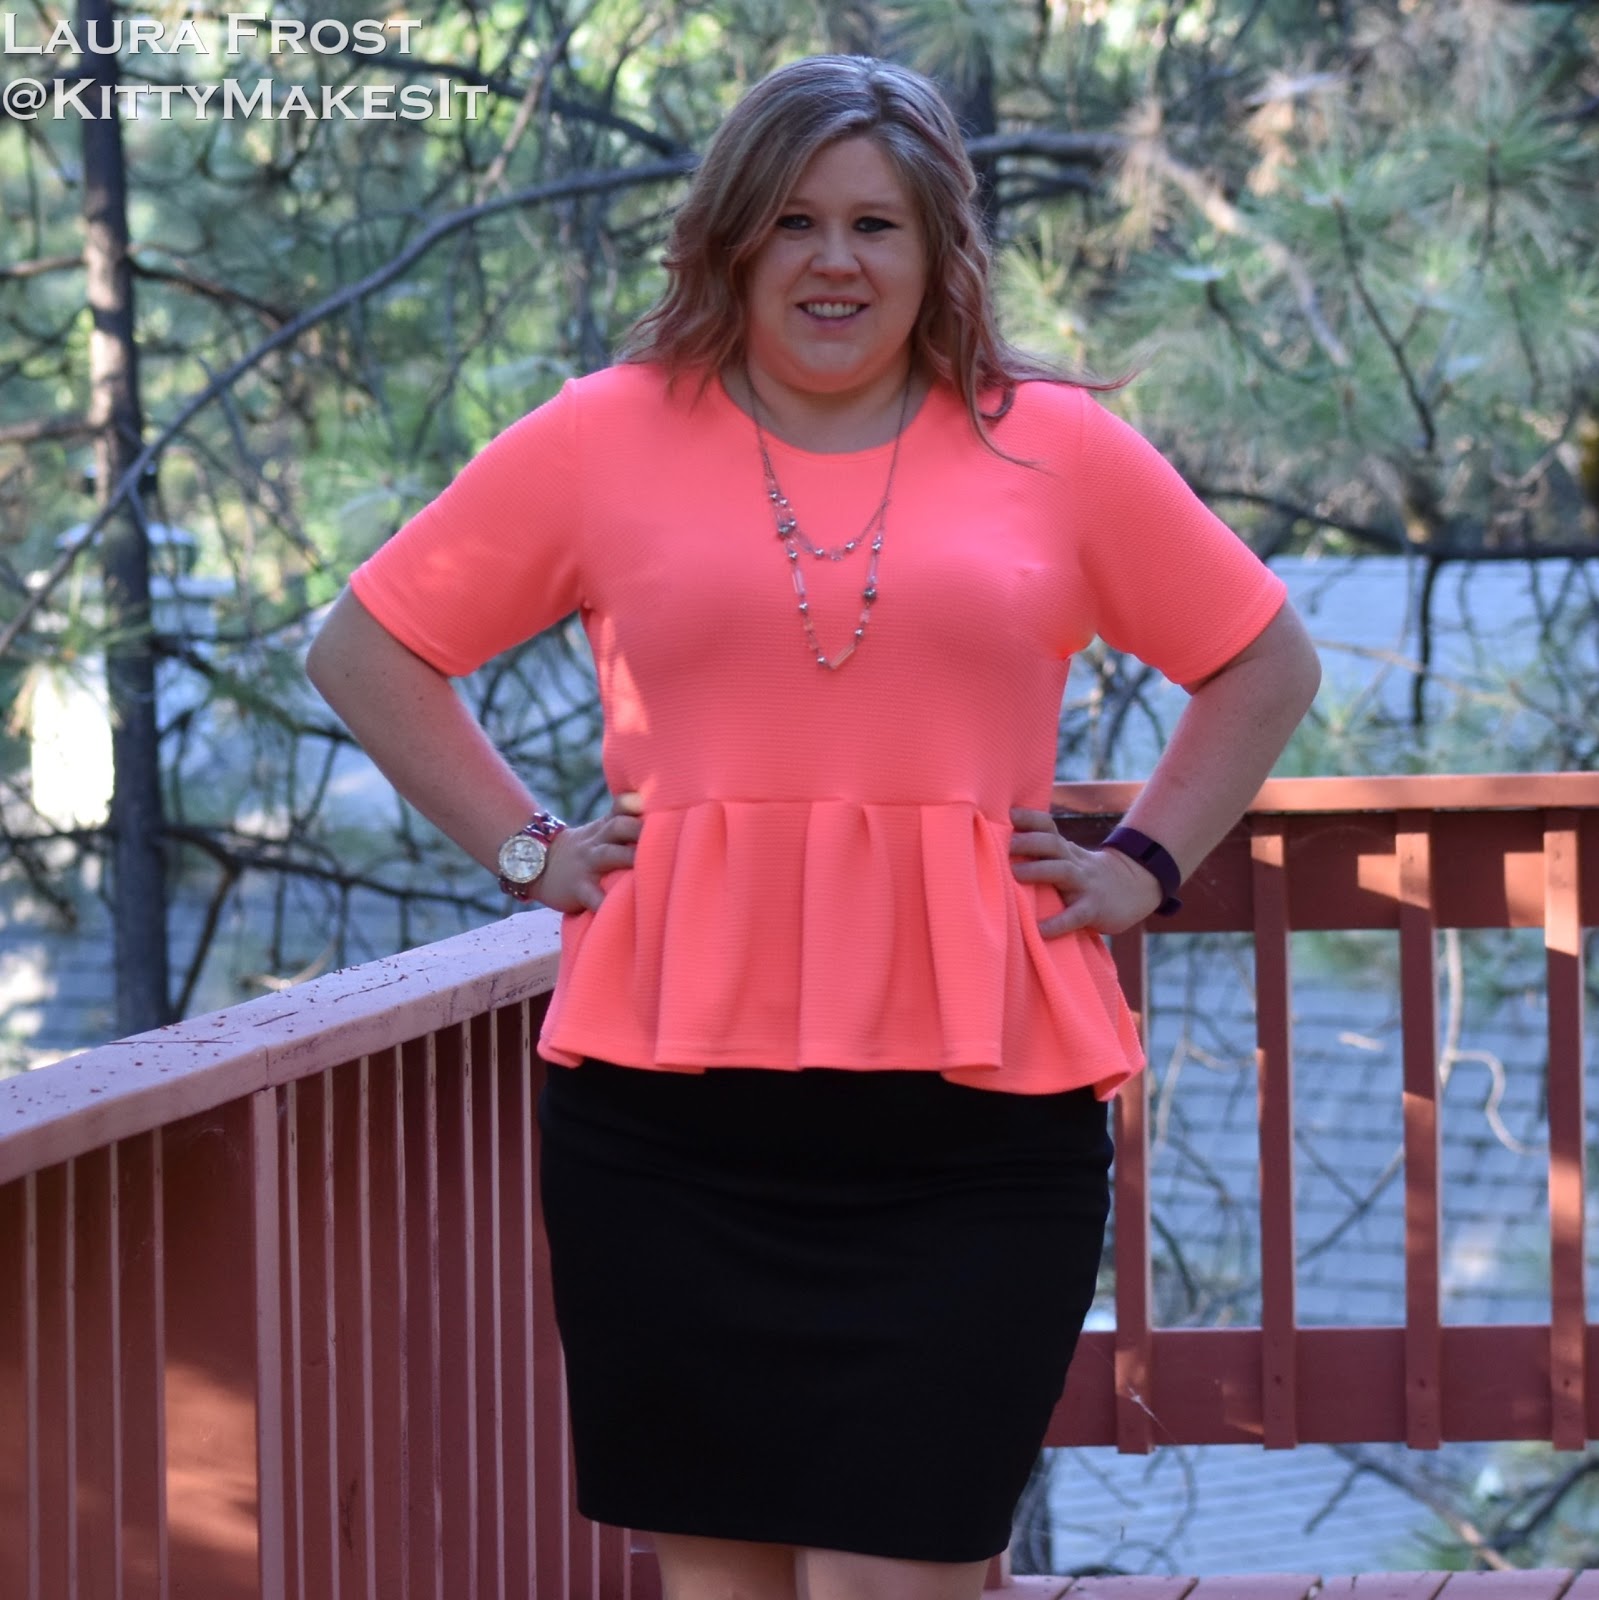 This post may contain affiliate links. They don’t change the prices you see, but I might get a small percentage to help fund materials for my next post.


1 thought on “Full Bust Adjustment – Peplum Top”
Pingback: Pleated Peplum Hack | Mamma Can Do It Sewing Blog