
I am so in love with the Adalynn dress. I’ve already made several of these dresses since I bought the patterns a couple of weeks ago for my girls ages 5 and 1. (And I, myself had the pleasure to test the mama version and have made myself a couple as well).
Have you gotten a copy of the Adalynn yet?
Now, I’ve only been sewing knits for a few months, and I have found this dress perfectly suited for my skill level. Sewing my 4th or 5th Adalynn (not even sure which number I’m on anymore; these dresses are seriously addictive) I played around with some scrap and made some playful at-the-shoulder flutter sleeves that came out surprisingly well considering how easy it was. Here’s what I did:
Step one:
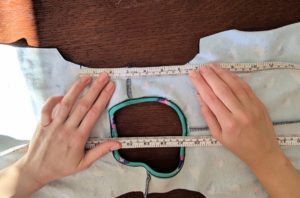
Once I had my front and back pieces of the dress sewn up at the shoulders, I measured from front notch to back notch like this. This doesn’t have to be perfect, so don’t stress if you can’t straighten the fabric out to measure. On this size 12 month, it came out to be about 6 1/2 inches.
 Step two:
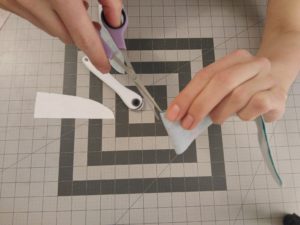
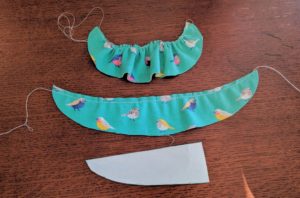
To draft my flutter sleeve pattern, I drew this half moon shape. Although it’s more like a half eaten empanada shape…mmm, now I’m hungry…. Ok, back on track here – you want the flat side of the half eaten empanada to be the same length you just measured from notch to notch on the shoulder of the dress. We are cutting this flutter sleeve on the fold, so the cut piece will actually be roughly 13 inches long. It will look like this: 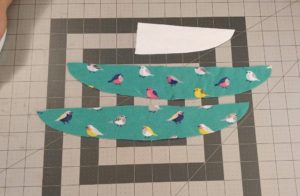 Again, don’t stress if it’s not absolutely to the measurement; gathered fabric is magic and makes any mistakes look not only intentional but ADORABLE. Also, play around with the width of the flutter. I made this about two inches but it would look cute both thinner as well as thicker.
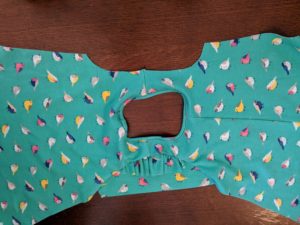
I did mark the middle of the flutter with a small snip in the middle of the flat side in order to keep my gathering as equal as I could through out the fabric. As I gathered, I measured periodically to keep the gathering equal on both sides of the notch. Adding a notch will also help line up the flutter to the shoulder seam correctly. I do have to say though, trying to find a small notch on gathered fabric is hard. Next time, I am using a washable marker to mark my middle. *sigh* Learning experience.
Step three:
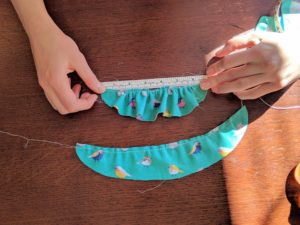
Sew a basting stitch along the flat side of the flutter. Then gather, gather, gather. You will want the gather to equal the length you measured from notch to notch. So for this dress, I gathered to roughly 6 1/2 inches.
…quick recap… The first is the flutter ready for the dress, the second is the flutter needing to be gathered, and the third is the half eaten empanada flutter sleeve pattern. Why is this recap backwards? I have no idea. Now, let’s move on to the fun part.
 Step four:
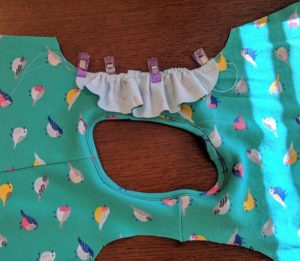
Clip or pin the flutter to the shoulder of the dress, right sides together, then baste it on.
 Step five:
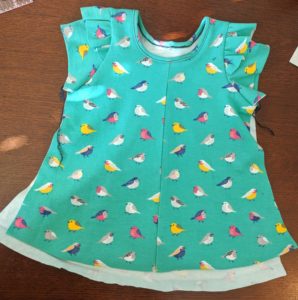
Add the sleeve as per the pattern instructions. Eek, you’re almost done!
 It’ll look like this now, isn’t it so cute?
Step six:
Repeat on the other side, and then sew up the side seams as it says on the pattern instructions and you’re done!
Wahoo! You made a super cute and playful at-the-shoulder flutter sleeve dress from a self drafted half eaten empanada pattern!
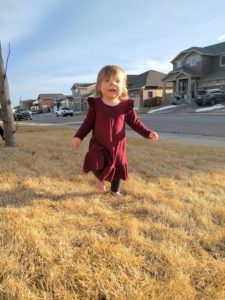
 I will be making a myself a flutter short sleeve dress next, as I find flutter sleeves flattering on myself, but rarely find them in RTW clothes. But for now, here’s a picture of my tiny who’s too busy to sit still for a picture.
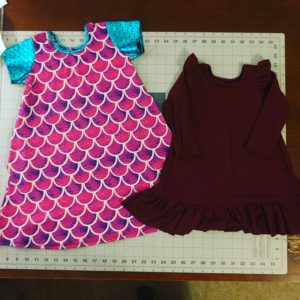
I feel so pretty in mine, and my girls look so cute in theirs!

Have you gotten a copy of the Adalynn yet?


